Holiday Light Necklace/Bulbs
thingiverse
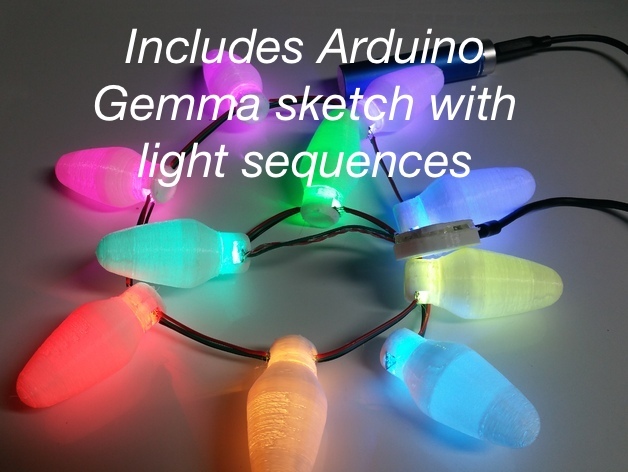
During December Six Flags and a lot of other theme parks sell necklaces of full sized battery-powered C9 (I think they're C9s) lights that flash as souvenirs for their holiday festivities (I say holiday because not everyone celebrates Christmas: The corporate holiday that includes awkward dinners and gift openings with family members and follows Black Eye Friday and Hallow(een)/Empty Wallet Day). I asked the vendor how much they were: $12!!! I think I'll save those $12 and use what I have at home to get something even better. That's were these files come in. I mocked up the base and bulb of the lights and to light them I used the 60LED/m WS2812B addressable LEDs commonly sold as DotStars™ or NeoPixels™. I cut up 10 individual LEDs, tined them on all sides, and re-soldered them with about 2 inches in between (2.5 inches for 1/4 inch of stripped wire on each side) of 3 wire ribbon cable. I daisy-chained them into the proper locations (output->input) and the first input to D1 of an Adafruit Gemma. Gemmas can handle up to about 100 sets 3 LEDS(red,green,blue) so 10 should be no problem. Edit the 'strandtest' program on the Arduino IDE by changing the pixel number to 10 and the output pin to 1 (not D1). Do all this while printing the bases and bulbs. Print the bases first at twice the size (the original file is too small for the width of the light FlexPCB) and string them through the hole onto the lights first pushing them all the way to the end and then solder all 10 lights together and slide and hot glue a base to each light. Paint the bases black or dark green. Paint, tape or heat-shrink the wires to cover them up (you can use anything just cover any exposed wires. Next, add any functions you want, flash the Gemma with the program and connect any back-up cell phone charger with a 5V at least 0.5A output. Then connect to power via the same mini USB you used to program the Gemma. You can also plug these into the wall with a cell phone charger or into your laptop or into the USB charging port in your car (if you have one). Finally sit back, relax and enjoy your little string of programmed lights. Enjoy the show! Any sized show is a show. The string could be one bulb or hundreds of bulbs. ---Update--- I've now include the mostly custom and fully tested Gemma Sketch. This will work with any Arduino or Arduino compatible device just make sure everything is in order to run the sketch. Disclaimer: By downloading the sketch, you take FULL responsibility to all effects of the sequence which includes strobing and bright light values. Use responsibly. Print Settings Printer Brand: Deltaprintr Printer: Deltaprintr Kit Rafts: Doesn't Matter Supports: Doesn't Matter Resolution: 0.2mm, 0.1 or 0.15 if you have the time. Infill: 0% for bulb, 0%-20% for the bases Notes: Print the bases twice the scale because alone they are too small... The bulbs are fine, print them as is... Post-Printing See the WS2812B and Gemma soldering instructions in the ... How I Designed This Autodesk 123D Design Free Version, patience, and the determination to make something better than a $12 light necklace that will stop working as soon as I leave the park I bought it from.
With this file you will be able to print Holiday Light Necklace/Bulbs with your 3D printer. Click on the button and save the file on your computer to work, edit or customize your design. You can also find more 3D designs for printers on Holiday Light Necklace/Bulbs.