Hollow Clock 4 - Pico
thingiverse
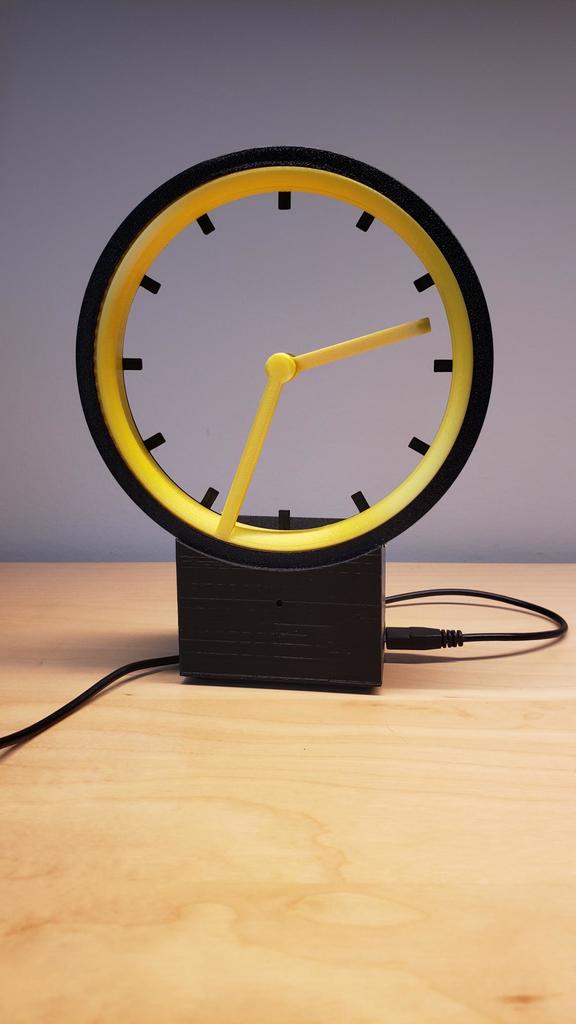
A remix of the Hollow Clock 4 by shiura which uses the Raspberry PI Pico instead of the original Arduino. The design has a modified base for the larger Pico CPU board and the addition of time adjustment buttons (slow/fast forward, slow/fast backward). A short button press results in slow incremental time change, a longer button press results in fast continuous time change. A support has been added for the rear cover providing additional mechanical rigidity to the hour and minute rotors. Hour tics have been added to the rear cover to improve visibility of the time. Mechanical assembly is essentially the same as the original Hollow Clock 4 with the exception of the additional rear rotor support which mounts to the cover (cap) with M3 x 6 screws and is fastened to the rear rotor cover with a suitable adhesive (CA, epoxy, etc). The Pico CPU and stepper controller PCB are soldered together (GP6 thru GP9, pins 9 thru 12 respectively). The stepper control PCB header pins IN4 thru IN1 are bent at a right angle to mate with the Pico pads 9 thru 12 respectively and soldered once alignment is assured. Power for the stepper driver is from Pico pin 38 (GND) & pin 39 (VSS). GND goes to stepper board 5V (-), VSS goes to stepper 5V(+). The time adjustment buttons common goes to Pico pin 28 (GND). Forward button +ve goes to GP20 (pin 26). Backward button +ve goes to GP21 (pin 27). The buttons are mounted on a 20 x 40 mm "prototype" PCB with the pcb_spacer via M2 x 6 screws and fastened to the base with a suitable adhesive (CA, epoxy, etc.). Some stepper motors may run in the opposite direction. If the clock runs backward jumper Pico pin 32 (GP27) and pin 33 (GND).
With this file you will be able to print Hollow Clock 4 - Pico with your 3D printer. Click on the button and save the file on your computer to work, edit or customize your design. You can also find more 3D designs for printers on Hollow Clock 4 - Pico .