Home Assistant Control Box
thingiverse
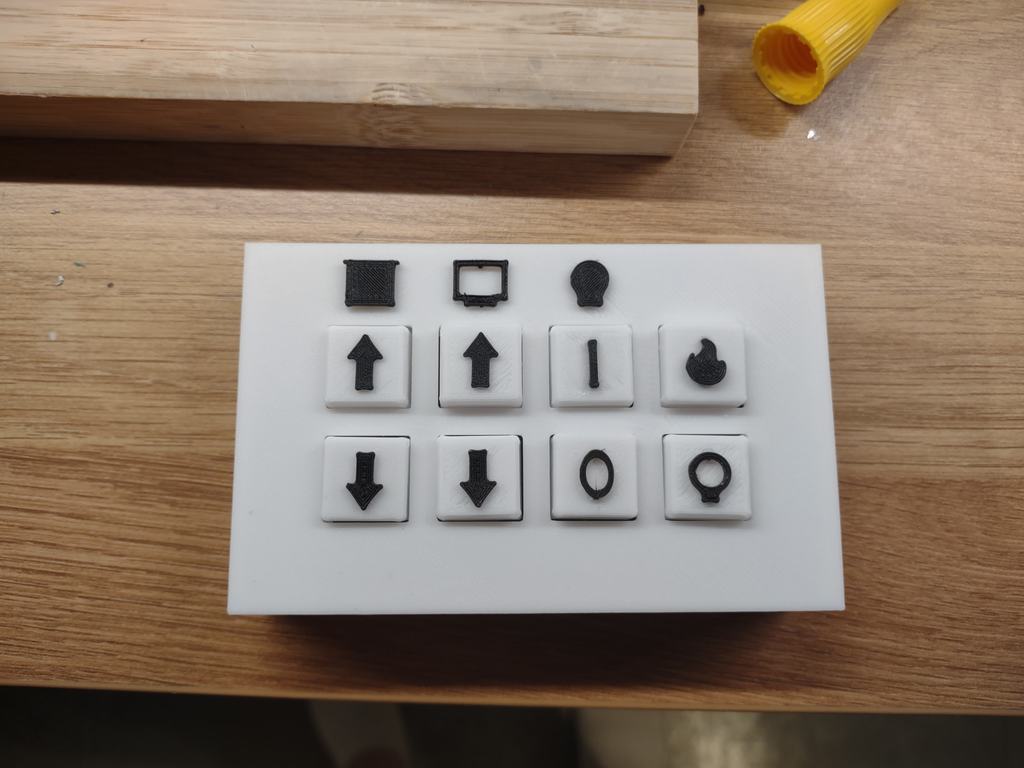
ESP8266 based 8 button controller for Home Assistant PCB here https://oshwlab.com/jinsin456/bedside-controller BOM 1 - ESP8266 V3 (Lolin) 4 - M2 x 8mm screws 8 - 6mm x 6mm x 10mm Tactile Momentary Buttons I've included the top file and the button files for FreeCAD. The icons use 2 x 1mm posts and there are corresponding holes on the buttons and tops (1.5mm dia) These may need adjusted depending on the tolerance of your printer or you may want to change their position. I installed the icons using superglue. When soldering the board THE BUTTONS NEED TO BE SOLDERED FIRST - some of them sit under the ESP chip and you won't have access once the chip is installed. The ESP chip goes on the back of the board, per the silk screen. The key caps just sit on the button stems, they shouldn't need glue and this makes them removable if you want to change anything. The ESP needs to be soldered direct to the board using the male / male headers, do not use female headers on the board. This was done to keep the enclosure thickness down. The top plate can be fitted either way so the USB cable can change positions, be mindful when editing the code, the default is for the USB to exit on the right and buttons are labelled 1 (Top Left), 2 (Bottom Left) up to 8 (Bottom Right). If you want the USB to exit on the left, the buttons will need to be inverted in the code.
With this file you will be able to print Home Assistant Control Box with your 3D printer. Click on the button and save the file on your computer to work, edit or customize your design. You can also find more 3D designs for printers on Home Assistant Control Box.