Honors Bio Cell Organelle Project
thingiverse
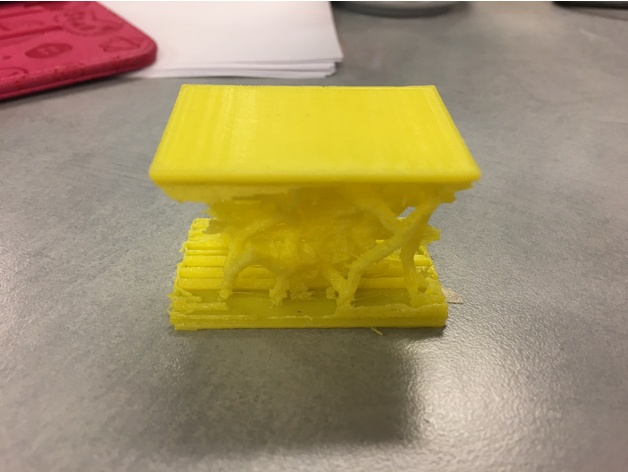
In this project, students will learn to use Tinkercad in order to design cell organelles and then 3D print them to correspond with a unit on cell biology in an Honors Biology course. Print Settings Printer Brand: MakerBot Printer: MakerBot Replicator (5th Generation) Rafts: Yes Supports: Yes Post-Printing Cleaning Up Supports For this particular example STL for this project, it was very difficult to remove supports. Would suggest to the student in the future to use MeshMixer, which provides much cleaner/easier to remove supports. How I Designed This Students used Tinkercad to make their designs after receiving instruction. The student example in Tinkercad. Standards NGSS Overview and Background This project is a collaboration between our Honors Biology course and our Maker Lab 3D design/3D printing instruction. The project idea stemmed from the Honors Bio teacher wanting to incorporate 3D design into her curriculum and make use of our library makerspace. After a day of instruction introducing the project and concepts in the Honors Bio class with their teacher, students then come into the MCHS Maker Lab to receive basic instruction on the application Tinkercad and certification in using our MakerBot Replicator 5th generation printers. Based on images from their research, they then have three weeks to make a 3D design and schedule the 3D printing of their organelle in preparation for their presentation during the Organelle Symposium. Lesson Plan and Activity Day 1 - In class Lecture and discussion on cell structure - students take notes and participate in the discussion (10 minutes) A. Students generate a list of what they already know about cells and cell structure with a partner B. Groups share with class and a list of parts and functions is generated Student pairs pick an organelle from the hat for this project. Organelle research - with a partner, students research the chosen cell part. Each pair creates a document that will allow them to collaborate. The textbook is the first resource; if necessary use other high quality, referenced, academic sources. Maintain a list of resources in MLA format. Find the following information about the cell part: A. name and reason for the name (is it named after a person, place, event?) B. function - describe what it does in detail C. detailed description of the structure - include a graphic (maybe more than 1) D. explanation of how the structure is appropriate for the function E. what type of cells have this structure? F. what Kingdoms of organisms could have cells with this structure? G. when was this structure first discovered? by whom? H. will cells have one,many, or a few of these structures? why? I. interesting or fun fact about the structure J. list of resources used, including those for images Day 2 - Students come the LLC for 3D printing/design instruction 3D Printing Certification Process: After verifying all students have the MakerBot Desktop app, they start by going to our Get Started page for the MakerBot Replicator (https://sites.google.com/a/moreaucatholic.org/mchs-maker-lab/getstarted/makerbot-replicator-certification) and downloading the button test file. They then open up the MakerBot Desktop app and click on the Prepare tab and click on Add File to add the button .stl they just downloaded. We then talk about the different icons that allow them to move around the space and move, rotate, and most importantly re-size their object. At this point, they are reminded that they will only be allowed to print for limited time depending on the number of classes scheduled. (show examples). We then click on Settings and talk about leaving everything at Standard for now, what rafts are, and why you would need supports (show examples). Then we have the students click, Ok, and click on Preview to see how long their print job will take. Remind them again this is where they would need to go back to the Scale icon if their print job is over the allotted time. At this point, the students click Export and then are reminded that for their own projects they need to change the file to their name and save it on the desktop for printing. Day 2 - 3D printing/design instruction cont. 3D Design Instruction: After certification, students are then asked to go to the 3D Design LibGuide (http://moreaucatholic.libguides.com/c.php?g=426721&p=2913214). Once there, they need to go to Tinkercad and sign up for an account. We then walk them through basic instruction on how to use Tinkercad (see the video on LibGuide) and let them get started on their designs. Independent Work Time - over 3 weeks Students are required to: Set up a time to 3D print your cell organelle. Prepare presentation materials for the Organelle Symposium Day 3 - Organelle Symposium in class One class period: Each pair of students displays the 3D model of their organelle along with supporting information from their research. Displays should be engaging and informative. Students visit each display, take notes, and complete a peer review for each project. Materials Needed Biology Textbook and other scholarly online resources Laptops Tinkercad accounts 3D printer/filament Skills Learned cell organelles MakerBot Desktop App Tinkercad 3D Printing Duration of Lesson 3 class periods plus outside class time. Preparation 3D Design/Printing Preparation Have samples to show for explaining supports, rafts, and length of print time Verify MakerBot Replicator Desktop is installed on all computers, otherwise refer to MakerBot Desktop download from site Create a schedule for printing all projects - students are expected to treat their scheduled time like a assignment due date Rubric and Assessment See Peer Evaluation Form and 3D Cell Organelle Project Assessment files.
With this file you will be able to print Honors Bio Cell Organelle Project with your 3D printer. Click on the button and save the file on your computer to work, edit or customize your design. You can also find more 3D designs for printers on Honors Bio Cell Organelle Project.