HOTAS/HOSAS Swivel Mount for desk with open corners
thingiverse
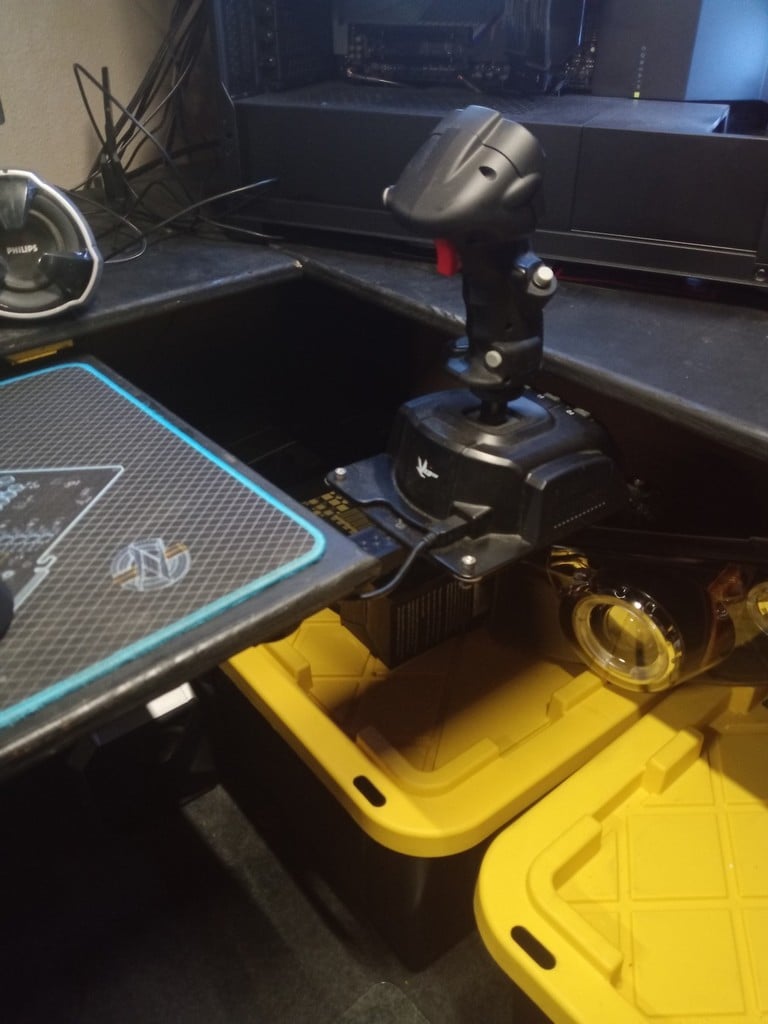
Hotas/Hosas Swivel Mounts for desk with open corners. It seems like most people just use Solid Clamp mounts for this sort of thing and i guess if you need absolute stability for realism that's fine if you can't go for a full sim pit, but I found that solid desk clamps just didn't work that well for me considering my sticks would be partially obstructing my keyboard/mouse usage for other tasks and games. I also had a plan for an ideal desk I wanted to build for myself and wanted something that would work together with that. After looking at some other ideas i saw online (including a really awesome sliding rail setup) I decided i wanted something that wouldn't stick out from my desk at all when not in use, which meant that i needed some kind of swivel/hinge setup, but I couldn't find any existing part or design to start with so I started from scratch. After much Iterating i finally have a design that I feel is Simple yet robust enough that other people might find it useful as well. Note that these will only really work on a desk/surface with open front corners. if your desk has legs at the front corners this isn't really going to work. The arms and included mount plates are designed with adjust-ability in mind, so the mounts have a bit of range where they can be attached to the arm for either clearance requirements or personal preference. The included parts are also small enough that they should be easily printable in their default orientations on most printers. I designed them to print on an Ender 3. there is a little bit of flex in the arm but that is to be expected as it is still plastic. I would like to mill these parts out of aluminum someday. PLA Printable - 100% Infill highly recommended on all parts. Do NOT use Eco-PLA Mirrored left/right side bases allow your controller to swing out of the way when desired. Strong Rare-Earth magnets hold your controller in place when in use. 2 Variants of each base, one with built in hinge core spacer, or print the hinge core spacer separately (recommended if your printer has poorer tolerances as it is slightly narrower OD) Arm is universal (has magnet pocket on both sides) Two included Base mounts, one is for VKB Flight sticks which share mounting dimensions, the second base mount is for the Thrustmaster TWCS Throttle. If need be you can design your own mounting plates, the arm is 30mm wide and accepts M3 screws w/nuts spaced 10mm apart Hardware required: 2x any 3/8 x 1-5/8in bolt and nut (coarse or fine thread) May also substitute with M8/M9 x 42MM+ metric 2x 3/8 x 1-1/2in Fender washers (or metric equivalent) 2x standard 3/8in washer (or metric equivalent) (a larger OD can be used but it cannot be as large as the other fender washer) 4x minimum M3x12 Flat head socket cap screws and nuts 4x AXK2542 Thrust Needle Roller Bearings 25x42x2mm https://www.amazon.com/uxcell-AXK2542-Thrust-Bearings-Washers/dp/B08FHTBX2H/ref=sr_1_4?crid=3Q8N9N4MBXCXV&keywords=axk2542&qid=1670234601&sprefix=axk254%2Caps%2C492&sr=8-4 4x 3mm Thickness Neodymium Disc magnets up to 28mm Diameter (bigger=better) 1/8" thickness magnets may work as well but may not sit flush with each other as they are a hair thicker https://www.amazon.com/MIN-CI-Decorative-Refrigerator-Whiteboard/dp/B09LCF4BT7/ref=sr_1_6?crid=5TTCCQZVD09A&keywords=neodymium+disc+magnets+3mm&qid=1670231010&sprefix=neodymium+disc+magnets+3mm%2Caps%2C647&sr=8-6 https://supermagnetman.com/collections/neodymium/products/d1080 Super Glue or a strong Epoxy to mount the magnets Could also try using screw mounted Magnets but would need to drill mounting holes: https://www.amazon.com/ZDYWY-Countersunk-Permanent-Refrigerator-Neodymium/dp/B096B595F6/ref=sr_1_40?crid=5TTCCQZVD09A&keywords=neodymium+disc+magnets+3mm&qid=1670231080&sprefix=neodymium+disc+magnets+3mm%2Caps%2C647&sr=8-40 8x base mounting screws: I use self-tapping lath screws to mount the base to my plywood desk, whatever works best for you may be different. base mounting screw holes are 5mm dia in a 54x67mm pattern Instructions: Again i would highly recommend printing all of the parts at 100% infill if using PLA, but you would probably be fine with less on the arm and VKB/TWCS mounting plates. Do NOT use ECO-PLA put one of your 3/8 (or metric equivalent) bolt and standard washer through from the backside of the baseplate. slide on the hinge core spacer (if not using the baseplate with integrated spacer) over the other end of the bolt Add one AXK2542 Thrust needle roller bearing to the baseplate (you can use one washer plate on the top surface of your baseplate if your print came out rough, but otherwise dont use them) Slide the arm onto the baseplate assembly Place a second AXK2542 Thrust needle roller Bearing (use one washer plate here if needed for spacing) over the arm add your 3/8 x 1-1/2" (or metric equivalent) Fender washer and 3/8" nut (or metric equivalent) to the other end of the bolt and tighten until the arm has no horizontal play. it should still spin fairly easily. See Cutaway view for approximation of finished assembly. after properly preparation of both surfaces (if using glue) mount one of your magnets to either the arm or the baseplate. you can place it on the pocket anywhere you want but the further away from the centerpoint of the hinge it is placed the stronger the leverage force will hold the arm in place while in use. once the first magnet is properly secured, carefully allow the second magnet to attract to it. we do this to align the magnet placement, as they will attract the strongest if they are properly aligned. add glue to the unglued magnet and move the arm until the magnet goes in its destined pocket. using a clamp vice at this stage may be useful to help ensure proper mounting once the glue has dried, test the assembly to make sure everything is mounted properly and holding. once you are satisfied with the magnet mounting, you can mount the clamps as desired then mount your mounting plate, adjusting for clearance and mount the controller to the mounting plate Repeat with your other controller (if any) Notes: I have added some QOL improvements to these designs since the last version I printed, which I am still using. everything should work but let me know if you have any issues. Update: 12/19/22. The Arm that my VKB stick was mounted on broke where i had the rear mounting plate screw installed. it appears to have been a combination of stress caused by the interference fit of the screw with repeated use strain. the older model this was printed from did not have the pockets for the hex nuts so it was threaded directly into the plastic instead. Ive uploaded a reinforced version of the arm that should work better with heavier controllers.i also opened up the screw holes to keep the screw from stressing the plastic. this means the hex nuts are required on that version however.
With this file you will be able to print HOTAS/HOSAS Swivel Mount for desk with open corners with your 3D printer. Click on the button and save the file on your computer to work, edit or customize your design. You can also find more 3D designs for printers on HOTAS/HOSAS Swivel Mount for desk with open corners.