Green-nade (plant bomb)
thingiverse
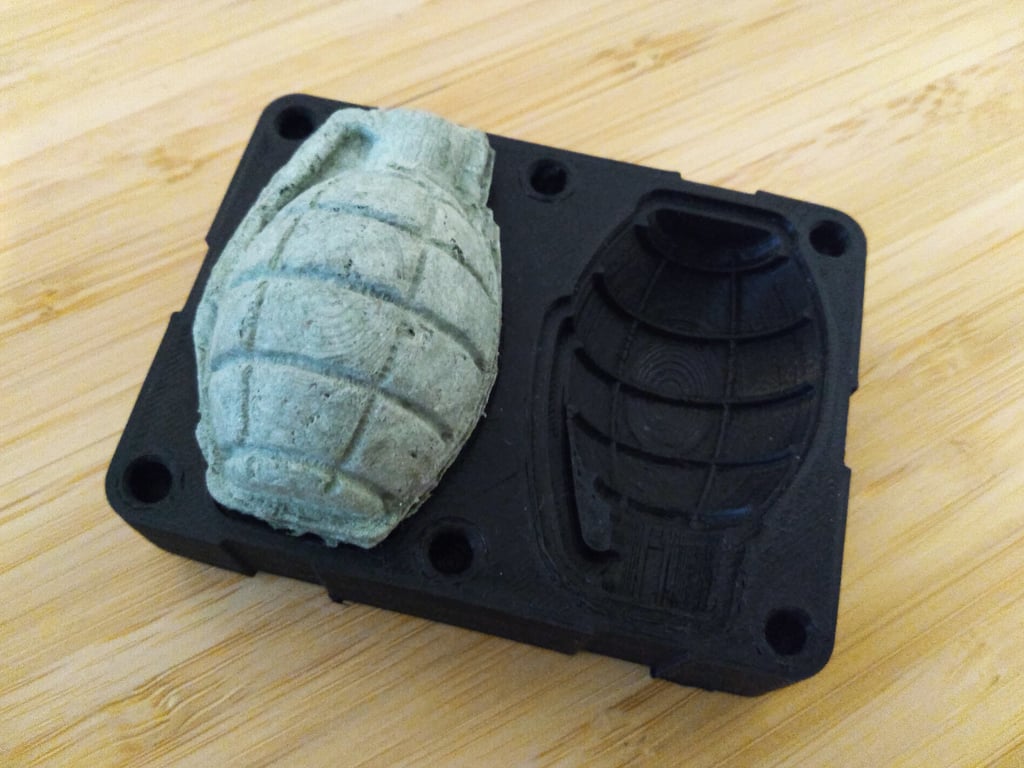
Simple 2 part mould for making hollow **"Green-nades"** or **"Plant Bombs"**. These make great little unique gifts and a fun project for kids and small school groups. **Instructions** **1\. Cut up old card/paper and blend with rice paste.** ------------------------------------------------------------------------- You can use paper from a shredder, old cardboard and flyers ideally anything that might not be recyclable by your local authority (such as greasy bits of pizza boxes etc). Use an electric blender to break this down further and add rice paste until you have a pliable dough like consistency. If you're having trouble getting a good consistency try adding a splash of water. **2\. Press out excess water to make a sticky pliable bio-degradable pulp.** ---------------------------------------------------------------------------- Filter the excess water from your pulp (I used an old worn sock), place the pulp in your filter bag/fabric/sock and squeeze out as much water/moisture as you can whilst leaving the material workable. **3\. Apply to the mould and allow to cure.** ---------------------------------------------------------- Break up the pulp and apply to the mould, distributing evenly. Do not worry about going over the edges these can be trimmed. Press the mould parts together (depending on how sticky your pulp is, it may be possible to remove the top quickly and check your if you filled the mould out properly). You can apply some elastic bands to the mould to help apply even pressure and keep the parts together during curing. Depending on your mix, ventilation and climate it can take a few hours to a day or so to fully cure. **Don't leave on a radiator or heat source, it's likely to warp and distort the mould** **4\. Fill with a mix of local wild flower seeds and dry soil.** ----------------------------------------------------------------- Carefully remove the mouldings, once they are cured they will of likely shrunk slightly and should be fairly easy to remove if you first free up the edges. The top and bottom of the moulds are thicker and so it is better to pull from these sides. Put a mix of seeds from local bee friendly flowers into your moulds with dry soil. These will be suited to your climate and do not add any invasive or foreign species to the mix. Try to select the flowers that are hardy and grow with minimal support. **5\. Bond your moulds together.** ------------------------------------ Add rice paste to the edges and trim down, cleaning up the edges once dry. **6\. Give to friends and family to distribute/plant - get going guerrilla gardening!** ---------------------------------------------------------------------------------------- Aim to plant in spots that will promote growth and away from roads/ high traffic areas and at the right time of year!. Depending on your pulp mix and climate the "Green-nade" should decompose in anywhere from 2-5 weeks. **Materials** 1\. Mould 2\. Dry Soil 3\. Mixing Bowl 4\. Elastic Bands 5\. Electric Blender 6\. Muslin bag/sock 7\. Cardboard/Paper 8\. Bee Friendly Flower Seeds 9\. Rice Paste/Glue [https://www.wikihow.com/Make-Rice-Glue]
With this file you will be able to print Green-nade (plant bomb) with your 3D printer. Click on the button and save the file on your computer to work, edit or customize your design. You can also find more 3D designs for printers on Green-nade (plant bomb).