Housing for 3x buck converters for Raspi and fan supply on 3D printer
thingiverse
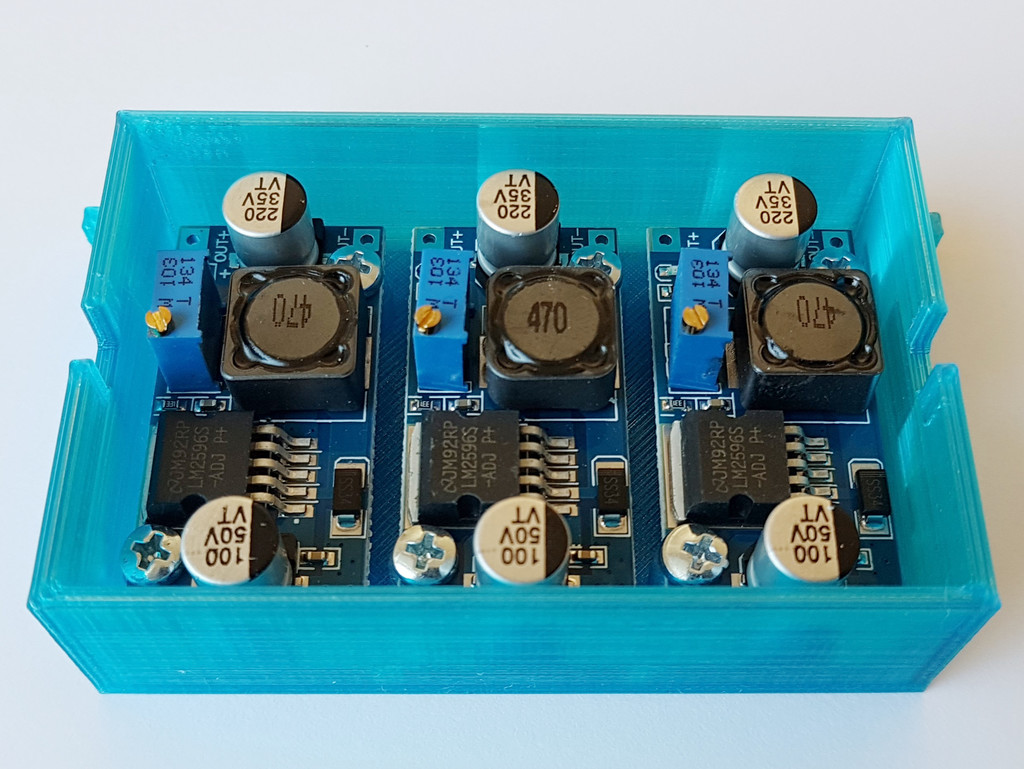
I have made this housing for my Ender 3 Pro. On a 3D printer one needs at least (IMHO) a 5V supply for the RaspberryPi that runs Octoprint and a 12V supply for one or more quiet Noctua fans. The housing can hold up to three of the very common and very affordable LM2596 converter modules, which can supply up to 3A at an adjustable voltage. The idea is to use printed T-nuts that go into the mounting rails of you printer, e.g. these: https://www.thingiverse.com/thing:3050607/files The appropriate screw size in that case would be M3x8. Of course you can mount this in any direction you want (after all, it's your printer), but I recommend to mount it below the print bed with the open side facing downwards. That will avoid filament from the print falling into you electronics housing and it will still leave enough cooling air to enter from the bottom. The module PCBs can be fixed with M3x6 on the respective domes. If you are careful and use a sturdy material like PETG, you can simply drive the screws into the plastic. I recommend using a thread cutter for nice M3 threads in the screw domes. A note on the pictures: After printing a prototype (which can be seen in the pictures) I realized that my mounting ears were a bit tiny and tended to slip into the grove of the mounting rail. This problem is already fixed in the uploaded thing, the ears are covering the full height of the housing.
With this file you will be able to print Housing for 3x buck converters for Raspi and fan supply on 3D printer with your 3D printer. Click on the button and save the file on your computer to work, edit or customize your design. You can also find more 3D designs for printers on Housing for 3x buck converters for Raspi and fan supply on 3D printer.