How a DC motor works - educational tool
thingiverse
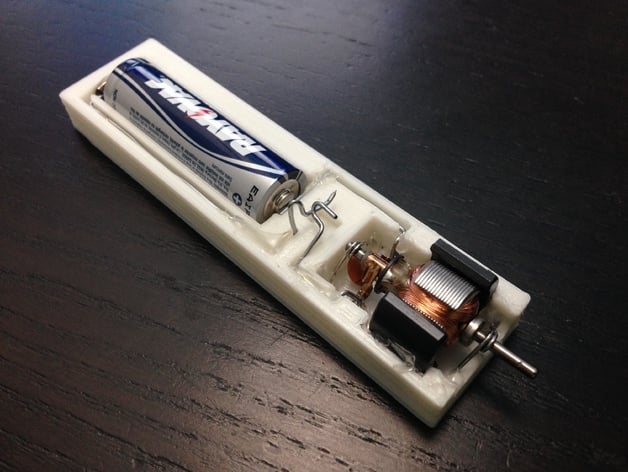
https://www.youtube.com/watch?v=66JXrxeZGUs This is a very simple tool that you can print to show how a dc motor works. I got the idea from Sonic Dad you tube channel. It includes a basic dc motor found in rc cars and other items. Taking the guts out and assembling it in a configuration that you can see the details. You will also need a battery, two paper clips, two safety pins. See instructions... Instructions Step 1. Print the object. Step 2. Take apart an old small dc motor. (Use pliers or whatever else to brake it apart, but dont damage it.) Step 3. Find a spring from some old battery compartment, or use another spring, hot glue it to the negative side. Step 4. Take 2 paper clips, and bend them to the path that is outlined on the item. Step 5. Hot glue the magnets. Step 6. Cut the safty pins to size so that the commutator shaft is centered, and the magnets are not touching the rotor. Then Glue 1st pin in place. Step 7. Hot glue the terminals/brushes on the bottom, across from where the paper clip path comes out to the motor. Step 8. Insert the motor. Step 9. Hot glue the second safety pin in place. keeping it centered. Step 10. Hot glue the paper clips in the correct paths. Step 11. Enjoy!
With this file you will be able to print How a DC motor works - educational tool with your 3D printer. Click on the button and save the file on your computer to work, edit or customize your design. You can also find more 3D designs for printers on How a DC motor works - educational tool.