How to get a good start when using a Z nozzle probe.
thingiverse
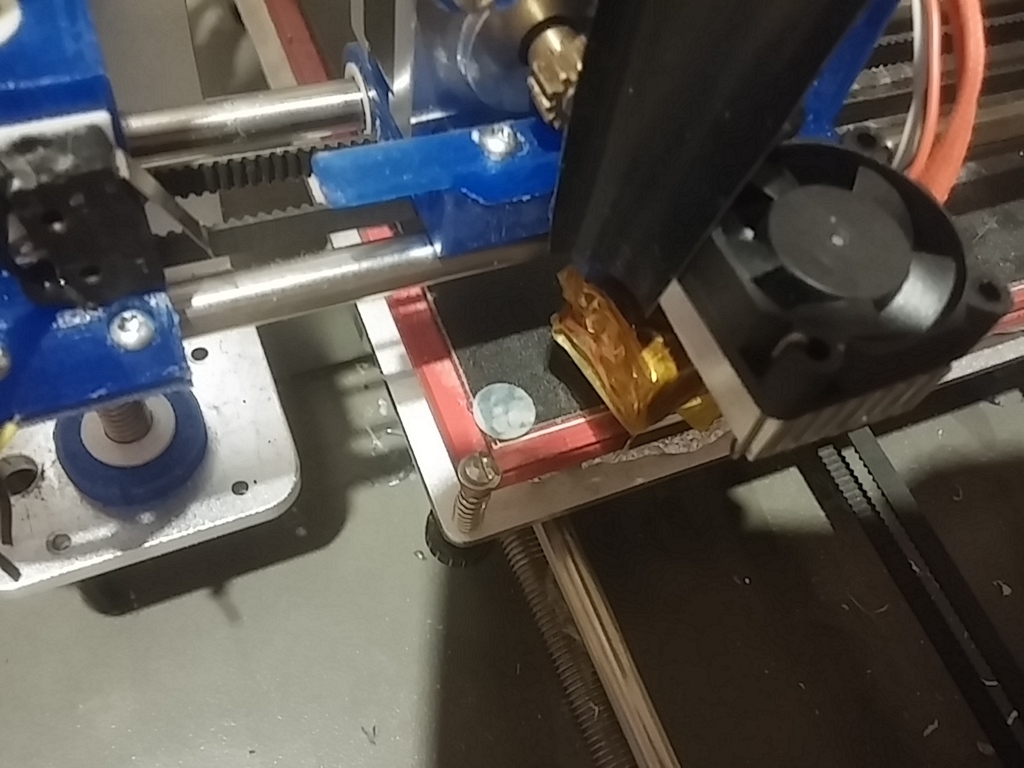
Even with a well-crafted machine that doesn't require auto bed leveling, you'll still need to adjust the Z end stop from time to time, such as when you change the extruder or remove the print plate. So I opted out of using the traditional Z home switch and instead created one triggered by the nozzle contacting the bed. Forget about cumbersome solutions like proximity sensors, BLTouch, or microswitches mounted on a servo – they all require adjustments and are often unreliable. To use the nozzle as a probe, various ready-made solutions exist: piezo sensors, strain gauges, vibration sensors, or mechanical switches. Research your options and choose one that can be seamlessly integrated into your hot end or carriage design, or create your own solution like I did (I won't be sharing my design here). A crucial caveat: the nozzle must be clean, and the bed surface it contacts should be free from debris, filament blobs, and other obstructions. I dislike scraping the nozzle, as it can easily become damaged. PETG is particularly sticky, so good luck with that. When the bed is covered with a sheet of BuildTack or similar material, the home position often results in a hole after the melted plastic has been scraped or damaged by the hot nozzle. Yet, the solution is surprisingly simple: just place a small piece of PTFE sheet or thin aluminum at the home position. Use an adhesive that can withstand the bed temperature, or, like I did, cut a portion of the BuildTack while keeping its excellent adhesive properties intact on the bed surface. Now you need to follow a straightforward procedure that can be done manually or via a G-code script executed at print start and finish (some setup can also be made in your firmware configuration). You may have to adjust the Z offset to achieve the correct Z0 due to the slight height difference. Here's how it works: - Lift the Z axis a few millimeters, bring the nozzle and bed up to working temperature, then home X, Y, and Z. You can also home Z again to ensure any melted filament is expelled. Note that my sensor requires about 1 Newton of force; if adjusted too lightly, issues may arise. Ensure your sensor isn't too sensitive (if it is, you'll encounter problems with vibration anyway!). When the job is done, remove the print, clean the nozzle, and home while the nozzle is still hot. This will prevent oozing and allow for a clean start on the next print. The PTFE sheet or aluminum shim won't damage the nozzle, and any blobs will be easily removable. You can even reinforce the PTFE with a thin metal sheet (0.1 mm) underneath. I've used both PTFE and aluminum with equal success. With a 0.1 mm sheet, you'll achieve the right distance to bed. Adjust the Z offset if necessary, especially if using a thicker sheet (which will be stronger and last longer). If required, cut a portion of the BuildTack, leaving just the strong adhesive, and stick the PTFE piece. As you can see, the nozzle face is flush despite no preliminary cleaning having been done, and there was melted PETG sticking to it. Time for me to install a silicone shroud! PS: I've used this setup for months now, and if your machine is properly built, no adjustments are needed. Don't believe the commenters below; check what they publish and have a good laugh! The STL file is here just because Thingiverse requires one.
With this file you will be able to print How to get a good start when using a Z nozzle probe. with your 3D printer. Click on the button and save the file on your computer to work, edit or customize your design. You can also find more 3D designs for printers on How to get a good start when using a Z nozzle probe..