HP 41C Calculator Plastic Screw Post Repair
thingiverse
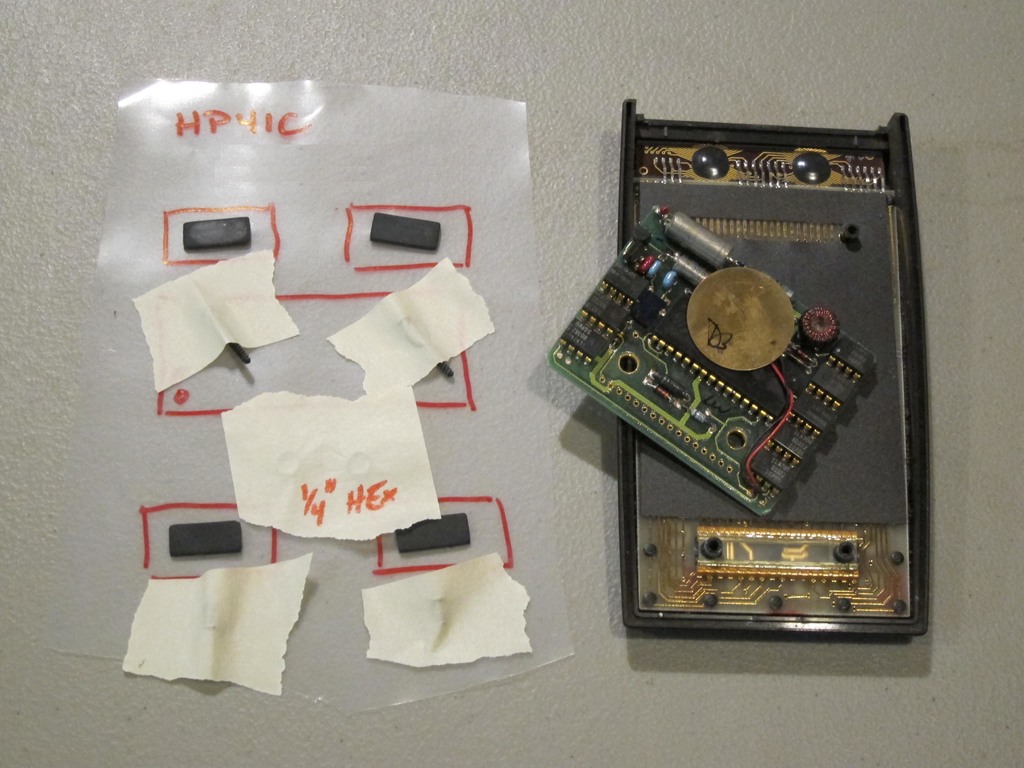
Caution: This is a moderately difficult job for many reasons. The alignment of parts is critical, thickness of sandwich of replacement parts and glue, fast skinning of glue and long clamp holding time, fragile component that needs to be reused (keyboard to PCB connector ???) etc. No warrantee is expressed nor implied by me. four 3D modeled parts: 1) The upper screw post reinforcement strap 2) the lower screw posts assembly 3) the alignment frame for the lower screw post assembly 4) the block used to glue and clamp the lower screw post assembly On this unit I chose to replace both lower screw posts and to just reinforce the upper screw posts. Later, if needed, I can rebuild the upper screw posts. HP41C Full Nut with the two-transistor PCB. This design was modeled in order to take as much advantage I could for finding bare PCB areas to glue the lower screw post assembly onto. Other PCB variations would benefit from a different custom assembly. E-6000 (thinner) or 3900 (thicker) glue. I used some amazing stuff and it has performed very well. ESD precautions, including as a minimum, a grounding wrist strap and grounded table mats pre-fit everything! the alignment tool, the PCB and the back of the calculator case...etc. if necessary, cut a new black insulator sheet to size. I did because of the upper screw post assembly pre-thread your screws into the lower screw post assembly, only once, and later be sure to use the same screw in the post you tapped.
With this file you will be able to print HP 41C Calculator Plastic Screw Post Repair with your 3D printer. Click on the button and save the file on your computer to work, edit or customize your design. You can also find more 3D designs for printers on HP 41C Calculator Plastic Screw Post Repair.