Hypercube 300 - Lite & Piezo Lite Carriage plus Other Mods
thingiverse
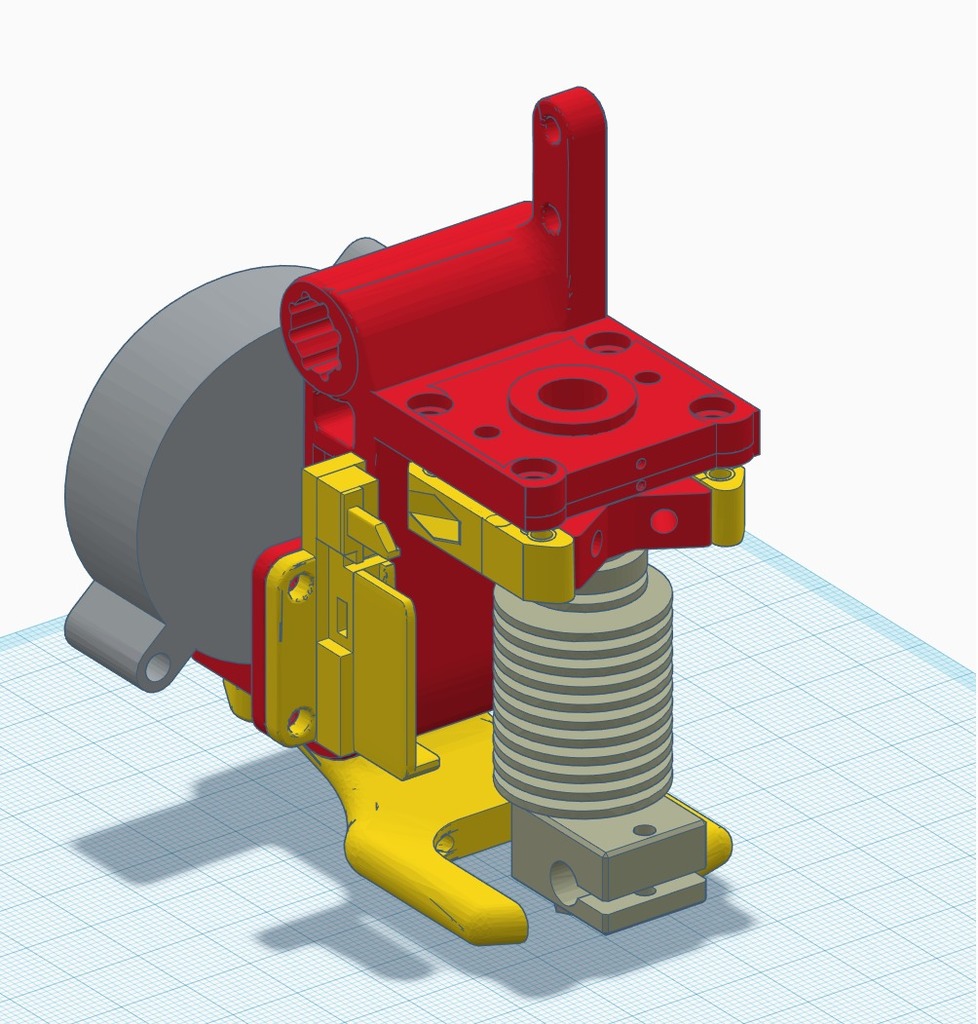
Update Aug 22, 2018: I've created both carriages on a tinkercad page with the standard 10.00mm bore holes. If you need to change the bore hole size you can copy to your own page, change the dimensions of the negative cylinder and combine, then save to stl. https://www.tinkercad.com/things/fceVjI97dml#/ If you don't have a tinkercad account, you'll need to create one. Update Aug 16, 2018: There was an couple errors in the regular carriage pointed out to me that I've fixed. There was a very tiny gap between the carriage and the hotend part (.05mm) that showed up on the slicer, and the screw hole for the parts cooling fan was partially filled. Both are now fixed. Reverted to exactly 10mm for the X rod holes. Update Aug 11, 2018: Moved the X rod holes 3mm towards the back to straighten the XY belts. (they came into the carriage on an angle before) and added the standard carrier as well, with my adjustments (relocated X rod holes, sturdier fan shroud bracket) I also increased the size of the X holes to 10.1mm. I can adjust them back if needed but my X rods are just slightly over 10mm. Combined the top plate from the piezo holder with the HC300 Lite carrier and removed the screw pins from the back of the clamp piece, and enlarged the hole in the piezo top plate to take a 9mm PTFE tube connector. Increased the material around the fan duct bracket slightly as I found it to be brittle. Increased the fan duct thickness by .25mm as it also was a little too brittle for my liking and altered the angle of the screw tabs so it'll print easier (previously was ~40 degrees, now 60). The pillowblock bearing spacer and Z bearing holder are part of a single motor to dual leadscrew I'm working on. Fine tuning the integrated bushings: I use a 10mm drill bit, and push it through (without turning) then very slowly spin it a few times with a drill to knock any protrusions off the inside. If it still binds at all on the X rods, I use a piece of 220 grit sand paper rolled into a tube, push through the hole and spin 3 or 4 times and check the fit again. You'll want to do this until the carriage moves freely on the X rod with no binding spots. Use a 9mm drill bit to tune the PTFE connector hole. If it's too tight it'll crack the plastic. One note on assembly. The fan duct hole is slightly rounded, so when you print the fan, use a knife to shave off the corner of the side that's completely square to keep it from pushing against the hole. The Piezo PCB holder mounts to the holes for the X end stop. It's for the larger multi-piezo board. If you have the smaller single-piezo board, I'll make a mount for that one soon. The rest of the pieces are the same, so you can get the belt clamp for the carrier from Hypercube 300 Lite X Carriage, and the other part of the Piezo Clamp from Piezo20 Hotend Z Probe.
With this file you will be able to print Hypercube 300 - Lite & Piezo Lite Carriage plus Other Mods with your 3D printer. Click on the button and save the file on your computer to work, edit or customize your design. You can also find more 3D designs for printers on Hypercube 300 - Lite & Piezo Lite Carriage plus Other Mods.