Hypercube BLV Fusion - 2020 + Linear rail X+Y axis conversion
thingiverse
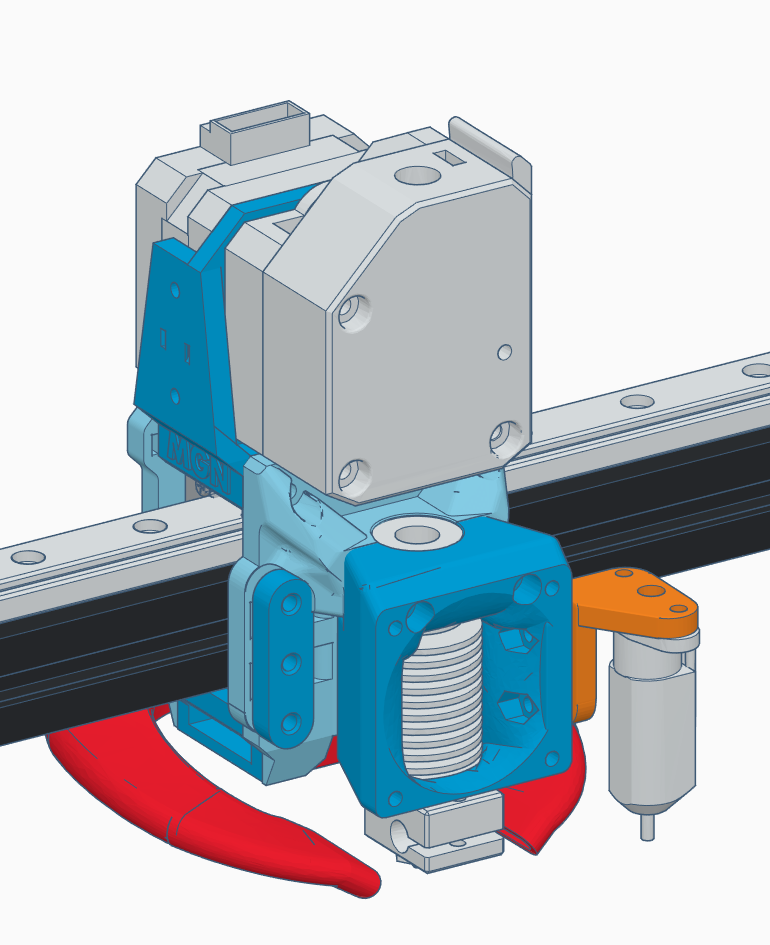
It appears to be a project for a DIY 3D printer upgrade, specifically an X-axis linear rail conversion using 2020 extrusion. The text describes the various parts needed and their functions, as well as some updates and modifications made to the design. Here's a breakdown of the main points: 1. Updates: * Added support for MGN9H * Added mount for Precision Piezo Orion (no fan duct yet) * Altered Spaceship Fan Duct to blow slightly forward and downward * Added built-in supports for fan opening on Spaceship Duct * Added tool to assist with belt installation * Added nut holes for bottom plate * Modified MK3 duct for easier removal 2. New parts: * Plate and fan mount for NF NC-01 cyclops 2in1out block * Mounting holes for Hypercube 300 standard sensor holders on V6 clamp/fan duct * Remix of Paul's Anet A8 Spaceship Fan Duct for BLV carriage 3. Changes: * Increased spacing around bearings 4. Notes: * The project is a work in progress, and the author plans to make further adjustments as needed. * The design uses a twisted belt system with F623zz bearings and 2020 extrusion. Overall, this appears to be a detailed and technical description of a DIY 3D printer upgrade project.
With this file you will be able to print Hypercube BLV Fusion - 2020 + Linear rail X+Y axis conversion with your 3D printer. Click on the button and save the file on your computer to work, edit or customize your design. You can also find more 3D designs for printers on Hypercube BLV Fusion - 2020 + Linear rail X+Y axis conversion .