Hypercube Evo MGN Linear Rail Conversion (V2)
thingiverse
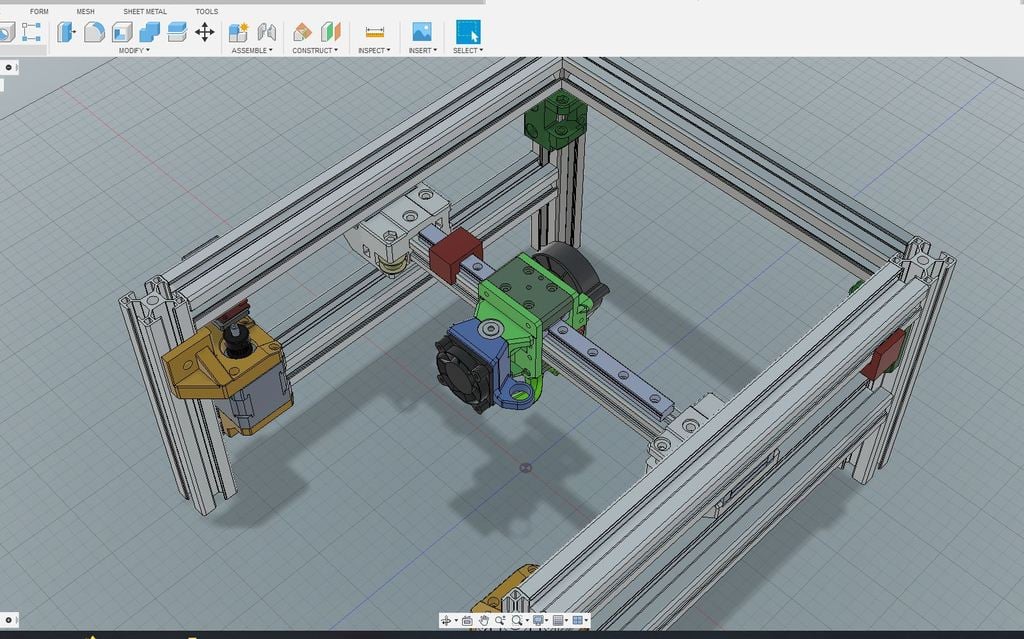
It seems like you have a comprehensive guide for modifying a 3D printer, specifically the HEVO (a variant of the Prusa i3). This modification involves upgrading the X-axis and Y-axis using MGN12 linear rails. Here's a breakdown: ### Upgrading to Linear Rails #### What Are Linear Rails? Linear rails are components used in precise motion systems. They're designed for applications where high accuracy, smooth movement, and low friction are required. In the context of 3D printing, they improve print quality by allowing for more accurate movements. #### Why Upgrade to MGN12 Linear Rails? - **Smooth Movement**: Reduces wear on your printer's components. - **Increased Precision**: Allows for finer details in prints due to reduced movement errors. - **Durability**: The rails can withstand a lot of use before showing significant signs of wear, reducing the need for repairs or replacements. ### Upgrading X-axis 1. **2020 Extrusion Size**: - If your Y rods are centered on vertical extrusions, cut the 2020 to 42mm less than the center-to-center distance of your Y rods. 2. **Linear Rail Requirements**: - Use an MGN12 linear rail that's 45mm shorter than your 2020 extrusion. - Ensure it comes with a 12H carriage block. ### Upgrading Y-axis - For Half Conversion: - Print two of the Y Axis Rod Caps and Y Axis Rod Joiners. These replace the stock HEVO joiners, fitting the 2020 extrusion for your new X axis. - For Full Conversion: - You'll need all other parts plus relocating your intermediate horizontal support higher with longer rods and lead screws. ### Additional Tips - **Belt Tension**: Get belts as tight as possible during installation. Use screw tensioners for fine-tuning the position of the X-axis, but be cautious not to interfere with travel. - **Squareness Check**: - After assembly, check if the axis is square by measuring diagonal distances and ensuring they match. - Adjust belt tension until it's square. ### Resources The guide you've shared seems comprehensive. However, for more detailed information or specific questions, consider visiting online forums dedicated to 3D printing or the manufacturer's website.
With this file you will be able to print Hypercube Evo MGN Linear Rail Conversion (V2) with your 3D printer. Click on the button and save the file on your computer to work, edit or customize your design. You can also find more 3D designs for printers on Hypercube Evo MGN Linear Rail Conversion (V2).