Hypercube Z axis motor mount
thingiverse
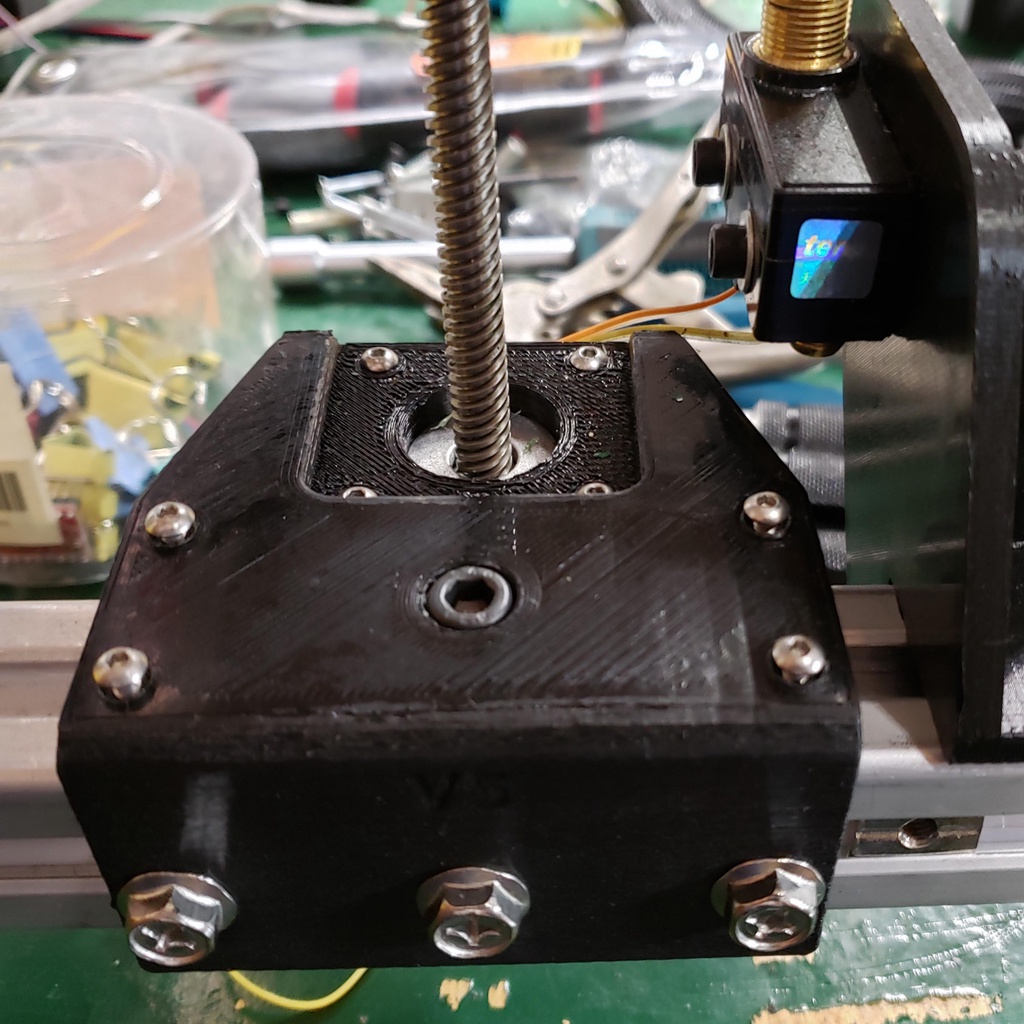
I have refined several iterations of stepper motor mounts. The last adjustment to be made is ensuring the stepper aligns perfectly with the z-nut on the bed after assembly. I discovered that it never lines up precisely, so I implemented a solution using small screws for fine adjustments. First, I center and securely mount the z-nut on the bed. Then, I slide the motor mount underneath and center it, noting where the lead screw passes through the bed's z-nut mount. Next, I slide the bed up and down while adjusting the screws to maintain the lead screw's position in the same spot within the bed's z-nut mount. It takes time to gradually tighten all bolts while adjusting the screws to keep the position consistent. Once complete, the z-axis stepper moves easily up and down with no binding. The plastic nut under the z-nut bracket allows for better clamping of the z-nut. The half nut is an added feature in case you forget to install the full nut during assembly. You can also use the half nut if needed after assembly. Required materials include 3 mm screws, M6 sliding t-nuts, M6 x 12mm flange bolts, and an M6 x 14 socket head bolt. I also utilize the same 3 mm inserts that Scott uses on the Hypercube Evolution.
With this file you will be able to print Hypercube Z axis motor mount with your 3D printer. Click on the button and save the file on your computer to work, edit or customize your design. You can also find more 3D designs for printers on Hypercube Z axis motor mount.