Hyperpixel 4 + Pi all in one Dash with Camera Mount for MK3S/S+
prusaprinters
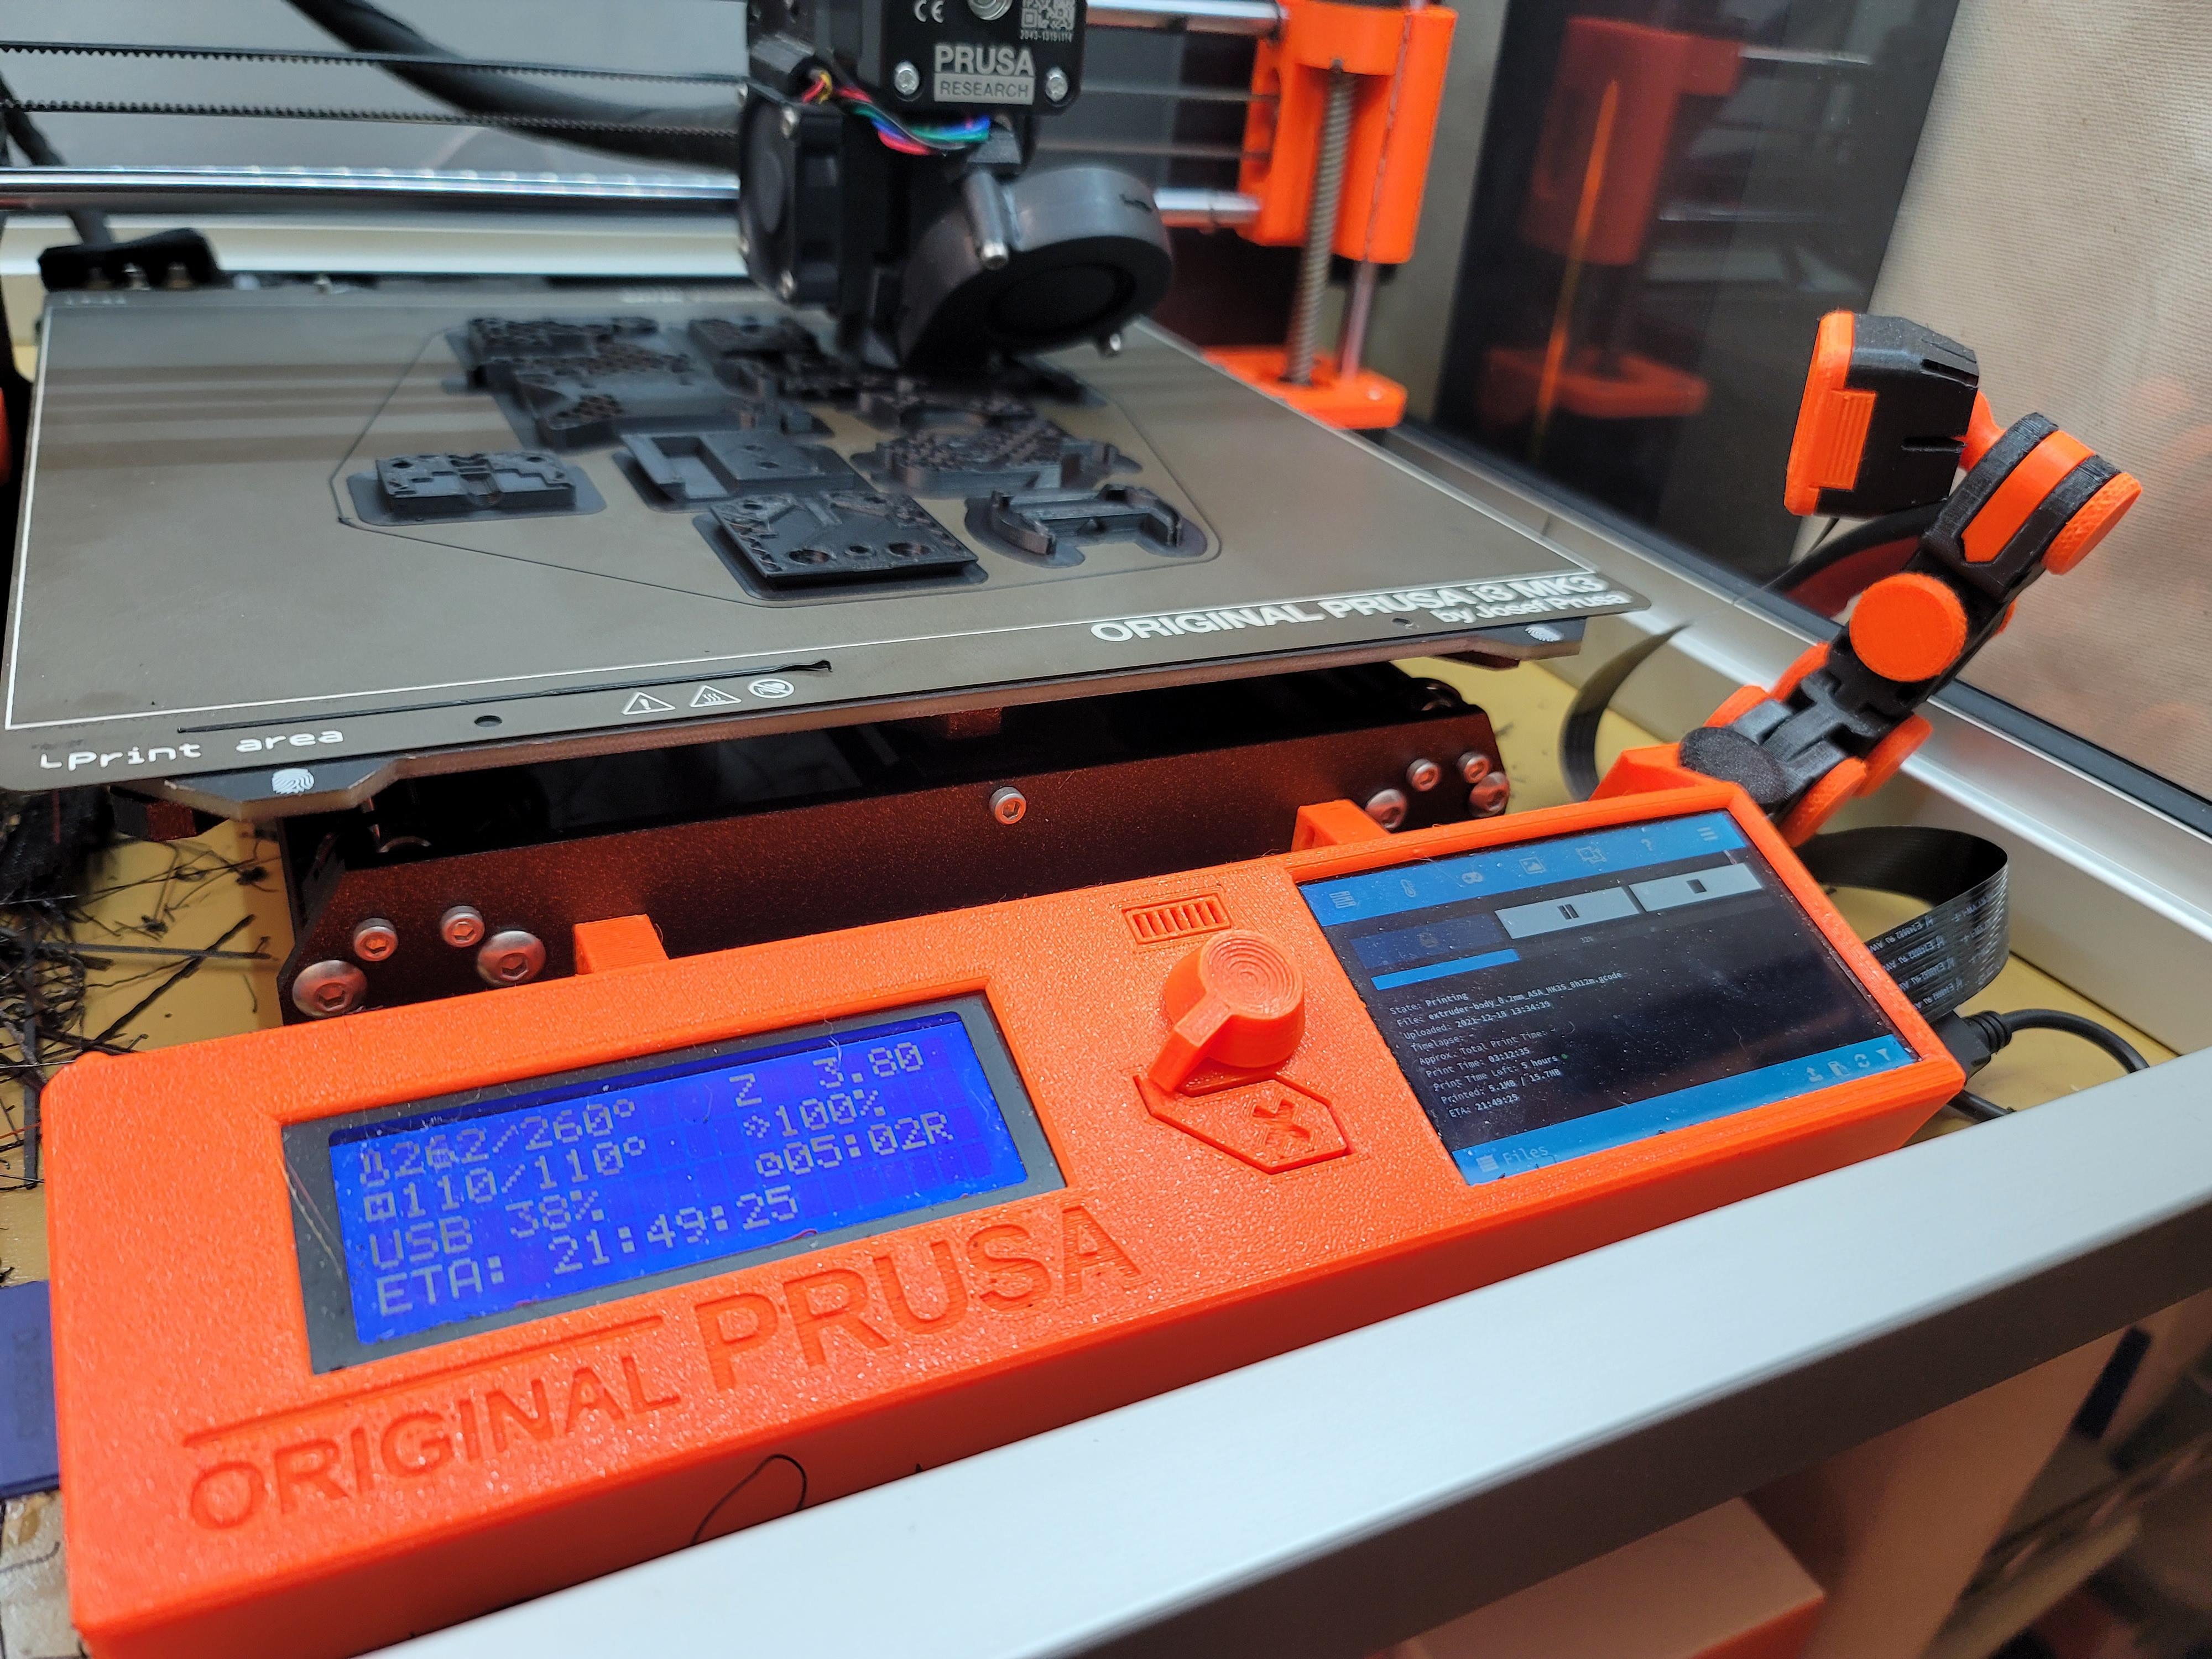
<p>Replacement Dashboard for a MK3S/S+ to include a Pi 4B and HyperPixel 4 display plus a camera mount. OEM look but way improved functionality!</p><p>I made this probably early 2020 after getting my MK3S. Parts of this design are remixes from other parts (like the OEM dash panel) or completely pulled from another shared/free design (camera case and arm components). I cannot recall where I got borrowed pieces so if someone sees this and did design part of it please do let me know and I will certainly credit you.</p><p>How is my design different from many other designs?</p><ul><li>The entire Pi 4B+, power conversion circuitry, and display fit within the dashboard while still allowing the printer to sit flat and also not interfere with the print bed movement. Many other designs make it so the dashboard has to sit over an edge because they angled things weirdly where the dashboard bottom edge sits lower than the printer itself. Or they move the Pi to a separate location from the dashboard which then requires a big ribbon cable from the Pi to the display. Both of which seemed very inelegant to me.</li><li>Has a camera mount. The arm isn't the best as your articulation angles aren't the best but I found a combination that gets me pretty much the view I wanted from OctoPrint.</li></ul><p>Specifications</p><ul><li>Pi 4B+ but if you really want to try a 3B it should work identically.</li><li>Pi v2 Camera (or v1) with an extended ribbon cable. i cannot recall what length I used here but looking at mine it appears somewhere around 12-15 inches.</li><li>Power converter is an Omzlo PiJack 6V-32V converter with the extended gpio header pin option: <a href="https://shop.omzlo.com/products/pi-jack-power-your-raspberry-pi-from-6v-to-28v">https://shop.omzlo.com/products/pi-jack-power-your-raspberry-pi-from-6v-to-28v</a></li></ul><p>How it's assembled:</p><p>This is going off memory unfortunately, but basically I wired a positive and negative input wire from the Omzlo PiJack that connects to the printer's power supply. 12V or 24V connections both work, just pick one. If your headers aren't soldered you'll need to solder the header to the Omzlo PiJack board, though it's only necessary to solder a few locations (it's kind of obvious which pins by looking at the top of the board). </p><p>You then assemble the Pi → Omzlo → Hyperpixel 4 on the headers, and use standoffs to hold it all together. I really can't recall if I used the standoffs and screws that came with the Hyperpixel or if I had some other lengths to get this just right. During assembly you should also insert the long CSI cable for the camera before stacking the devices on the GPIO headers and run the cable out towards the USB ports side. </p><p>Once this is assembled you just slide the combination in from the right side of the dashboard (when viewed as if you were standing in front of the printer) and it's a friction fit to hold in place. You run the power wire under your printer to the power supply.</p><p>Camera assembly is fairly straight forward. The Camera case snaps together with the CSI cable running out the bottom, and the ball joint snaps into its back. </p><p>I also used some clips that snap into the aluminum extrusions for wire routing. This helped route the USB cable rather cleanly underneath the printer as well as the power from the power supply to the Pi.</p><p>I printed mine out of Orange and Black Prusament PETG. I really can't recall what settings I used but here is my best guess:</p><p><strong>Dashboard:</strong></p><p>0.1mm layer height, with supports though you should block them for the interior nut insertion holes</p><p><strong>Camera Mount Ball, Camera Arm Links, Camera Arm blank filler, Camera Arm Links, Wire Routing Clips:</strong></p><p>0.2mm layer height, no supports</p><p><strong>Camera Arm Thumb Screw and Nut:</strong></p><p>0.05mm layer height, no supports</p><p><strong>Camera Case pieces:</strong></p><p>0.1mm layer height, no supports</p><p> </p>
With this file you will be able to print Hyperpixel 4 + Pi all in one Dash with Camera Mount for MK3S/S+ with your 3D printer. Click on the button and save the file on your computer to work, edit or customize your design. You can also find more 3D designs for printers on Hyperpixel 4 + Pi all in one Dash with Camera Mount for MK3S/S+.