HyperX Cloud Orbit hinge replacement
thingiverse
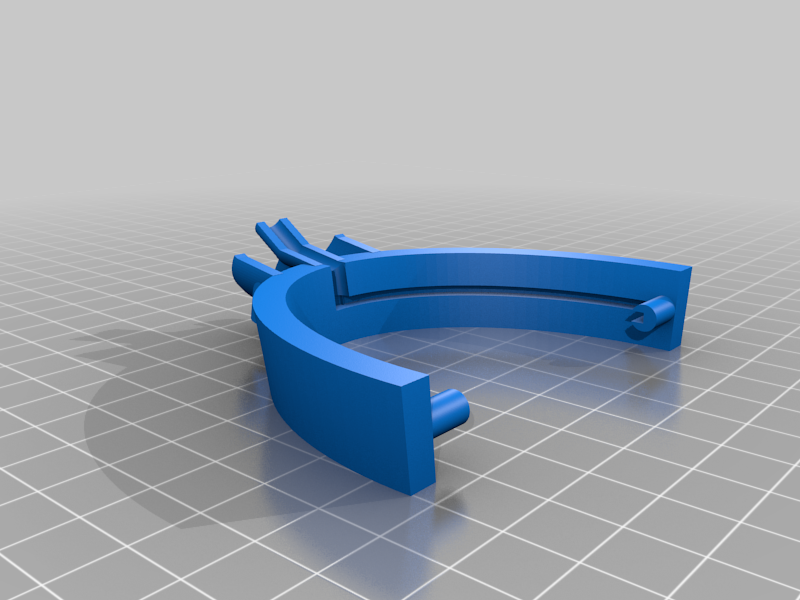
The standard hinge on my HyperX Cloud Orbits developed cracks and broke over time, perhaps on account of my massive head. I decided to share my lazy solution with the world. This design works decently, but there's definitely room for improvement. While it doesn't crack due to repeated stress like the original, I've found it's much less resistant to sharp impacts (such as being dropped). Required materials: Dremel, or equivalent cutting tool 2 m3 x 20mm bolts (per side) 2 m3 hex nuts (per side) electrical tape (optional) You'll need to take apart the headset. the ear cups are glued in, so pry it off with a guitar pick. After that there are 4 screws on the speaker housing and 2 on the sliding part. Once those are removed, there are 2 more brackets holding the hinge to the pcb that you will also need to remove, store everything in a safe place. VERY CAREFULLY dremel the wire free from the original hinge. After that slide the wire in the new cable channel, and affix with electrical tape. Fit the larger 3d printed piece back into the holes, you will need to flex it a little. Put the hex bolts in the hex holes, and screw the two pieces together while being careful to keep the wire in the cable run.put the new hinge back into the sliding piece and squish it back together. I made the nub as fat as possible for strength, but it won't want to go in. You may need to apply a little pressure. Screw everything together and you're done.
With this file you will be able to print HyperX Cloud Orbit hinge replacement with your 3D printer. Click on the button and save the file on your computer to work, edit or customize your design. You can also find more 3D designs for printers on HyperX Cloud Orbit hinge replacement.