I-Sobot
thingiverse
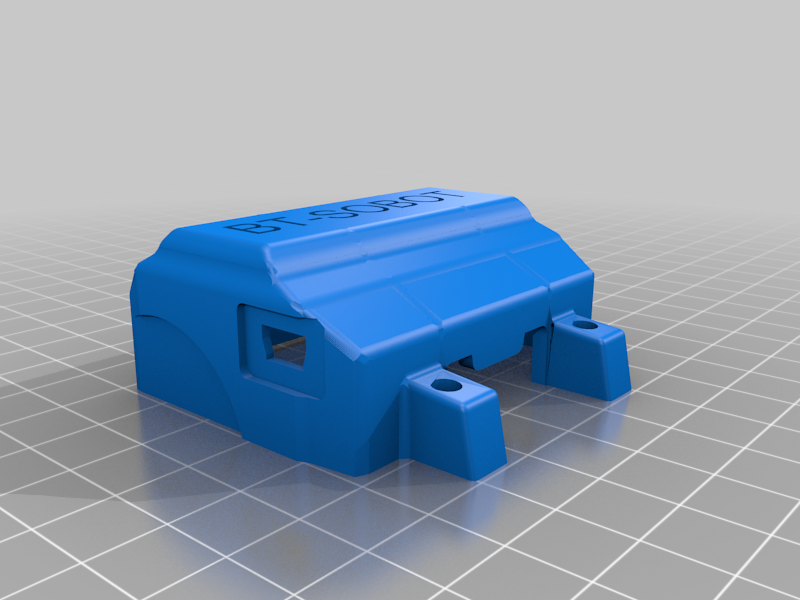
This is front cover for japanese I-Sobot robot upgraded to BT version. To control I-Sobot using any phone over Bluetooth you just need: arduino nano + HC05 + IR transmitter from any useless remote + NPN transistor +1K resistor Schematic : nano's digital pins 3,4 to RX/TX of the HC-05 BT module, 5 to IR Transmitter diode from any useless TV remote, BT546 NPN transistor and 1K resistor is connected to power up Arduino and BT module streight from Li-Ion power supply. I have used old SAMSUNG Li-Ion battery + Charging&protection board. For programming you will need library posted in arduino.cc forum (1st pageout off 4). Below is my Arduino sketch: /* * This is I-Sobot Arduino Nano + BT-05 module sketch. */ #include <Isobot.h> #include <SoftwareSerial.h> Isobot bot(5); //IR transmitter hooked to D5 unsigned long time1, time2; String data0; String data1; char* Commands[] = {"fwd", "bwd", "sdrt", "sdlt", "flt", "frt", "blt", "brt", "fclw", "fctr", "bclw", "bctr", "hl", "hr", "lfwrd", "lbwd", "lpc", "r12", "lchop", "scpl", "cbpc", "rpch", "rchop", "l12", "sdcpr", "lbchd", "dlcp", "dbch", "slpg", "rbcnd", "uprcp", "rndhl", "rndhsr", "frdkl", "frdkr", "skl", "rdhr", "fwdklr", "cbk", "sdkr", "bckl", "bckr", "hikl", "hikr", "sps1", "gl", "gdr", "dlg1", "dlgr2", "ddgl", "ddgr", "duck", "swbk", "upblk", "spl2", "cbbk", "zero", "hpos", "soff", "afm", "dsree", "gdmg", "gr1", "gr2", "gr3", "gr4"}; /*, "bye1", "bye2", "bye3", "bye4", "bye5", "rpct", "thk1", "thk2", "lv1", "lv2", "lv3", "supft", "supbk", "extd1", "extd2", "extd3", "extd4", "pty", "amzd", "rgt1", "rgt2", "rgt3", "wry", "pain1", "pain2", "beg1", "beg2", "mry", "hlrs", "hdsk", "ylike", "mstr5", "tpy", "tklm", "tdft", "needb", "wv1", "wv2", "aplse", "mtr6", "tsexy", "clink", "rlx", "scr1", "scr2", "scr3", "lift", "ctnme", "atcln", "swf1", "swf2", "swf3", "swf4", "ctrgh", "catch", "rdmpf2", "wstn", "gntr", "tcldc", "rdmanl", "rdmf1", "argtr", "ardm", "excs", "hstdexs", "fwdslt", "mtry4", "mtry3", "mtry2", "mtry1", "pose3", "pose2", "pose1"};*/ unsigned long Code[] = {forward, backward, sideright, sideleft, fleft, fright, bleft, bright, fclockwise, fcounter, bclockwise, bcounter, headleft, headright, leanforward, leanback, lpunch, r12, lchop, sidechopl, combopunch, rpunch, rchop, l12, sidechopr, lbackhand, doublechop, doublebackhand, slapping, rbackhand, upperchop, roundhousel, roundhouser, forwardkickl, forwardkickr, sidekickl, roundhouselr, forwardkicklr, combokick, sidekickr, backkickl, backkickr, highkickl, highkickr, splits1, guardl, guardr, doubleguard1, doubleguard2, dodgel, dodger, duck, swayback, upblock, splits2, comboblock, zero, homeposition, soundoff, affirm, disagree, goodmorning, greet1, greet2, greet3, greet4, bye1, bye2, bye3, bye4, bye5, respect, thanks1, thanks2, love1, love2, love3, standupfront, standupback, excited1, excited2, excited3, excited4, party, amazed, regret1, regret2, regret3, worry, pain1, pain2, beg1, beg2, merry, hilarious, hidenseek, youlike, mystery5, tipsy, tickleme, tiredfeet, needabreak, wave1, wave2, applause, mystery6, toosexy, clink, relax, soccer1, soccer2, soccer3, lift, countonme, articulation, showoff1, showoff2, showoff3, showoff4, cominthrough, catch, randomperformance2, western, giantrobot, tropicaldance, randomanimal, randomperformance1, airguitar, airdrum, exercises, headstandexercises, forwardsomersault, mystery4, mystery3, mystery2, mystery1, pose3, pose2, pose1 }; SoftwareSerial mySerial(3, 4); // указываем пины rx и tx соответственно void setup() { // put your setup code here, to run once: pinMode(3,INPUT); pinMode(4,OUTPUT); Serial.begin(9600); mySerial.begin(9600); Serial.println(F("I-Sobot serial control v1.0. Please type command the push enter")); } void loop() { // put your main code here, to run repeatedly: serialCommand(); } void serialCommand(){ //--------------------Serial Command----------------- if (Serial.available()> 0 || mySerial.available()) { data1 = Serial.readString(); data0 = mySerial.readString(); int arSize = sizeof(Commands); for(byte i =0; i<arSize; i++){ if(strstr(data0.c_str(),Commands[i]) || strstr(data1.c_str(), Commands[i])){ Serial.println("Match found: \"" +String(Commands[i]) + "\" command received. Executing..."); bot.buttonwrite(Code[i],3); break; } } } }
With this file you will be able to print I-Sobot with your 3D printer. Click on the button and save the file on your computer to work, edit or customize your design. You can also find more 3D designs for printers on I-Sobot.
