I2C 4 Relay box enclosure
thingiverse
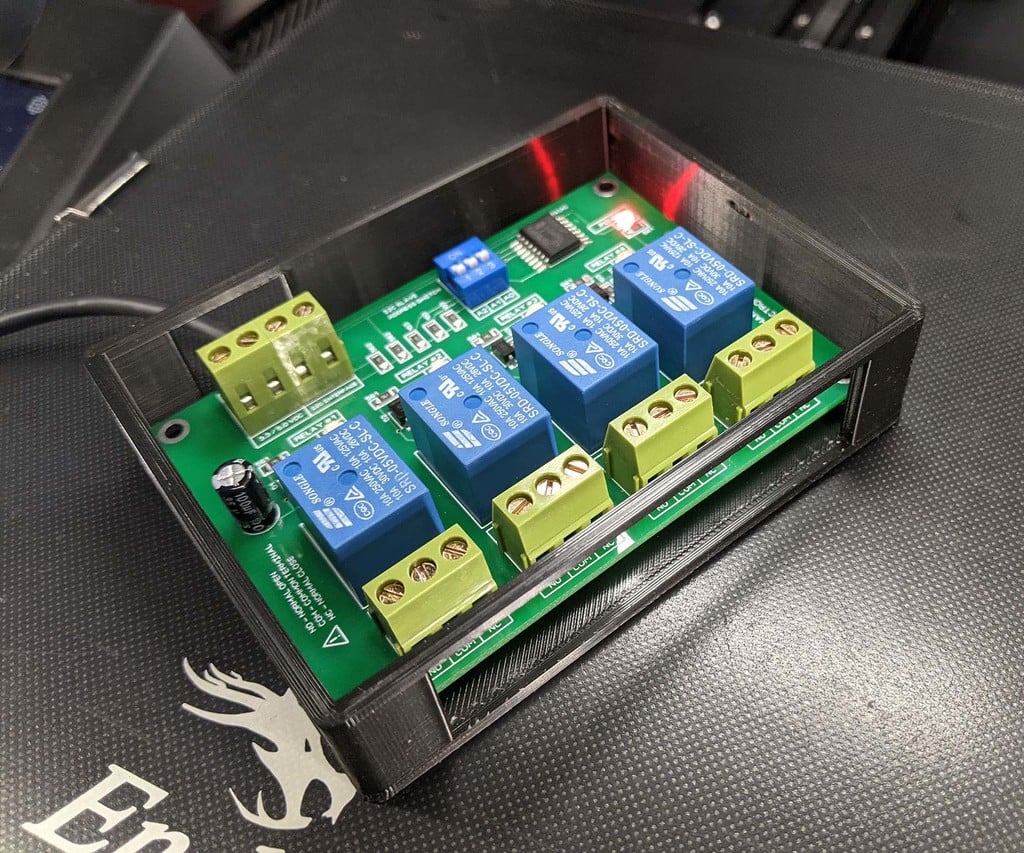
I created an easily accessible enclosure for this specific I2C relay board: [4 relay I2C Board from Amazon](https://www.amazon.com/gp/product/B08D7899CD/ref=as_li_tl?ie=UTF8&camp=1789&creative=9325&creativeASIN=B08D7899CD&linkCode=as2&tag=hanshobbies-20&linkId=861ad39d017d74845572f6dc096d2a16) There is a small gap (.2 mm) between cover and enclosure to allow easy removal (versus being flush) and open areas for wiring. When I printed this the final fit is perfect pressure as the layer ridges on the enclosure on the two shorter sides hold the board in place when you press it to the bottom of the enclosure. No screws needed. I'm going to be doing a tutorial about the HyperPixel 4.0 Touch and the I2C jumper and how to configure/connect everything to work as I wanted. I will say you need to use the 5V (pin 4) supply from the Raspberry Pi 4 B and not the 3.3V as it's not enough voltage to trigger the relays reliably. I just finished the PDF on how to setup and configure the I2C, hope this helps others! [Octoprint Raspberry Pi 4B HyperPixel 4.0 Touch Display I2C Breakout](https://bit.ly/3wV9z8a) Here is a video of the PSU Control plugin and the Enclosure plugin being used to control the lighting and power to the Ender 3 V2: [Octopi / Octoprint Raspberry Pi 4B Hyperpixel 4.0 I2C Relay In Action](https://www.youtube.com/watch?v=xiGgdYmSLQY)
With this file you will be able to print I2C 4 Relay box enclosure with your 3D printer. Click on the button and save the file on your computer to work, edit or customize your design. You can also find more 3D designs for printers on I2C 4 Relay box enclosure.