Ice / Chocolate mold raspberry with leaves sketchup meshmixer tutorial
thingiverse
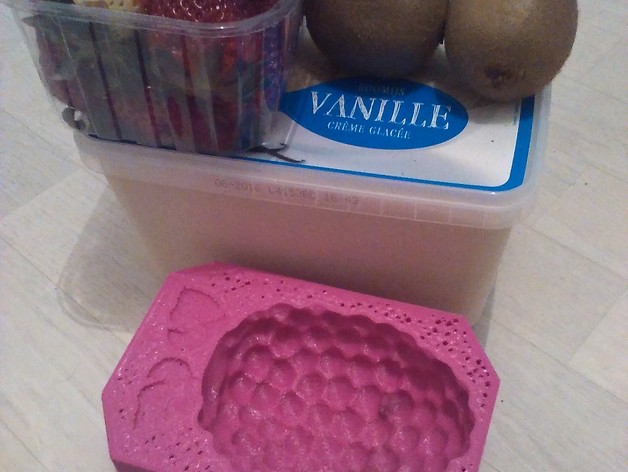
Raspberry Chocolate Mold Tutorial Instructions for Creating a Raspberry Ice Cake Using a 3D Printer Important Note: Visit http://www.instructables.com/id/Raspberry-Chocolate-Mold-Tutorial to print this model online. To start, we will need to create a solid from the original raspberry object. This involves selecting the imported object in the Object Browser and choosing "Make Solid" under Edit. Then, choose "Accurate" from the drop-down menu to get a precise surface. Next, append a cube to your Raspberry model by going to MeshMix -> Primitives -> Append Cube. Scale and stretch this cube on top of the raspberry to match its shape. Now that we have both models solidified, we can create a mold. To do so, select one of the models in the Object Browser and choose "Make Solid" under Edit again. For the Raspberry model, use "Accurate" and standard values for the cube. This will hollow out the mold. After this process, select both solids by holding Ctrl and choosing the first model, then the second. Now, go to Edit -> Boolean Difference and use a 45° angle if needed to get the correct result. To refine the surface of the mold, "Cut Planes" again after exporting it from MeshMix and "Analyze" with automatic repair all enabled. In preparation for printing, reduce the number of faces by going through Select, selecting any part in the model, and going under Edit -> Reduce to minimize data complexity. Choose "Shape Preserving," then drag back on "tri count slider" until 1/4th, leaving 25% (0.75) if desired. Next, take out your chosen ingredients: a large block of ice cream (about 1 liter), red-colored jam (300 grams), and three kiwi's to mash in with it. Take one-fifth of the ice cream and mash in some good amounts of the squished kiwi until well combined with a little whipped cream.
With this file you will be able to print Ice / Chocolate mold raspberry with leaves sketchup meshmixer tutorial with your 3D printer. Click on the button and save the file on your computer to work, edit or customize your design. You can also find more 3D designs for printers on Ice / Chocolate mold raspberry with leaves sketchup meshmixer tutorial.