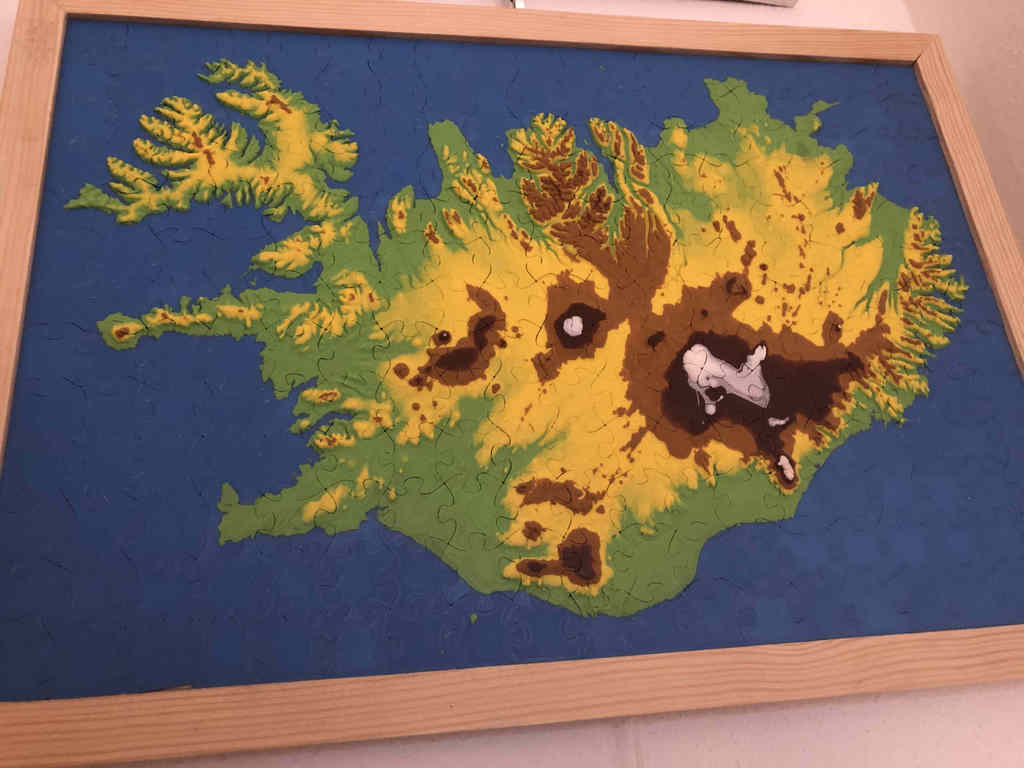
Iceland Topographical Map Puzzle 19x13
thingiverse
I got bored over the last year, so I decided to make a puzzle using a topographical map of my favorite travel location __Iceland__. This puzzle consists of 247 pieces that, when printed at default scale, will extend to a 26cm by 38cm map. I've had the Idea after watching Make Anything's video about [Making 3D Puzzles](https://www.youtube.com/watch?v=VdI1NXhAyRo). # Project Structure The puzzle pieces are ordered by their height starting at the lowest. I grouped them by the color scheme I have used in in my most recent print. I recommend starting at the lowest as this helps in reducing the number of overall color changes required for all prints. * up to 2.0 mm: 000 - 071 (Blue) * up to 3.0 mm: 072 - 091 (Blue - Green) * up to 3.9 mm: 092 - 120 (Blue - Yellow) * up to 4.8 mm: 121 - 180 (Blue - Light Brown) * up to 5.7 mm: 181 - 215 (Blue - Dark Brown) * above: 216 - 246 (Blue - White) The **puzzle_pieces.png** file displays how the pieces are then arranged. Use the **water-**parts to calibrate your settings to the desired outcome before moving on. # Configuration To get this nice topographical map, I used six different colors of the **3DJake** EcoPla material. To get a transisition in between, use the cura post-processing extension to pause the print and manually change the filament color. Therefore go to `Extensions > Post Processing Scripts` and configure `Pause at Height` depending on your desired outcome. CHEP also made a [video for that](https://www.youtube.com/watch?v=1nBnVtOEAiY). The puzzle pieces are designed with a 0.2mm gap by default. Depending on your printer and tolerance this can be adjusted using the `Horizontal Expansion` setting in Cura. I recommend doing this [Printer Clearance Test Puzzle](https://www.myminifactory.com/object/3d-print-printer-clearance-test-puzzle-55744) by Make Anything. Especially make sure that your `Initial Layer Horizontal Expansion` is well calibrated. Setting this to a negative value removes the Elephants foot of material getting squished to the build plate on the first layer. When opening the files, cura might re-orient them on the build plate. This resulted in inconsistent directions for the top layer infill, especially for the water pieces. To automatically re-orient them, select all parts, right-click and `Merge Models` and then `Ungroup Models`. Now you can place the parts on the build plate with the correct orientation. What I liked for my puzzle was setting the `Bottom Thickness` to 0. After printing you can then see the Infill from underneath and its easy to distinguish top and bottom side of each piece. Especially for the water-only pieces this helps at little with their orientation. But bear in mind that pieces might stick less well to your printers bed. # Helpful What I've found crucial to successful prints was having a part-cooling fan setup, that cools from both sides. Octoprint Plugin __Exclude Region__: In case one part loosens during printing this usually creates a mess, when material is now extruded in the air. The Plugin allows ignoring this area and not waste material or cause more failures.
With this file you will be able to print Iceland Topographical Map Puzzle 19x13 with your 3D printer. Click on the button and save the file on your computer to work, edit or customize your design. You can also find more 3D designs for printers on Iceland Topographical Map Puzzle 19x13.
