IKEA Bosnäs Hack
thingiverse
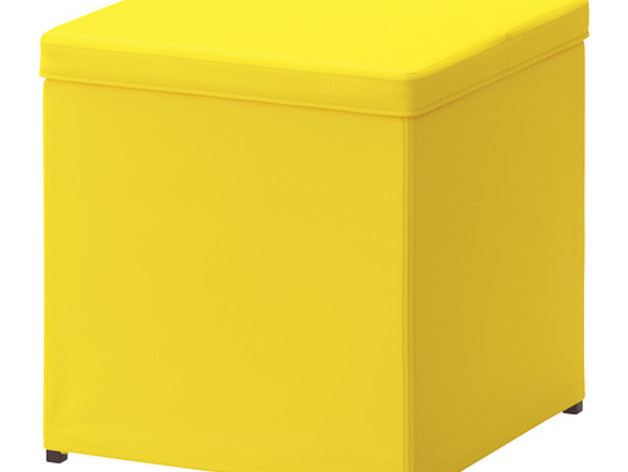
This model inspired by the "IKEA Bosnäs - footstool with storage" is built with Autodesk 123d Design. Print this model to enjoy, or get inspired to create and print your own personal furniture! This project is previewed as "starter lessons" for classes with children form 12 to 16 years. Read on to understand the object and the structure of the project. Print Settings Printer Brand: MakerBot Printer: MakerBot Replicator 2 Rafts: Yes Supports: Yes Resolution: 0.2-0.1mm Infill: 10-15% Notes: You have to print 4 x "Top_1" 4 x "Top-Fix" 1 x each "Buttom"-File check the last picture to see how to place them to get least support possible.. "x, y, z" are exemplary for square section and hollow section steel. "Plate" is exemplary for a 3-5mm plywood plate. All these don't have to be printed of course. How I Designed This In this section I'll tell you about how I designed the 3D model of the "Top_Construction"-file. In the next section I'll suggest an outline for a classroom project where students create their own furnitures. The 3D models of this project were made in Autodesk 123d Design. This software is free, runs on Mac, Windows or Linux, and is really easy to learn. They offer even an understandable introduction and some sample constructions. Attention: You may have to adjust the files depending on the steel sections you've got. Project: Design your own furniture Objectives Design and create 3D printed joints from scratch. Build "real things" (furniture) from simple component pieces. Learn basic 3D design skills and how to use Autodesk 123d Design. Learn to work metal (cut, drill, file, etc.) and how to tap. Explore interior-design, design-history, joints, or unrolling (depending on classroom usage). Audiences Anyone from 12 years on that is new to 3D modeling can use this project to get started with Autodesk 123d Design. Students can use this project as a jumping-off point for constructing models of their own "IKEA Hacks" or to develop their own furnitures. Preparation Students will need access to computers with the software Autodesk 123d Design installed. Autodesk 123d Design is easier to use with a mouse than with a tablet or trackpad, so computer mice are recommended. No previous 3D design experience is required for the students, although familiarity with Autodesk 123d Design would be helpful. The instructor should be comfortable answering modeling questions about Autodesk 123d Design and be able to advise students to avoid design features that might cause printing difficulties (overhangs, delicate features, etc). Use some USB-Sticks to save the students work. It's easy and fast to use and you got all files bundled and mobile. You'll need one or more 3D printers and some useful tools like pliers, files, sandpaper, etc. Other Material needed 4x 15x15x450mm square section steel 4x 15x15x450mm hollow section steel (wall thickness 1.5mm) 4x 15x15x850mm hollow section steel (wall thickness 1.5mm) 8x M4 x 20mm screw 8x 4 x 15mm woodscrew 1x 890x480x5mm plywood plate Other materials to make an enclosure like fabric, foam, wood, metal, etc. Tools needed Measuring instruments Hacksaws Files Mallets Center punch Drill press 4 and 3,3mm drill bits Tap and die Screwdrivers Other tools to work save and to make the enclosure. Structure Introduction This project can easily be used in conjunction with other parts of your curriculum. In this section I would like to suggest an outline for a few different ways of implemantation: Interior-design That's probably the most difficult and complex way. The idea is to think and rethink existing interior-designs. The students should research objects of their interest and analyse them by usability and feasability. After that they should create a remake, remix or modification. (A visit in a furniture store could be a great experience and an interesting extracurricular place of learning.) It's recommended for advanced students and teachers experienced in project based learning. History or design-history The model presented is based mainly on section/profile steel. These are standardized industrial goods. This fact allows a link to the history (Industrialisation, Great Depression, etc.) and the design-history (Bauhaus, Functionalism, etc.). After such a theoretical approach you can activate your students to create their own "Bauhaus-furniture". Go to the mechanical workshop in your school. Offer them a few kinds of section steel. And let them thinker. The diminution of some profiles and the possibility to create all other parts needed with the 3d-printer, gains an exciting (and favorable) design-challenge. Furthermore they empathize with the avant-garde of this time. Joints In your "Tech-class" you might teach how to joint steel (welding, brazing, rivet, bolting, etc.). Right here we've got a mix-solution. Based on this preknowledge you can enhace the task like: Use at least 4 different joints to create your onw furniture (One of them has to be 3d-printed.) Create an office lamp with the section steel given. Create at least two different 3d-printed "mobile joints". Unrolling In maths you start to make unrollings of primitives. "To take hold of" you can e.g. unroll "TetraPacks" etc. Then you will go more abstract. In design processes exists something comparable called disassemble or reverse engineering. That's an important way to drill down on engineering problems. You can use this project in "Tech-classes" just as the "TetraPack" in the previous example. Results At the end of this project, each student should at least have: An initial sketch of its joints A CAD-model and -file in Autodesk 123d Design A *.stl-file to print the objects All the 3D printed joints A "real" and functional furniture Basic ideas of the project Well, the basic idea behind this project is to engage young people to get in touch with the game changing tools and to start thinkering and engineering in school. That's why I decided to chose a subject of their world and interests. The asset of this project is to create not merely a model of something, but rather a real thing. It represents a "real world" conjunction of low- and high-tech materials, wich demands an ajustment of solutions, what assists knowledge reconstruction and problem-solving skills. And, as I tried to explain under "Structure", this project provides even a meaningful context for understanding abstract concepts (history, math, engineering, design..). And at least it could be a jumping-off point for critical design and environment analysis by students and to actively remake, make and invent things - as responsible personalities - to make things better. Souces used http://www.ikea.com/us/en/catalog/products/80266699/?query=bosn%C3%A4s Image:http://www.ikea.com/us/en/images/products/bosnas-footstool-with-storage-yellow__0241135_PE381200_S4.JPG Documentation:http://www.ikea.com/ch/de/assembly_instructions/bosnas-hocker-mit-aufbewahrung__AA-951518-1_pub.pdf
With this file you will be able to print IKEA Bosnäs Hack with your 3D printer. Click on the button and save the file on your computer to work, edit or customize your design. You can also find more 3D designs for printers on IKEA Bosnäs Hack.