IKEA Cabinet Light Sensor Mount
thingiverse
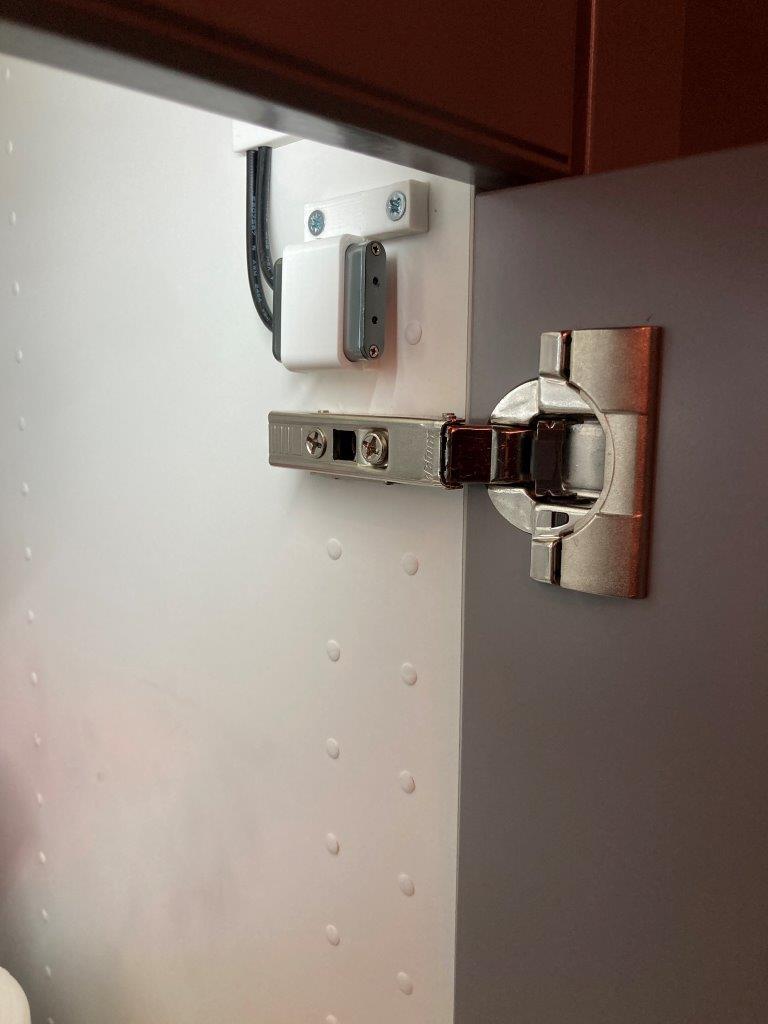
Hello- The sensor I used is a non contact IR sensor. It is a Normally Closed Sensor and Opens when it sees the reflection of the signal. (When it sees the door.) This sensor is around $10 which I thought was reasonable. https://www.amazon.com/gp/product/B00KVFG9S6/ref=ppx_yo_dt_b_search_asin_title?ie=UTF8&psc=1 The cabinet I am using is an IKEA, SEKTION 802.65.398, but the screw spacing is all the same for all the SEKTION cabinets as far as I know. This is a simple mount I designed to be used with the above mentioned sensor. I used left over screws from the cabinet builds that worked perfectly. The screw dimensions are Head: 7.3mm, Body: 6.2mm, Length: 12.9mm. I included these measurements because I found some that were slightly different. Since I did this project a year ago, I don't remember exactly where the screws came from. The sensor mount spacer was used and can be scaled for different thicknesses if necessary. If you make it too thick, you may need longer screws. FYI... the spacing between screws is 32mm. One note about the sensor, if it does not shut the lights off, flip it over 180 degrees. The sensor worked fine one way, but always stayed on the other. Not sure why. Maybe the beam is angled different. I added a cable management mount that also uses the same type screws and should help tidy up the wire pigtails from the sensor. I also had to print the Cable Management in the orientation shown in the image in yellow. If it is flipped the opposite way, my printer was catching on the areas where the wire would go and rip it off the bed. I'm sure it was just me needing a filament calibration. Enjoy- Shins
With this file you will be able to print IKEA Cabinet Light Sensor Mount with your 3D printer. Click on the button and save the file on your computer to work, edit or customize your design. You can also find more 3D designs for printers on IKEA Cabinet Light Sensor Mount.