Ikea Dioder Clip for Replicator
thingiverse
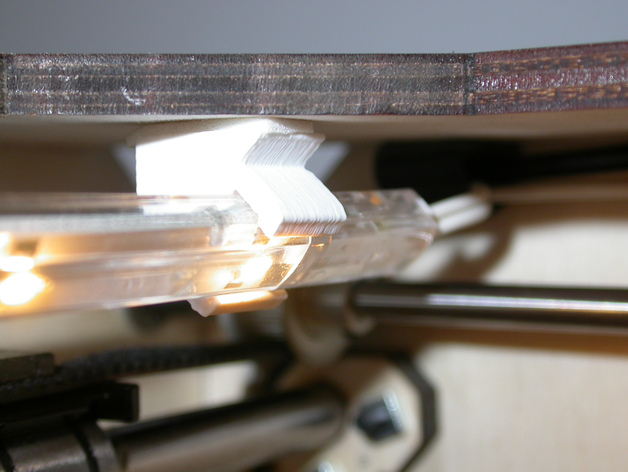
Modified mount clips for Ikea Dioder lighting to enable strips to be affixed internally in the Replicator frame. This model is based on a combination of designs from txoof (Thing 98691) and hullo3d (Thing 32373). I wanted the LED strips to be INTERNAL to the Replicator frame, and light the build platform from both top and front, maximizing the output from the strips, protecting them from accidental damage, reducing glare, and maintaining the aesthetic of the machine. Most importantly, this method does not interfere with any method of enclosing the build platform with plexi so that you can still use any clips or mounts on the top, front and sides of the machine. Instructions 1) Print 8 clips either individually or use plated file with no infill and single wall to help aid flexibility. These aren't heavy duty parts, so you don't need much to hold the LED strips. Depending on tolerances, you might need to slide clips onto Dioder strips from the end - they can be a tight fit. 2) Cut one side of the adhesive foam provided by Ikea in half, apply each segment to the flat side of the clip. 3) Position LED strips to the left and right short sides of the front and sides, sliding clips to adjust for opening, carefully positioning wired ends above Replicator (drive rail) shafts. 4) Follow existing wiring to snake Dioder leads through existing Makerbot wire clips so that they reach underneath machine, use twist ties to take up slack. 5) Mount transformer and 4-way plug under Replicator deck frame using remaining foam strips.
With this file you will be able to print Ikea Dioder Clip for Replicator with your 3D printer. Click on the button and save the file on your computer to work, edit or customize your design. You can also find more 3D designs for printers on Ikea Dioder Clip for Replicator.