Ikea LACK based printer enclosure for 500x500x4 mm panels
prusaprinters
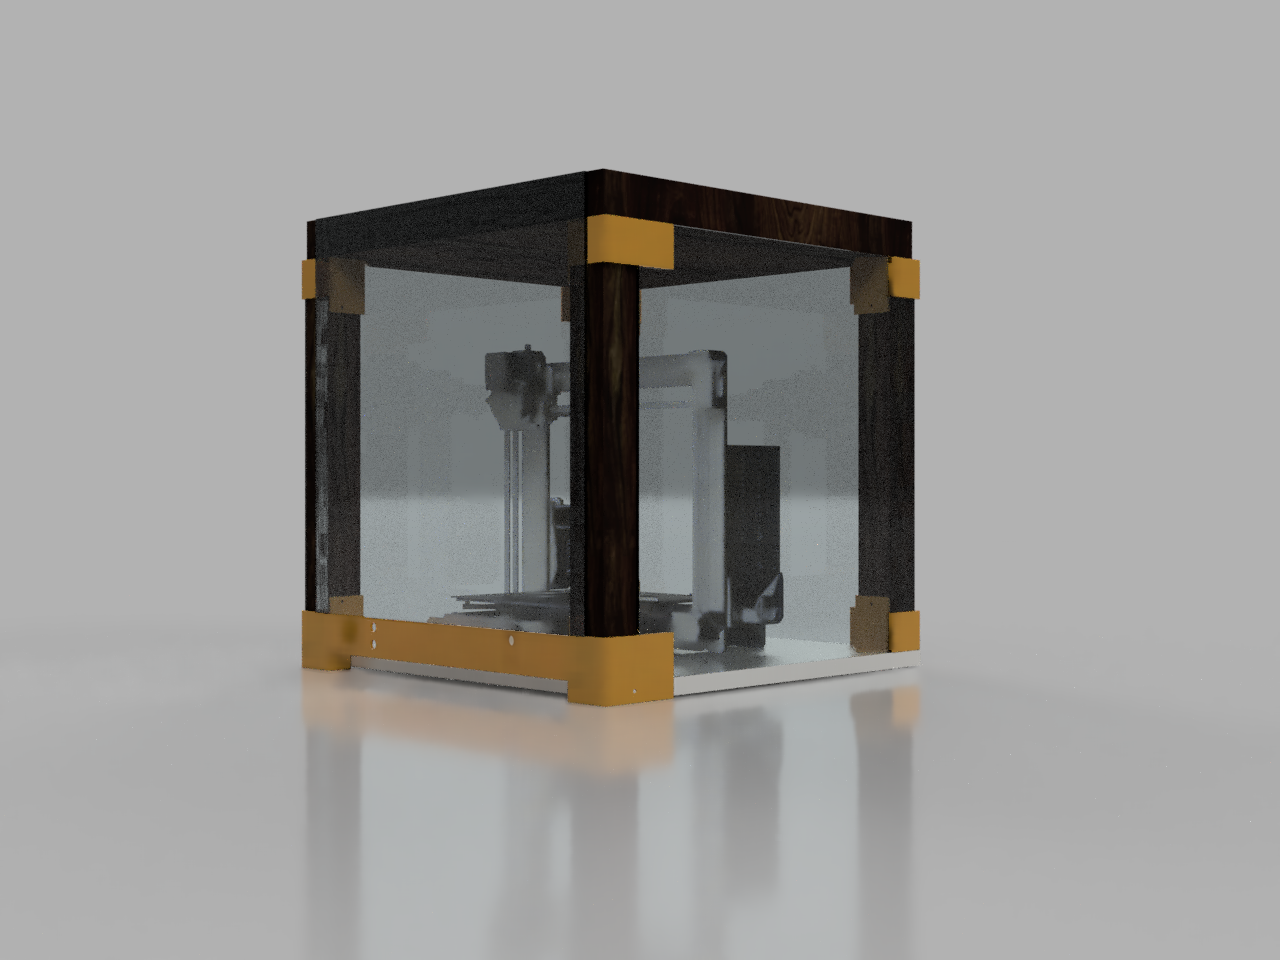
<p> </p><p>I had some leftover acrylic panels sized at 500x500x4mm (they seem pretty common in hobby stores) which were meant to become a printer enclosure. Having found no projects that matched the requirements, set forth to design my own.</p><p>Requirements were:</p><ul><li>no acrylic cutting or drilling</li><li>easy access on all sides if needed</li><li>PSU and Raspberry Pi outside the enclosure</li><li>cooling with air filters with the possibility of inner temperature adjustment</li><li>some monitoring</li><li>as many printed parts as possible</li><li>front panel opening towards the top (like a car hood)</li><li>tower PC case style cooling (draw in air from the front, exhaust at the top)</li></ul><p>Parts:</p><ul><li>the traditional Ikea LACK coffee table</li><li>for a bottom panel, I used a HJÄLPA shelf (903.311.66) - you will want to print <code>Adapter_FR_R</code>, <code>Adapter_FR_L</code> (and possibly <code>Adapter_Shim_FR_L</code>, <code>Adapter_Shim_FR_R</code>) if you use this. If you can source a 55x55cm bottom panel, good for you - these are not needed.</li><li>5V XL4015 buck converter for powering the internals</li><li>Arduino Nano for temperature control, sensors, fan control</li><li>2x 120mm fans with PWM and RPM sensing (4 wires)</li><li>2.4" LCD from Aliexpress</li><li>12 mm temporary push buttons</li><li>DHT-22 temperature sensor</li><li>MQ-9 gas sensor</li><li>whatever LEDs you want to install (I used one 10mm strip and 2 holders for HW-5V-12 LED plates)</li><li>3 mm (10-12 mm long) wood screws for internal components</li><li>5 mm (20-25 mm) wood screws for the legs, top/bottom mounts</li><li>4 HEPA filters - I got <i>4x AeroForce HEPA Filter Für iRobot Roomba Serie 800, 900, 860, 866 - Aero Force </i>from eBay</li><li>carbon activated stove hood foam from the local DIY shop, a 50x50 cm sheet should suffice</li></ul><p>Rough instructions:</p><ul><li>take the top panel, measure and mark the cutouts as per the attached DXF; cut with a simple cutter</li><li>mark/install whatever top accessories you will have right now, as it will be easier than later (my top plate has: 1 LED bar, 2 LED holders, MQ-9 and DHT-22 sensors, Arduino mount, XL4015 mount)</li><li>screw in the top and bottom spacers to the 4 LACK legs (drilling a small hole before helps keep it clean); use the large screws</li><li>attach the legs to the top panel</li><li>slide 3 acrylic panels into the slots, arrange legs as square as possible, mark the locations on the bottom plate</li><li>attach the legs to the bottom plate</li><li>insert again the 3 acrylic panels to give it some stability</li><li>mount the 3 front plates</li><li>attach the printed hinges on the 4th acrylic panel using strong double sided tape (VHB, ideally);</li><li>arrange the front acrylic panel in position (be careful about adjusting the clearance to the front plates, you want to leave a 1 mm gap or so, not have the acrylic resting on the plates because it will be annoying when opening)</li><li>finally glue the hinges to the top LACK panel</li><li>attach the original LCD to the front center plate</li><li>depending on your room temperature and what you're printing, insert carbon foam sheets in the 3 front panels' slots.</li></ul><p>Random considerations:</p><ul><li>the PSU is mounted on top of the plate, as it was the most suitable option for my space. You can relocate it anywhere you want, there are plenty of PSU brackets available. I extended the PSU cables (including the power panic cable) just fine, used XT-60 connectors and routed the cables through the top, rear left pass through.</li><li>the RPI is mounted outside, on the rear left leg. USB cable goes through the bottom pass through. </li><li>once done, print 2 <code>Plate_Lockplate</code> and <code>2 Plate_Pin</code> - these will be the latches that hold the front panel closed. See pictures. </li><li>the top cable pass through is pretty tight; I should have made it larger or used something like a XT60 panel mount - <a href="https://www.thingiverse.com/thing:3559875">https://www.thingiverse.com/thing:3559875</a> </li><li>rename <code>fontu.h</code> into <code>fontu.ino</code>, install the attached <code>lcd_test_3.ino</code> on your Arduino (figuring out all the required libraries is your own homework, pinout wiring is at the beginning of the INO file). Push the top/bottom button to increase/decrease the desired chamber temperature.</li></ul><p>Additional prints that I used:</p><ul><li>my own designs:<ul><li><a href="https://www.printables.com/model/85963-dht-22-plate-holder">https://www.printables.com/model/85963-dht-22-plate-holder</a></li><li><a href="https://www.printables.com/model/85962-mq-9-plate-holder">https://www.printables.com/model/85962-mq-9-plate-holder</a> </li><li><a href="https://www.printables.com/model/85342-xl4015-plate-holder-tenstar-robot-variant">https://www.printables.com/model/85342-xl4015-plate-holder-tenstar-robot-variant</a></li><li><a href="https://www.printables.com/model/84945-piranha-12-led-light-mounting-system-hw-5v-12led">https://www.printables.com/model/84945-piranha-12-led-light-mounting-system-hw-5v-12led</a> </li></ul></li><li>others' designs:<ul><li><a href="https://www.printables.com/model/24173-ikea-lack-filament-guide">https://www.printables.com/model/24173-ikea-lack-filament-guide</a></li><li><a href="https://www.printables.com/model/12-psu-replacing-brace-for-mk3">https://www.printables.com/model/12-psu-replacing-brace-for-mk3</a> </li><li><a href="https://www.printables.com/model/63903-dash-dual-adjustable-spool-holder">https://www.printables.com/model/63903-dash-dual-adjustable-spool-holder</a> </li><li><a href="https://www.printables.com/model/7479-small-wire-clip-for-lack-table-enclosure">https://www.printables.com/model/7479-small-wire-clip-for-lack-table-enclosure</a></li><li><a href="https://www.printables.com/model/26167-prusa-steel-sheet-holder">https://www.printables.com/model/26167-prusa-steel-sheet-holder</a> together with <a href="https://www.printables.com/model/41351-mountable-stability-feet-for-prusa-sheet-holder">https://www.printables.com/model/41351-mountable-stability-feet-for-prusa-sheet-holder</a></li><li><a href="https://www.printables.com/model/39326-led-diffuser-for-lack-enclosure">https://www.printables.com/model/39326-led-diffuser-for-lack-enclosure</a></li><li><a href="https://www.thingiverse.com/thing:2867374">https://www.thingiverse.com/thing:2867374</a> - lockdown feet, attaching the printer to the bottom panel</li><li><a href="https://www.thingiverse.com/thing:4742129">https://www.thingiverse.com/thing:4742129</a> - 120mm fan with HEPA air filter and carbon foam or carbon pellets</li><li><a href="https://www.thingiverse.com/thing:2890592">https://www.thingiverse.com/thing:2890592</a> - MK3 60 degrees heatbed cable cover (alternatives: <a href="https://www.thingiverse.com/thing:3585029">https://www.thingiverse.com/thing:3585029</a> or <a href="https://www.thingiverse.com/thing:3007210">https://www.thingiverse.com/thing:3007210</a> )</li><li><a href="https://www.thingiverse.com/thing:3559740">https://www.thingiverse.com/thing:3559740</a> - printed T-nuts for the printer feet</li><li><a href="https://www.thingiverse.com/thing:4870910">https://www.thingiverse.com/thing:4870910</a> - fully customizable hinge</li></ul></li></ul><p> </p>
With this file you will be able to print Ikea LACK based printer enclosure for 500x500x4 mm panels with your 3D printer. Click on the button and save the file on your computer to work, edit or customize your design. You can also find more 3D designs for printers on Ikea LACK based printer enclosure for 500x500x4 mm panels.