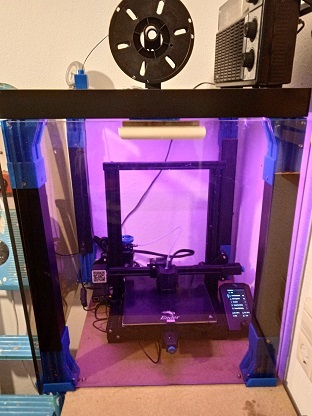
IKEA Lack enclosure - on the edge
thingiverse
If you are cheap on space, and just need to place your printer enclousure on the edge of a table, this enclosure is perfect for you, just like for me. You can create different variations of that enclosure, with a set of just three main elements: -Spacer (to extend the legs of the lack table) -Clamp (for placing the walls) -TableClamp (combination of Clamp and counter fixture of Spacer for edge mounting) I´ve used a black ikea lack table to build the whole enclosure up on the ender 3 v2. On top of the ikea table, i´ve placed the original spool holder from the ender 3 v2 and used a filament guide into the enclosure. For the wall, i worked with thick plexiglas, which will be hold via magnets on top of the lack-table. So it´s pretty easy and reliable to open the enclosure from different sides. On that way, i can keep the temperature stable in the cabine. Additionaly, there is a LED strip for lightning and a smoke detektor underneath the lack. You can use the SPACER10mm direktly on th table or in combination with the TableClampBOT to fixture on the edge of a table. If you need more details, please feel free to ask questions and i will try to help.
With this file you will be able to print IKEA Lack enclosure - on the edge with your 3D printer. Click on the button and save the file on your computer to work, edit or customize your design. You can also find more 3D designs for printers on IKEA Lack enclosure - on the edge.
