IKEA LACK enclosure / table printer tower
thingiverse
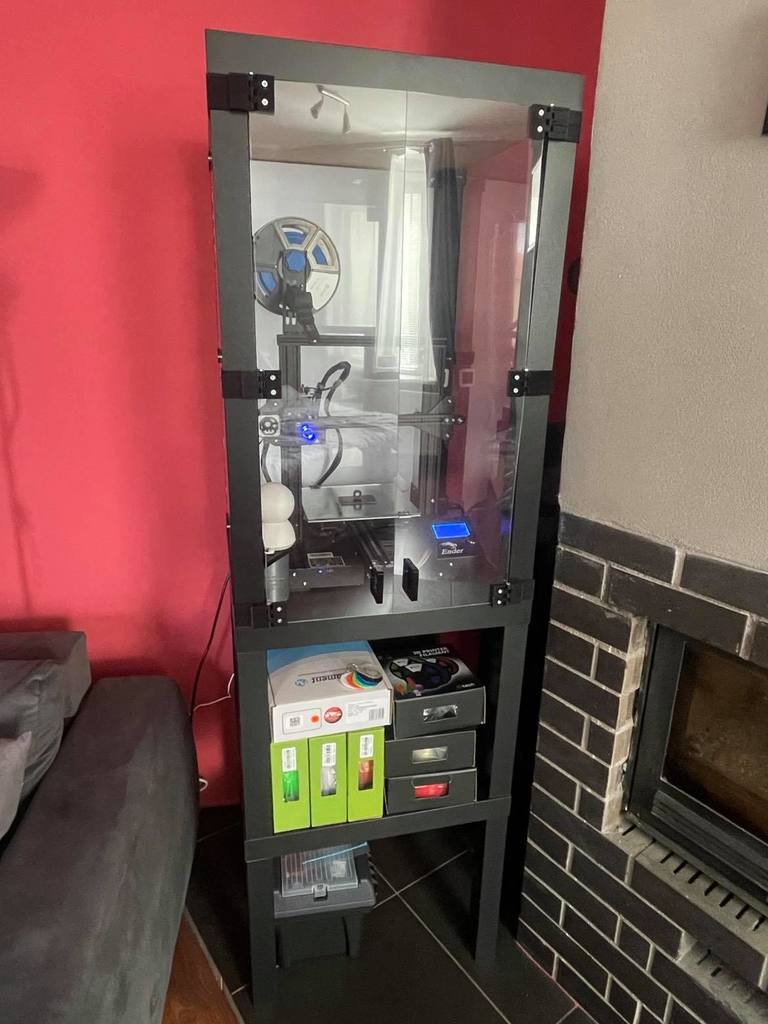
PRINT TOWER by Lilik7 created from 4 Ikea Lack tabels (3 boards and 16 legs) You need: 4 x 1000x500x2 (or 4) plexiglass 32x 4x40 screw 8x 3x15 screw 22x 4x25 bolt 6x 4x40 bolt 12x 4x25 bolt (countersunk head) 34x M4 nut 74x M4 pad You print: 2x A-LACK 2x B-LACK 2x C-LACK 6x D-LACK 2x E-LACK 4x F-LACK 4x G-LACK 1x handle 3 1x handle D (1x CAM holder) (1x screen cover) Instruction: 1/ Assemble T1 and T2 (use Ikea instructions) 2/ Connect T1 and T2 with G - LACK 3/ Assemble T4 - between legs and board use A - LACK, B - LACK and 2x F - LACK 4/ Screw on A - LACK, B - LACK and 2x F - LACK on board of T2 and screw on T3 on T2 5/ Screw on 2x C - LACK and 2x E - LACK on T3 6/ Put on it T4 and screw it 7/ Measure and cut the plexiglass 8/ Catch on side and back plexiglass 9/ Connect D - LACK 10/ Measure position of front plexiglass (doors) and screw it 11/ Put HANDLE on doors (50 mm between screws) 12/ If possible, cut a hole for the cables 13/ Place the 3D printer 14/ Send photos of your print tower!
With this file you will be able to print IKEA LACK enclosure / table printer tower with your 3D printer. Click on the button and save the file on your computer to work, edit or customize your design. You can also find more 3D designs for printers on IKEA LACK enclosure / table printer tower.