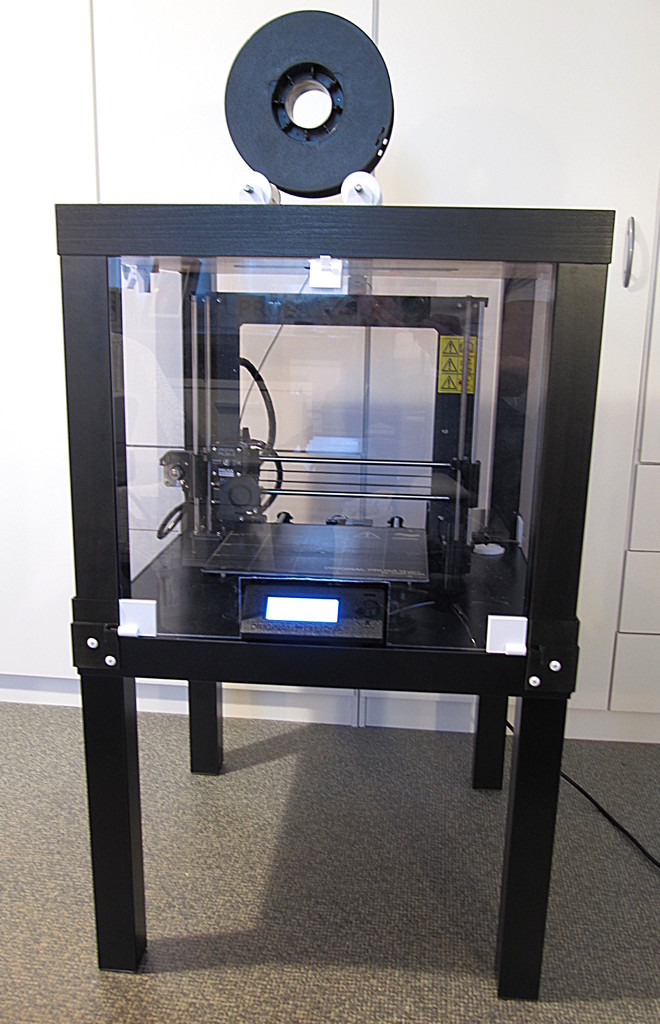
IKEA Lack printer enclosure
thingiverse
There is no shortage of excellent plans for IKEA Lack based printer enclosures but I wanted to make my own anyway since it's fun... The key difference between this one and the other ones I found is that it is designed to be very easy to take apart. The hinges are on the bottom edge of the panels and connected to the bottom table, which means that the panels when fully opened are hanging down the sides of the bottom table and that the upper table can simply be lifted off when the printer needs service. Since all four panels are identical the enclosure can be opened from all sides. The hinges are also designed so the panels can easily be lifted off after opening just a little bit, so placing the printer against a wall doesn't make it difficult to lift off the upper table. I also didn't want to raise the upper table, which means that there is not much space above the printer. In practice this means that there must be a wide slot for the filament instead of just a single hole. I designed a slot with maximum width printable on my prusa I3 mk2, but there are lots of others to choose from, no need to use my version. I thought long and hard about what to do with the display unit since it doesn't quite fit in the enclosure while also making room for the Y-cable on the back. In the end I decided to simply make a cutout for the display in the front panel, since I'm not aiming for a completely sealed unit anyway. I might try to design something to cover up most of the gaps around the display later, but I think it's nice to be able to use the display without opening the front panel. The front panel cutout means that the printer must be pretty well lined up inside the enclosure, otherwise the front panel can't be closed. I solved this by combining something that keeps the printer in the correct position with a vibration absorber and making it ultra low profile so the printer still fits: https://www.thingiverse.com/thing:2723239 The panels need some kind of handle, and also some kind of lock. This combined handle and latch turned out to work really nice: https://www.thingiverse.com/thing:2703407 The mains cable also needs a solution. Again there are ready made similar things, but I made my own anyway (I'm new at cad and learning by doing is fun). None of the parts need added support, but the hinge-pins and probably also the corners and hinges need a brim. Print the pins on the side for strength, they have a small flat section. The corner piece has support pieces included below the shelf on the inside, which is easy to cut away. If you are slicing with slic3r (and possibly other slicers also) you need to enable 'detect thin walls' in the print settings, otherwise the included support won't come out right. The hinges and the linked handle are designed for 4mm sheets.
With this file you will be able to print IKEA Lack printer enclosure with your 3D printer. Click on the button and save the file on your computer to work, edit or customize your design. You can also find more 3D designs for printers on IKEA Lack printer enclosure.
