Ikea Mulig Integrated Drawer Unit
thingiverse
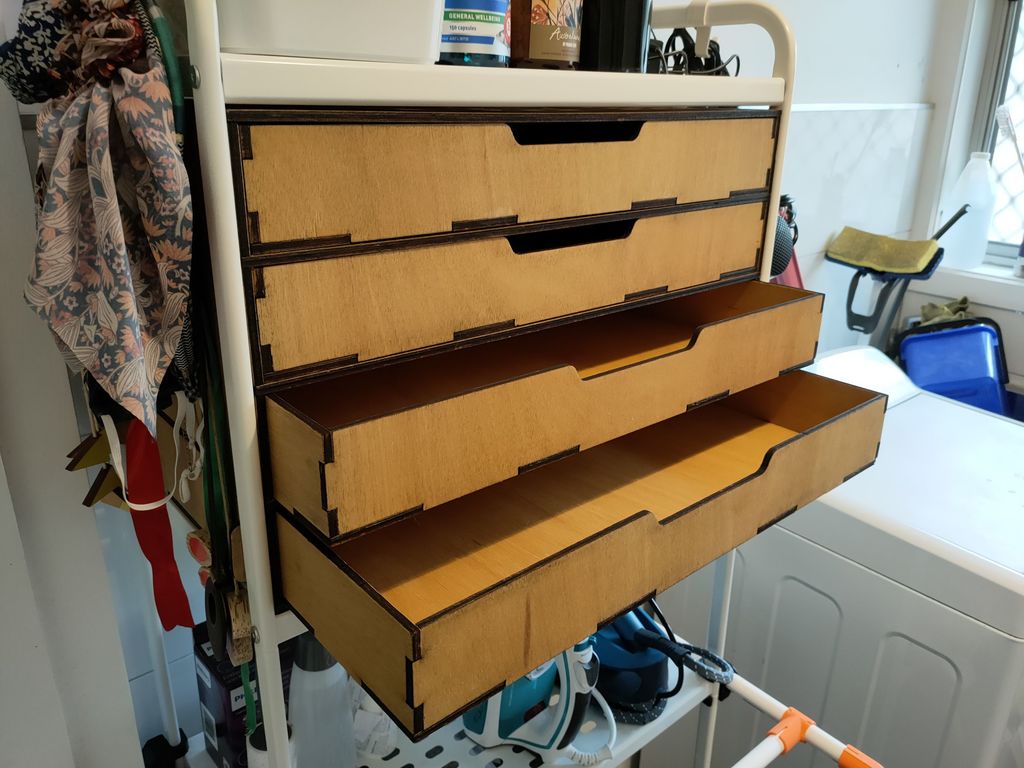
Add more storage to your Ikea Mulig unit with this integrated four drawer unit! # Materials: 1. 6mm ply 2. PVA glue 3. Sealant, paint or oil # Equipment: Laser cutter or CNC router Clamps Sand paper or orbital sander # Instructions: 1. Cut all the parts 2. Clean the soot from the edges - I find white vinegar and scrubbing brush or paper towel works well 3. Sand any particularly rough surfaces 4. Chamfer handle area and front edges of shelves for easier insertion 5. Glue all components together and clamp firmly in position, allowing at least 24hrs to set 6. Sand any protrusions, edges and stains from assembled parts 7. Apply selected surface treatment 8. Place on desired shelf level - You may need to loosen some of the shelving bolts in order to insert the unit, tightening them again after the unit has been positioned 9. Insert tabs to secure position 10. Insert drawers # Note: You could even do this by hand - trace the template outlines onto stock material and cut using a jig saw (or even handsaw if you're brave). Create a straight edge guide by clamping a length of material to assist you. [Read about it on my blog](www.samjohnston.net/blog/2021/10/23/ikea-mulig-integrated-drawers).
With this file you will be able to print Ikea Mulig Integrated Drawer Unit with your 3D printer. Click on the button and save the file on your computer to work, edit or customize your design. You can also find more 3D designs for printers on Ikea Mulig Integrated Drawer Unit.