Ikea Platsa 3D Printer Enclosure
thingiverse
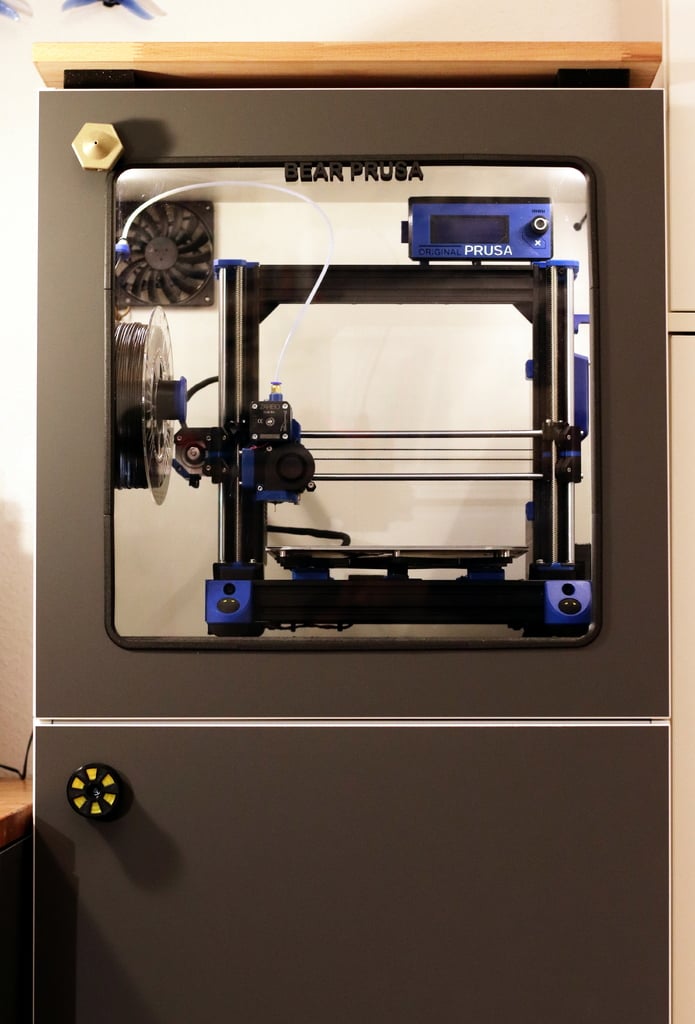
This is my universal Printer Enclosure based on 60x60 Ikea Platsa Cabinet i use for my Bear Prusa MK3. I don't really focus on printing ABS and didn't make it air tight, i just want to protect my printer from dust and cold draught and get quiet operation. I added a 120mm fan at the back side of the cabinet, so that i can leave electronics and PSU inside the enclosure. There are no other changes (beside the reverse bowden mod) on my printer, so i can still take it out and print outside the enclosure without any changes. The Platsa Cabinets offer enough space for the spool inside as well as a heavy 50x50x5 paving stone as a solid printer base. Concerning depth, for the full bear frame (and the original frame) it is needed to mount the LCD on top and use an angled bed-connector (like https://www.thingiverse.com/thing:3003237). The files include: - Spool Holder for the orinigal drilling inside the ikea cabinets - Reverse Bowden Mount (M6 or M10,Left or Right side of cabinet) - LED Strips with cable guide - LED and Fan switch - LCD Top Mount for V-slot extrusions and original Prusa LCD and cover - Little Toolholder for SD cards and tweezers Edit 2019/06: - Added Bowden Mount for M10 and M6 Connectors for right and left side of the printer. Print the version, you want to use. - See www.thingiverse.com/thing:3674747 for some additional parts, e.g. for mounting the PSU outside the enclosure. All credits to toddel! Notes: - The LED Rail is printed using transparent PETG and holds my 8mm wide LED strips. The model is just 10mm long, scale it to the lenght you need. - The LCD Top Mount fits the full Bear upgrade or other frames with V-slot extrusions. There are files for different types to mount either side on the v-slot or on the metal plate (corners of the bear frame). This way the LCD can be mounted on the left or right side or in the middle, as you like. - There are no glass doors for the Platsa Cabinets from Ikea. I cut a hole into the front mounted plexiglass from the inside. To hide the cutting edge, i printed the Window corners 4 times and glued them into place. Next step is to measure the missing distance between the corners and size the part WindowSide to the right length in your slicer. Print them and glue them into place. This way it works for every window side >30cm.
With this file you will be able to print Ikea Platsa 3D Printer Enclosure with your 3D printer. Click on the button and save the file on your computer to work, edit or customize your design. You can also find more 3D designs for printers on Ikea Platsa 3D Printer Enclosure .