IKEA Storage Optimizer
thingiverse
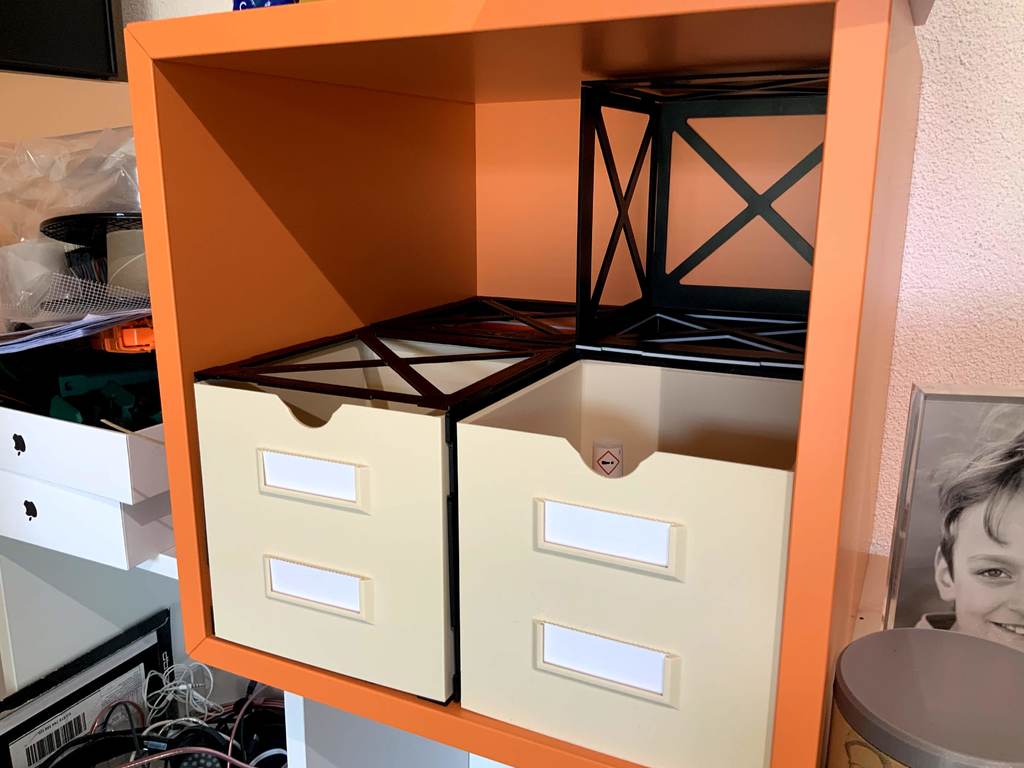
General ==== I’ve got a few wall mounted IKEA EKET boxes in my office. They are the wall mounted storage units and have internal dimensions of (WxHxD) of approx 315x315x330mm. UPDATE 18th May 2020 ---- I made up some two piece boxes that bolt together using M3x10 nuts and countersink screw heads. Goal ---- My goal was to make some boxes that would help organize some of the smaller items in my office, to learn more OnShape - and have a bit of fun. And of course; at the end of this I can have a more organized work space. I had a couple of limits which influenced my decisions - firstly my print bed is only roughly 200mm deep/wide - so I can’t print large items in one go. Secondly; I dislike printing with supports - so I wanted something that was easy to print, and that printed easily - so say goodbye to supports. Lastly; while I could have designed the boxes to print in two parts and clip together with a press-fit I made the choice to keep the first attempt simple, so the boxes needed to stay within the print bed. Design ---- The current design is a series of “plates” that you plug together. The STL files are created with a small 0.15mm offset to ensure the plates will fit snugly without deforming. Read below for more tips about assembly. The box has two label slots - this is because there is one box behind another - so you have a label for the rear and front box. My idea was that I would put infrequently accessed things in the rear box. The plates are labeled - for each compartment, you have a backing plate, two top and two side pieces. Have fun putting them together :-) Assembly Notes ---- 1. __HIGHLY RECOMMENDED__: glue the plates together - I've tried superglue, considered epoxy resin (yuk, what a mess) and ended up using something much much easier: a hot glue gun. Neither the PETG nor PLA is melted by the glue, but the hotend of the gun will make an impression on the plastic. Take care to ensure that none of the glue leaves "blobs" or "streaks" of extra glue on the __inside__ of the frame as this will make sliding boxes in/out difficult if not impossible. I applied glue only on the corners of the top/side plates and biased it to the outside of the edge - making it easier to clean up once it had hardened. 2. the backing plate is optional when you fill the EKET horizontally / vertically with frames. The fit is really snug; and the extra support isn't needed. 3. the non-vented top plate is intended to serve as a shelf. The idea is to build two frames with this top plate and place them at the back of the EKET unit - creating a shelf area with space for two boxes underneath. This is likely where you want to have a backing plate - to provide the extra stability. 4. remember to leave off the "backing" plate for the frames placed at the front - this will allow you to access the rear most box (obviously you have to take the front box out first). Disclaimer: don’t blame me if you run out of filament and at some point realize these are the most expensive boxes EVER to be produced. If you wish to modify the design; the public OnShape document is here - please copy it and do as you wish; I only ask you post a comment here and keep your changes public as well. License: GPL v3 OnShape Document: https://cad.onshape.com/documents/75a2176517a647f569f453a7/w/f33c71066a6b8bc34f70c41c/e/defb1471f108a2e36f83730e?configuration=List_6fzrAzMO21yT19%3DDefault%3BVented_Top%3Dtrue
With this file you will be able to print IKEA Storage Optimizer with your 3D printer. Click on the button and save the file on your computer to work, edit or customize your design. You can also find more 3D designs for printers on IKEA Storage Optimizer.