Illuminated Display Base for 3D Laser Engraved Acrylic Block
thingiverse
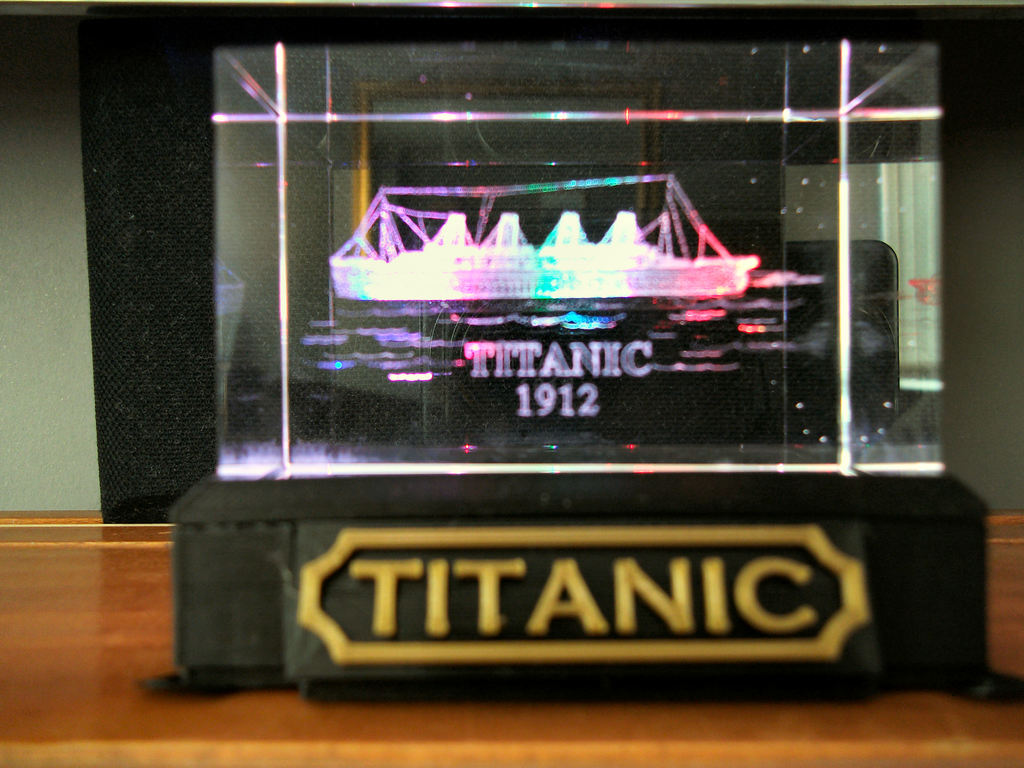
Now, my well of design ideas has run dry of late. I'm certain it's a temporary drought, but I was struggling to think of something new to create. The trouble with Thingiverse is that somebody has usually thought of it. I was considering giving up till after Christmas, when I remembered this "paperweight". I bought this acrylic block sculpture about 11 years ago. As a Titanic nerd (as opposed to a titanic nerd), it was unavoidable, and wild horses wouldn't have prevented me handing over my spondulicks. The lamp base was out of stock at the time, and the shop ordered one for me, but unfortunately they were never able to get one. So the acrylic block has been floating around as a nothing more than a paperweight ever since. I checked in my workshop, and I just happened to have three 12 Volt, colour changing, LEDs in my possession. Or, to be more accurate, 3 LEDs that had been pre-fitted with resistors to allow them to work at 12Volts. After a bit of measuring and drawing, I came up with a simple hollow box, open at the base, with three holes for the LEDs. The initial plan was to have two AA batteries and a switch contained within the hollow space. But on the first draft print, I quickly realised this made the box look disproportionately big. I didn't fancy AAAs, so I quickly redesigned the box to use an external power source, to be decide on later. The acrylic block was to sit inside a small lip on the top surface. This would serve to align the block and to stop it moving once in place, but it meant that supports would be necessary on the top surface. As I wanted the top as smooth as possible, my solution was to print the lip separately, to be glued on after printing. It also gave me the opportunity to make it more of a frame than a lip. Niiice! It now looked pretty good, but I felt it needed a little something more to break up the large area of black on the front face. As I had just taken delivery of a sample of gold coloured filament, I designed a small, vintage effect, name plate that would be fitted to the front. To make this, you have to print the main body of the plate, and then change to the gold filament just after the print nozzle has reached height of the letters themselves The design worked a treat, but I'd made a blunder: Not knowing how these things worked, I designed a "light well" around the LEDs, recessed into the top surface. I thought it made sense to harvest as much light as possible from the LEDs. But it turns out that this is the last thing you want; the scattered light simply kills the effect of the edge lighting, and creates unwanted reflections within the acrylic block. Rather than reprint the whole thing again, I knocked up a small filling piece that took care of the problem. It can be glued in place if you wish. If you peruse the Sketchup file, you'll see I've already removed it from there, so if anyone's looking to alter the design for a different size, they needn't worry about this step. I've currently connected the LEDs to part of a USB cable that I had left over from another design. I was never going to use 12 Volts on the LEDs, as I believe that running them at lower power helps extend their lifespan. By happy coincidence, I think the 5 Volts from the USB provides exactly the right level of light for my taste. The base cover is an intentionally tight fit (earlier ones tended to drop out when the box was lifted). I originally tapered the front edge of the base to match the inner angle of the box, where it leans back to accomodate the name plate. But by removing the taper I found it makes it grip more tightly as it's pushed into place. It saved me designing a clip, and it seems to have worked a treat! I've also printed out a small battery holder for 2 AA cells (Thing 2339441), as an alternative source of power for when USB isn't available. I am planning to modify the design further. Partly to get rid of the lightwell, and partly to provide a more convenient power socket fitted flush on the rear face of the box. Oh, and one last detail: I had some warping issues that I put down to a cold ambient temperature. The little circles on the base were added to alleviate this, and will need cutting off the finished assembly. I've now added some optional bracket feet to the design. If required, these are simply glued in place on the finished assembly. I'll do a picture when I get a moment. Now, does anyone know where I can get a matching acrylic iceberg?!!
With this file you will be able to print Illuminated Display Base for 3D Laser Engraved Acrylic Block with your 3D printer. Click on the button and save the file on your computer to work, edit or customize your design. You can also find more 3D designs for printers on Illuminated Display Base for 3D Laser Engraved Acrylic Block.