Impossible Table String Tension Peg
thingiverse
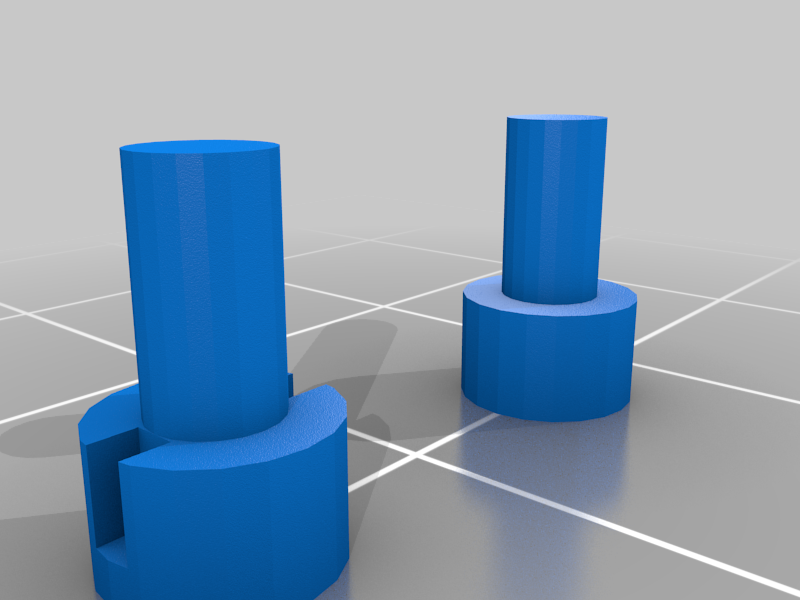
https://www.thingiverse.com/thing:3970291 created an 'Impossible Table' - awesomely cool, **thanks Oak600!** I found that getting the upper table to float was difficult in that tying, untying, re-tying knots while maintaining correct tension on the outer strings is very difficult. Knots also generally look messy. This 'thing' (so trivial it's hardly worthy to be called a 'thing') is a peg (of which you will need eight) *which completely eliminates tying knots*, and provides an extremely clean look. The pegs fit tightly in the eight holes of the table. They are best used with light-weight fishing line, which is also nearly invisible. With slight peg diameter changes you could probably use other strings as well. NOTE: I've included two pegs, one with and one without a hole through it. I used the one without a hole and it worked fine. The one with a hole might better keep the string from slipping if the pegs don't fit tightly enough in the table holes. How to use: --------------- 1) Place a string through the center post holes. 2) Press pegs about 3/4 of the way into each center arm hole, leaving a slight gap before the head bottoms out. There should be about 1.25 inches of string between the holes. One peg head should be on the bottom side of the hole which will be lowest when assembled, and the other on the top side for the hole which will be highest when assembled, i.e., place the pegs so that the string tension pulls the pegs *into* the hole. 3) Wrap one string free end around its peg gap twice, and pull tight while pushing the peg firmly the rest of the way into the hole. Repeat for the other peg. The center is now done. *NOTE: If using the peg with the hole, thread the string through the hole before wrapping around the post twice. You can also thread the string through the hole a second time at this point (assuming it fits) and one more wrap for added security. This applies to steps 4 and 8 below as well.* 4) Run a string through one pair of corner holes. For the table bottom, push the peg **up from the bottom** about 3/4 of the way into the hole, wrap the string around the peg gap twice, then firmly press the peg the rest of the way into the hole. 5) Adjust the string length to approximately level the table top, then push the top peg **down from the top**, but only about *half way* into the hole. 6) Repeat steps 4 and 5 for the two other corners. 7) It should now be possible with some force to pull the string either direction through the half-inserted top peg holes. Iteratively adjust each corner to achieve a firm, level table orientation. A very slight overtight string tension may be desirable since a *very* small length of string may feed through when inserting the pegs fully into the holes. 8) Once all corners are adjusted, press each top corner peg about 3/4 of the way into the hole, wrap the string around the gap twice, and hold tight while pressing the peg firmly / fully into the hole. 9) Use an Exacto knife to trim off the end of the strings for a perfectly clean look. Finished!! Good luck! I think you'll find this much more satisfying (assembly-wise and aesthetically) than getting tied up in knots while trying to tie knots...
With this file you will be able to print Impossible Table String Tension Peg with your 3D printer. Click on the button and save the file on your computer to work, edit or customize your design. You can also find more 3D designs for printers on Impossible Table String Tension Peg.