Improved, no-glue-required parts for "Lightsaber with internal components"
thingiverse
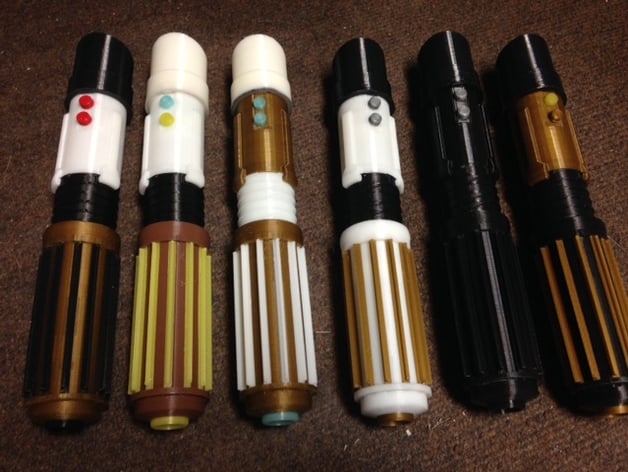
Recently, I successfully 3D-printed several white crystal chambers for lightsabers, but encountered difficulties when attempting to print in silver. The issue was attributed to the narrowness of the 4 pillars within the chamber. To resolve this problem, I designed a modified version featuring thicker pillars (chrystal chamber with fat posts.stl). In an earlier update, I created a "rib retainer ring" that snaps onto body1 and holds the handle ribs in place without the need for glue. Additionally, I modified body1 (V3 file) to have deeper detents for the rib tips and fixed the size of the opening at the top where the original part sticks through. Inside surfaces were also adjusted for better printing. A new body2 was uploaded after encountering issues with the first version during slicing. After making thing 35120, I handed my son the lightsaber, and unfortunately, the tabs on body2 broke, causing damage to the internal parts. Consequently, I redesigned body1, body2, and body3 (as well as the cap that fits into body2). The modified designs resulted in a no-glue outer body (except for the ribs on body1), with stronger tabs on body2 and a 45-degree edge on the inner lip to aid in printing. The cap is intended to be printed with flexible filament, allowing it to snap onto body2 without the need for glue. Body3 was modified with cut sections to allow for a push-and-twist action when attaching body 2. Additionally, vertical ridges were added as stops for the twist action at both ends. Body1 was also modified with a ring at the bottom for push-and-twist attachment onto body3 and small detents to hold one end of the ribs. A version of the original crystal laying on one side that prints without support was included. The internal chrystal_chamber_cap was also modified to avoid a 90-degree overhang for improved printing quality. To assemble, the cap should be printed with flexible filament and press-fit onto body2. If printed with normal filament, remove the ridge on the matching end of body2 to allow fit without glue. The rib retainer ring is recommended to be printed with flexible filament for a tight fit, although it can still function with normal filament. Remember to print the inside parts from the original thing: http://www.thingiverse.com/thing:35120. Print all the outside parts with a brim for better anchoring, especially body1 due to its height.
With this file you will be able to print Improved, no-glue-required parts for "Lightsaber with internal components" with your 3D printer. Click on the button and save the file on your computer to work, edit or customize your design. You can also find more 3D designs for printers on Improved, no-glue-required parts for "Lightsaber with internal components".