Improved Precision Piezo
thingiverse
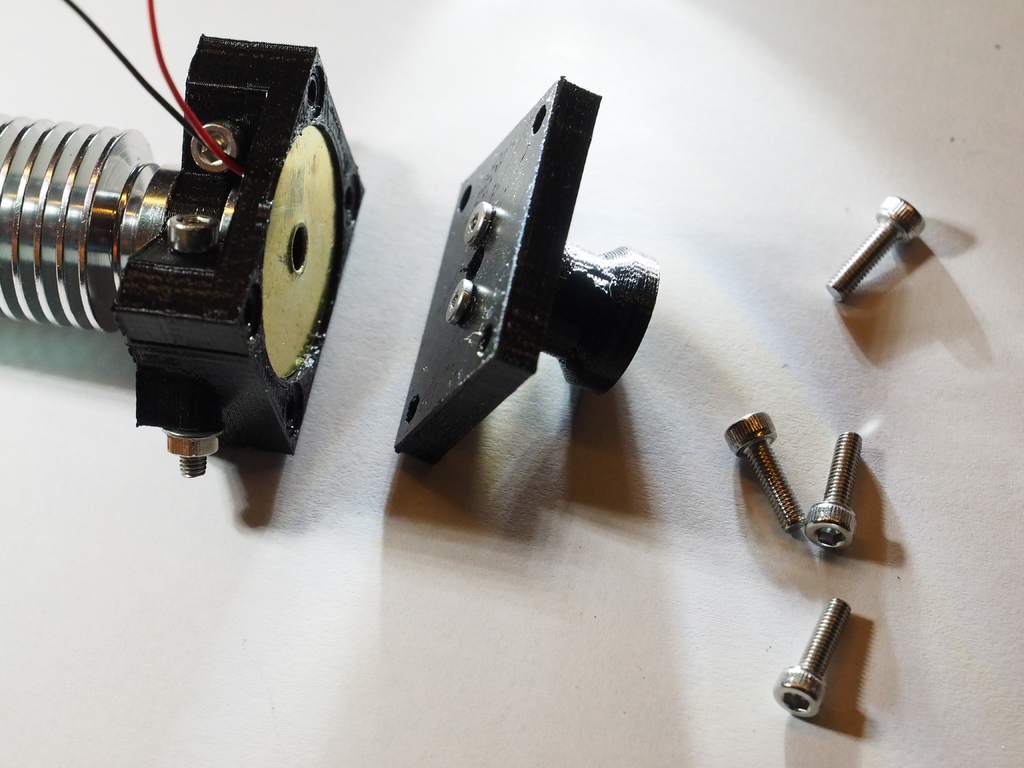
I made an enhanced version for the Titan extruder that can also be used with all groove-mount setups. With the bowden top, you can easily convert it to bowden setups, but keep in mind that the PTFE tube adds stiffness inside the extruder and the piezo setup relies on a 0.2-0.3mm flexibility that this extra tube might not allow. Advantages over the original 3D printed housing: -Smaller size, so it fits flush under the extruder if you want to put something behind or in front of it (fan duct) -27mm piezo element: easier to drill and bends better without cracking -Better cable management: you don't have to twist your cables so that they come out at a specific place while not snapping off the solder and in general not crushing the solder against something -Only 2 major pieces: easier to assemble standing on one leg and bending over the 3D printer -Better bend pattern on the piezo element (U shape pushed on two points as opposed to crushed in the middle ... the metal is not elastic, so the U shape works much better) -Space for 4pcs optional M3 spring loaded washers in the corners if you are not comfortable placing all the spring action on the piezo element -2 pcs M1.5 (12mm) grub screw metal support inside the plastic "netch" to protect against breakage (4pcs for the bowden setup). You can just push in the grub screw, and not thread it in if you don't have a small Allen key. -2 pcs M2 screws to give industrial strength to the groove mount and function as the push on the piezo. Please see the photos how the screw heads stick out and push the back side of the piezo. You can adjust the height of the screw heads to control the push strength. Don't make it too tight because the ceramics on the piezo will crack or the brass will bend permanently. Place the piezo element into the holding face down Don't over-tighten the 4 sides. Leave a 1mm gap so the extruder can push up against it when performing the leveling and hitting the table. Remember that this kind of leveling works better when the head is moving fast. It creates a higher voltage spike when the piezo element is hit harder. Unfortunately, at the moment you still need to get the precision piezo board. It will cost between $8 and $29 depending on where you get it. However, there is no real reason why this couldn't be hooked up to your Arduino-based system directly or use a $1 ATtiny dev board. I will put up some designs as soon as I have them.
With this file you will be able to print Improved Precision Piezo with your 3D printer. Click on the button and save the file on your computer to work, edit or customize your design. You can also find more 3D designs for printers on Improved Precision Piezo.