Improved Z-Endstop for KP3S Pro & Pro S1
prusaprinters
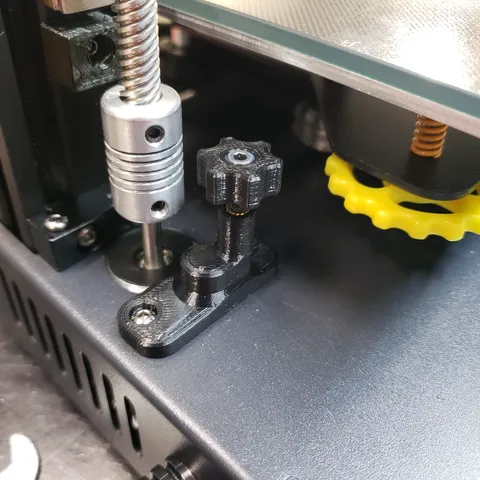
This model aims to improve the rigidity, ease-of-adjustment, and height range of the z-axis adjustment screw/z endstop on the KP3S Pro. Bill Of Materials (BOM)NameNotesQuantityM3 Screwlength depends on part, 39-44 uses 16mm, the rest use 20mm1M3 Heat Insertstls are for M3x5x4, see editing section for changing insert size2ThreadlockeroptionalN/APrinting and Parts SelectionPrint settings:Infill: 20% GyroidPerimeters: 3Parts selection:You need to print thumbscrew.stl and one of the mounts. The mounts have height ranges in their name, pick the one that matches the distance between the bed and frame. In the photo you can see that my bed is ~56mm from the frame, so I'll pick mount 50-58.stl. AssemblyPress the heat-insert in making sure the insert doesn't go past the bottom of the larger hole Apply threadlocker to the screw then tighten the screw all the way and wipe off any excess threadlocker Press the heat-insert into the base Remove the highlighted screws and install the base with them Thread the thumbscrew into the base and adjust the height to trigger the z endstop when the nozzle touches the bed Editingopen the .f3d file in fusionopen the parameters window by navigating to Modify>Change ParametersRead the notes next to the parameters and change them to match your heat inserts export the model by navigating to File>3D Print, select the part you want to export, ensure that you have selected the high option under Refinement, and finally press OK
With this file you will be able to print Improved Z-Endstop for KP3S Pro & Pro S1 with your 3D printer. Click on the button and save the file on your computer to work, edit or customize your design. You can also find more 3D designs for printers on Improved Z-Endstop for KP3S Pro & Pro S1.