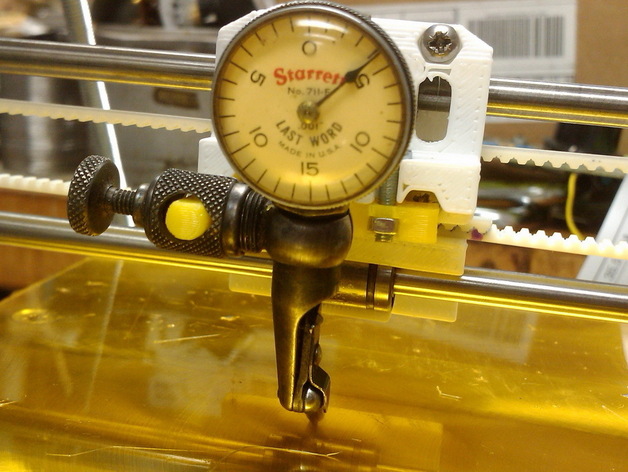
Indicator Holder for Emaker Huxley print head
thingiverse
By installing two M3 screws, 12-14 mm long, into the M3 nuts pressed into the hex sockets on your Huxley, you can mount a test indicator that will help you achieve precise bed leveling. Ensure the test indicator's point is near the extruder centerline before attaching it to the X carriage for optimal alignment results.
Download Model from thingiverse
With this file you will be able to print Indicator Holder for Emaker Huxley print head with your 3D printer. Click on the button and save the file on your computer to work, edit or customize your design. You can also find more 3D designs for printers on Indicator Holder for Emaker Huxley print head.