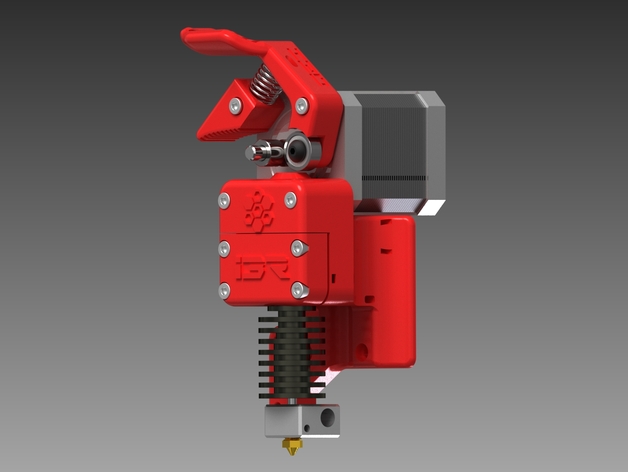
Infill 3D Direct Drive
thingiverse
Here is the Infill 3D direct drive extruder for our i3R in 1.75mm, sorry I do not have an assembled version of it to take pictures as you can guess from my previous post I prefer geared extruders however when I started into 3D printing the first thing I did is ditch the Wade extruder and build this direct drive I used it for quite a while it served me well however as all direct drives they do not do so well with irregular diameter filament, every time I ran into a problem I blamed the hotend until I figured out that it was not the hotend it was the direct drive lacking force to push the filament when it got out of spec. Since then I been using geared extruders with zero problems, with that said if we are talking direct drive extruders it is a good one. Those holes on the bottom are for attaching accessories like LED's and fans also there is a hole that goes from one side of the extruder to the other for bring power to the attachment area, but since the SunBurn hotend has a PLA fan duct that integrates ducts that blow air into the printing surface there is no need for those mounting points unless you want to use them for LED's or if you are using other hothends, let me know if you want me to post the fan mount that goes in the attachment area it uses a 40mm fan. Also because of the configuration of the mounting screws you'll need to use one of our X-Carriages (http://infill3d.com/24-i3redux). Instructions Here is a list of the items your are going to need... -Extruder Body 2x M3X20 Socket screw (motor) 4x M3X20 Socket screw (clamp) 2x M3X25 Socket screw (lower 2x screws to X-Carriage) 2x M3X35 Socket screw (upper 2x screws to X-Carriage) -Motor Lever/block 2x M3X16 (block and lever to motor) 1x M4X10 Button socket screw 1x M4 Washer 1x 624ZZ bearing -Utility Comp Spring 3/8 x 1-1/8 x.041 (9.528 x 28.575 x 1.041mm) The bearing for the lever assembles in this order button M4X10 in bearing then washer the washer goes against the lever, the washer acts as a spacer so it can rotate freely, the M4 button threads into the lever. Once the lever is assembled use the M3X16 screws to attach the block and lever to the motor. The motor attaches to the extruder body with 2x M3X20. Rest is kind of self explanatory just keep notice when you attach the body to the X-carriage upper screws are M3X35 and lower screws are M3X25. Also keep in mind the X-carriage in my website (http://infill3d.com/24-i3redux) is a must it wont work with other X-carriage.
With this file you will be able to print Infill 3D Direct Drive with your 3D printer. Click on the button and save the file on your computer to work, edit or customize your design. You can also find more 3D designs for printers on Infill 3D Direct Drive.
