Infill StarWars clipart coasters
prusaprinters
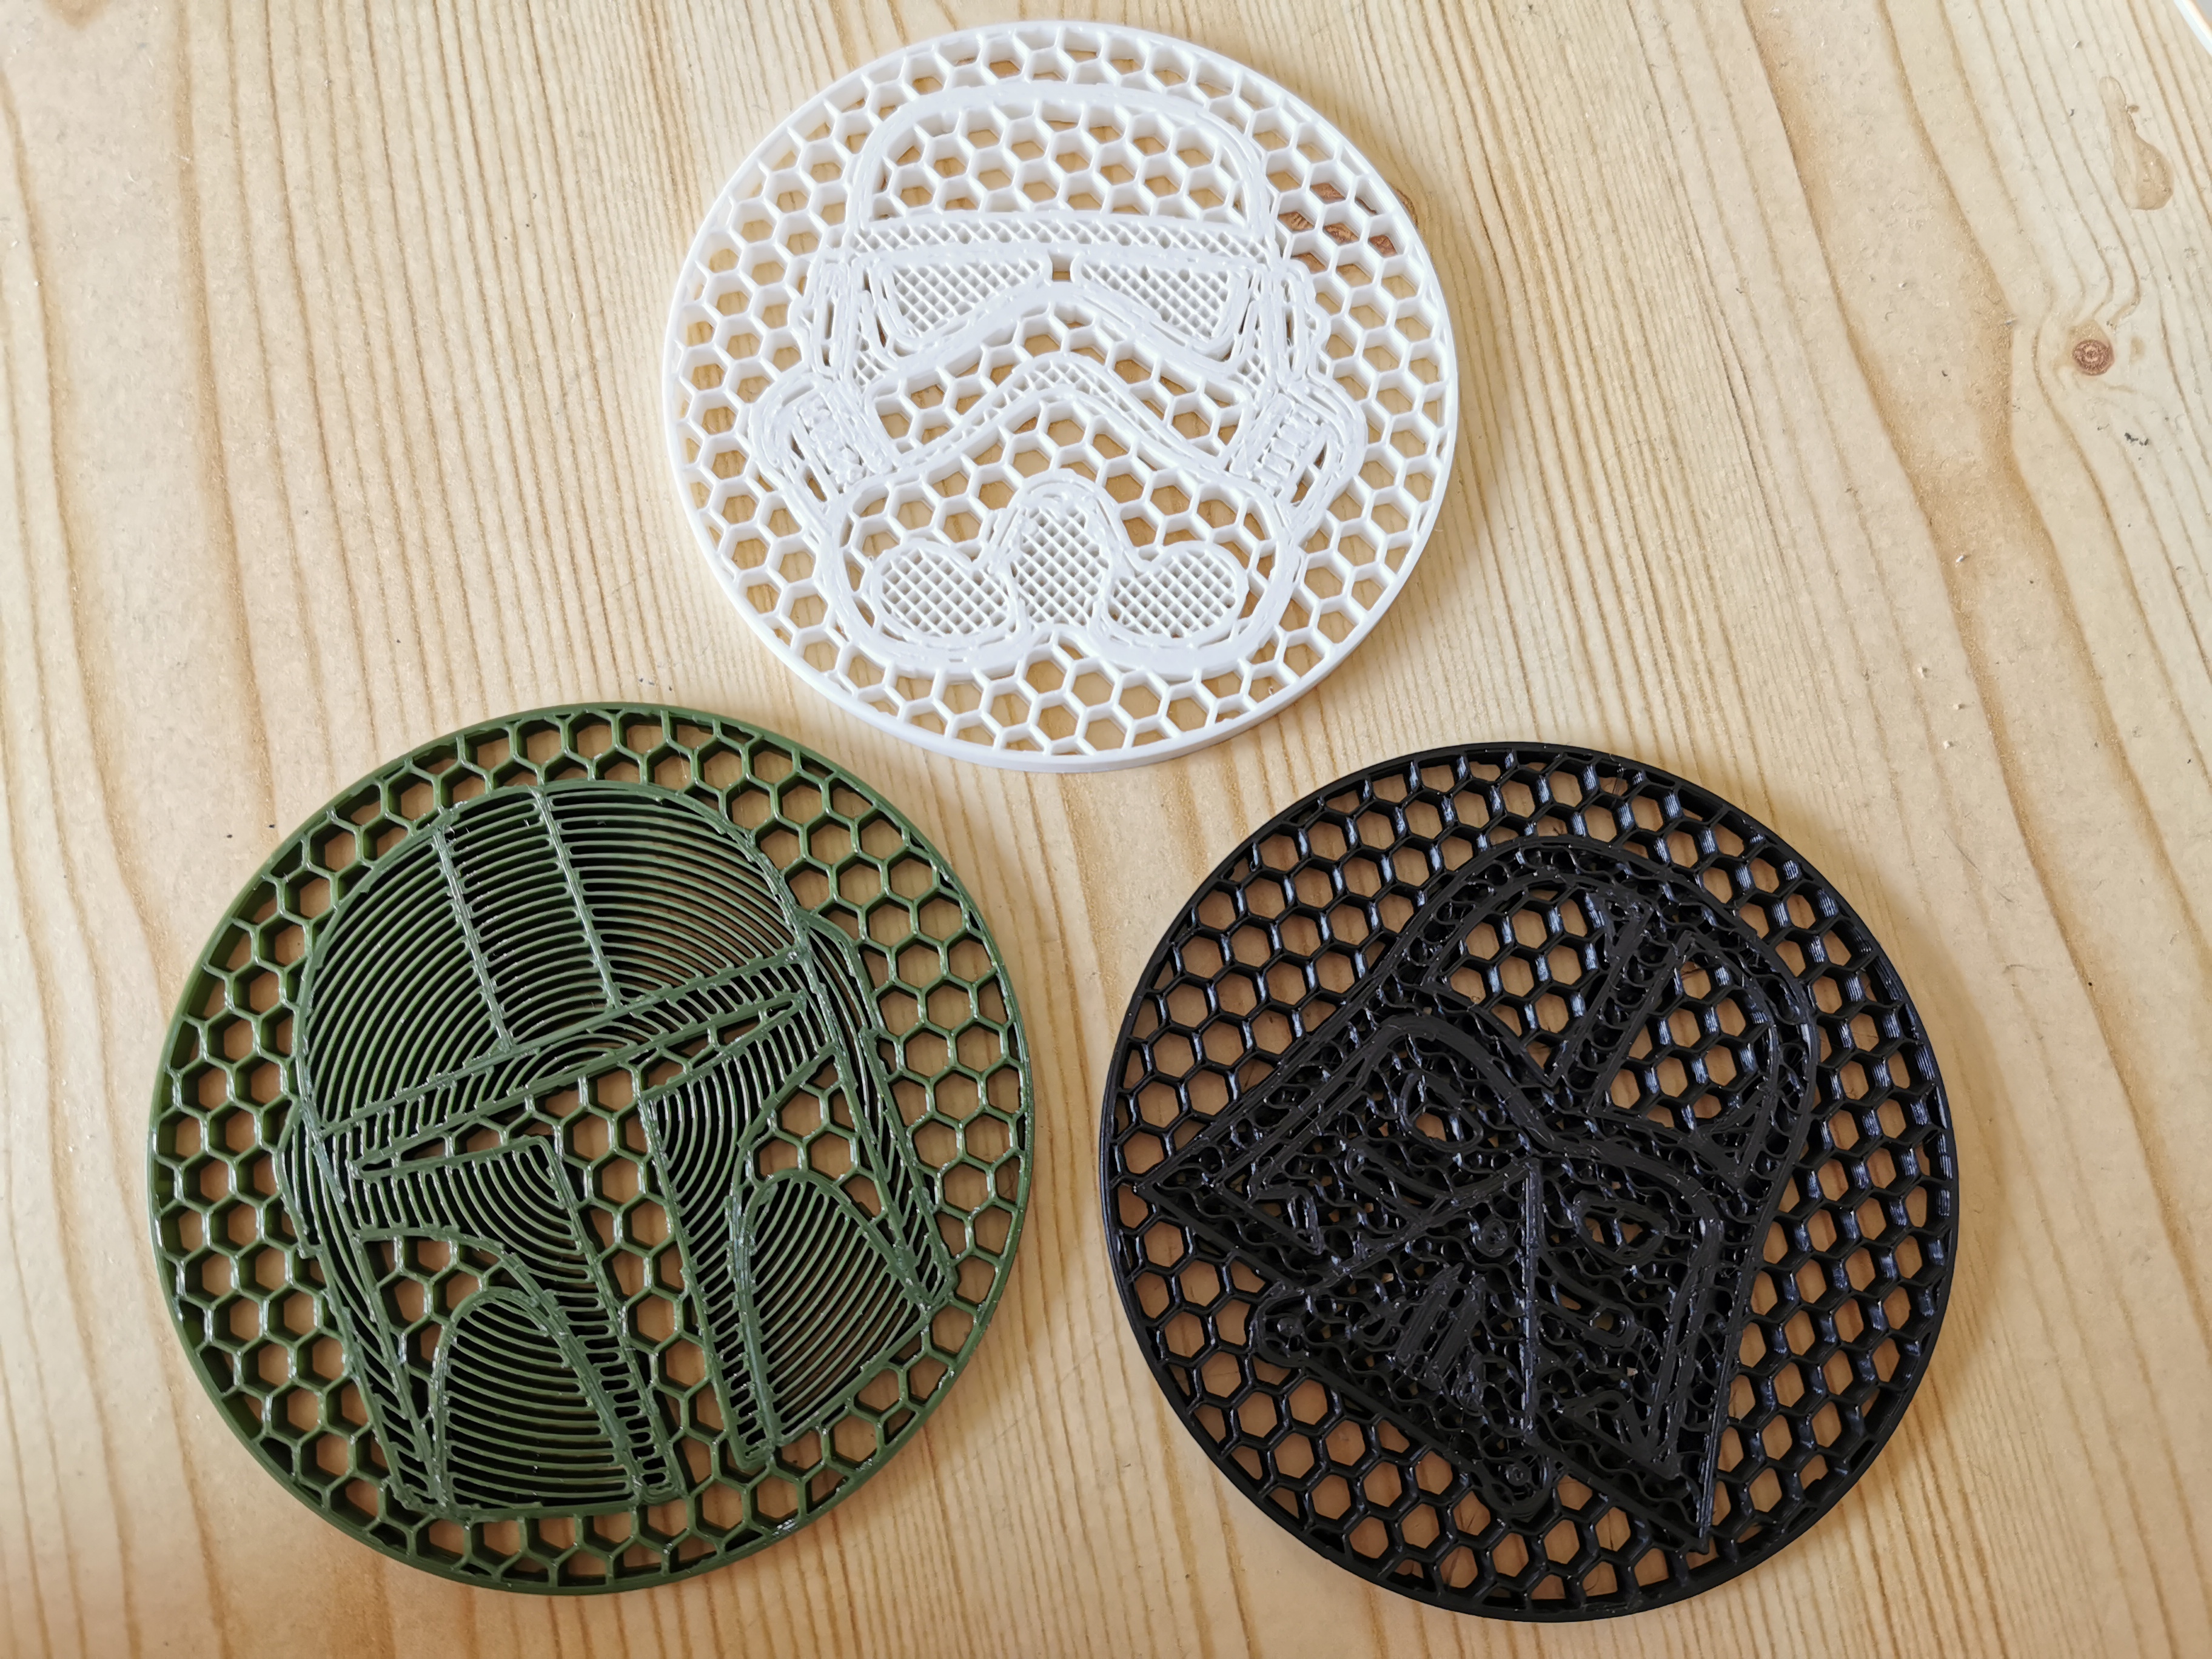
<p>Steps to reproduce:</p><ol><li>Open PrusaSlicer</li><li>Add a cylinder (right-click, Add shape, Cylinder)</li><li>Set size (for example, 90 x 90 x 4)</li><li>Set number of top/bottom solid layers to 0</li><li>Configure infill as needed</li></ol><p>Now you have a basic infill coaster. </p><p>Next step is to find some clipart you like (or make your own) and then use some 3D modelling tool to change it into (flat extruded) stl. I'm using FreeCAD to do it but you can certainly do it in other modellers too. Or you can find a flat STL image that you like.</p><p>Let's continue:</p><ol><li>Right-click in the cylinder in the slicer and select Add modifier, Load. Load the “clipart” STL.</li><li>Position and scale the clipart inside the cylinder. Make sure that is it at least as high as the cylinder. </li><li>Right click the “wheel” icon next to the loaded STL and select Infill. Repeat and select Layers and Perimeters.</li><li>Set different infill for the STL. Experiment with different Perimeter settings.</li><li>Check the sliced preview frequently.</li><li>Print when happy with the results :)</li></ol><p>Or you can just skip everything and print my files :) I'm using PLA, 0.2 layers, 0.4 nozzle.</p>
With this file you will be able to print Infill StarWars clipart coasters with your 3D printer. Click on the button and save the file on your computer to work, edit or customize your design. You can also find more 3D designs for printers on Infill StarWars clipart coasters.