InMoov Eyes HD720P Tecknet Camera Mount
thingiverse
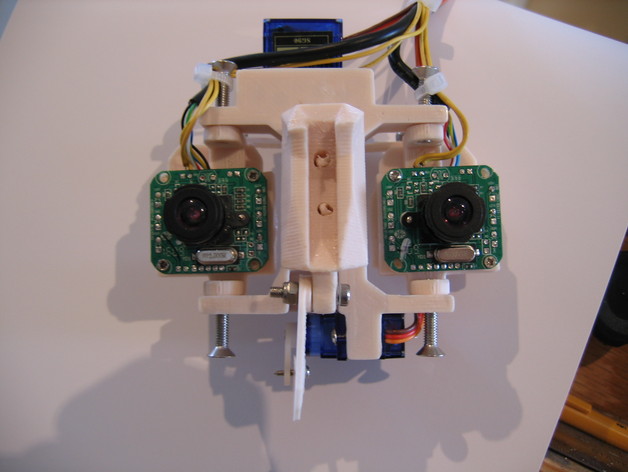
This file contains both left and right mounts for the InMoov Eyes using an HD720P Tecknet Camera. The existing InMoov parts EyeBallSupportLeftV1.stl and EyeBallSupportRightV1.stl did not fit well. You can find the camera on Amazon.com here: http://www.amazon.com/TeckNet%C2%AE-C016-Webcam-MegaPixel-Microphone/dp/B000Q3VECE?ie=UTF8&*Version*=1&*entries*=0 I removed the six LEDs on each camera, and soldered extension wires on the Mic circuit pads after removing the microphones. I plan to mount the mics with another custom part on a bed of silicone on the left and right InMoov ear pieces. I used a hot needle to just start a hole in two of the four posts, diagonal from each other, and re-used the screws that held the board in the original camera housing. To make space for the movement of the lenses behind the eye openings in the face I printed four of the EyeToNose_Extender.stl strips. (There are two in each print so 2 printings will do it.) I formed them "hot off the press" to the EyeglassV2.stl, then glued them in place one at a time. Finally, gluing the the whole Eyes mechanism to the EyeglassV2 which was a bit of a dance to get a pleasing alignment of the eyes (first making sure the servos were at neutral.) This design requires that a bit of material be ground away from the base of SkullServoFixV1.stl in order to allow room for the connection between the servo arm and the two little EyeHingeV1.stl I also added a block spacer there from some scrap plastic, and wound up grinding down the corners of the jaw supports as well as a tiny bit of the corner of the eye. Not a lot of room in there for all this stuff... See Pics Now I've uploaded a more compact version of the eyeball support: Eye_Support_MayaV2.stl The pins that hold the board are shorter and there's a cutaway to allow room for the jaw hinge. You can see I've put the speaker where the mouth is, and in another post a mic on each ear. I'd like to feed an input from a differential amplifier using the two mics as sensors, so the InMoov can look in the direction a sound is coming from. After Thoughts: This eye mechanism has been declared, "the hardest thing in InMoov to make" and so far I agree. It turns out I took my little extender strips back off one I got the new eyeball supports in place. I also wound up not using the two EyeBallV1.stl at all. Instead, I punched a hole in each half of one of these little soft plastic balls (the size of a ping pong ball but cheaper and more forgiving) and slipped them over the camera barrel, then reinstalled the camera lens. (It's important to have the lenses in focus prior to installation because the clearances are so tight.) I used these plastic balls: http://www.amazon.com/Ping-Pong-Balls-pack-12/dp/B003EDWJNQ?ie=UTF8&psc=1&redirect=true&ref_=oh_aui_detailpage_o00_s00 OK - See that pic of my fingers holding the original support for the top of the skull? That thing has to go. Just cut/grind it off. It leaves no room for the Y axis movement of the eyes. Now print Skull_Mount.stl and glue that in place at the back of the servo holder. Now you can see there is all kinds of room for the eye mechanism to pivot back and forth.
With this file you will be able to print InMoov Eyes HD720P Tecknet Camera Mount with your 3D printer. Click on the button and save the file on your computer to work, edit or customize your design. You can also find more 3D designs for printers on InMoov Eyes HD720P Tecknet Camera Mount.