Integrated Cupcake Z-Rod
thingiverse
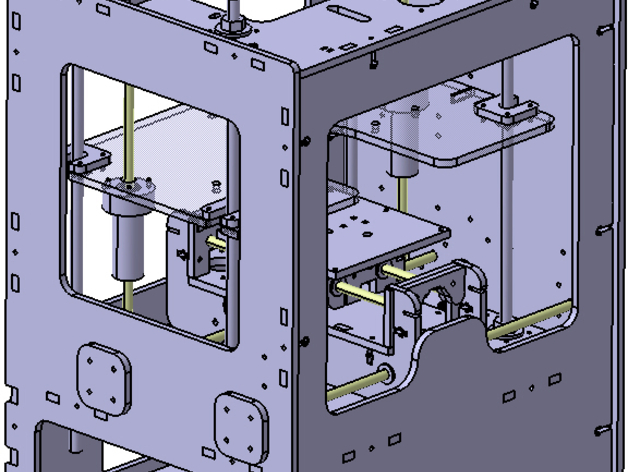
This is a spin-off of the Wobble Arrester by twotimes:http://www.thingiverse.com/thing:2151 I love his idea, but I had a hard time getting the offset linear guides to work properly - my prints always had a sort of blobby section right at the top, which took my bushings out of alignment and caused binding. No doubt I still need to work on my skeinforge skills. Anyway, I figured that ideally the Z-rods should be somewhere in the middle of the Z-stage - in other words, between the drive screws. This should reduce binding and in the event of a crash won't load the Z-rods and bushing clamps as badly. It also turns out that there's space enough to add the standard makerbot rod mounting scheme: through holes with external covers, although the covers are a little different due to space constraints. I have uploaded DXFs that can be used as templates for modifying your top, middle, and Z-stage; if you have access to a lasercutter you could use them to cut drop-in replacements to the standard makerbot parts. I certainly don't want to step on any toes, but I'd like to see Z-rods as a standard option, so I tried to make this mounting arrangement easy to implement on the production side. Unfortunately I couldn\'t find a stock part for the bearing mount, but it should be easy to machine in quantity if it comes to that. The bearing retainer comes in 3 flavors: 3/8" through hole for use with bearing inserts, 1/4" through hole for use without bearings, and 3/8" without counterbore for printing. (Note that if you intend on printing you'll have to use a non-headed bushing or relieve the underside of the Z-stage to accommodate the bushing head.) Just choose your poison. EDITED TO ADD: I noticed an error in the modified Z-stage DXF, so I have removed the old file and uploaded a corrected one. The first version would still work fine as a template to modify an existing stage, but not for cutting a new one. Please download the updated version. Instructions 1) Alter your existing top, middle, and Z-stage OR cut yourself a new set. 2) Make a pair of bearing mounts - I'd suggest delrin or aluminum for the 3/8" counterbored version and delrin for the 1/4" version. If you print them, be ready to tap the 4 M3 holes for assembly. 3) Make 4 rod retaining covers either by hand or on a lasercutter 4) Print 4 Z-floats from the aformentioned Wobble Arrester by twotimes (or your preferred substitute). 5) Install and lubricate. 6) Get back to work, lazybones!
With this file you will be able to print Integrated Cupcake Z-Rod with your 3D printer. Click on the button and save the file on your computer to work, edit or customize your design. You can also find more 3D designs for printers on Integrated Cupcake Z-Rod.