Interlocking Puzzle Piece Flat
thingiverse
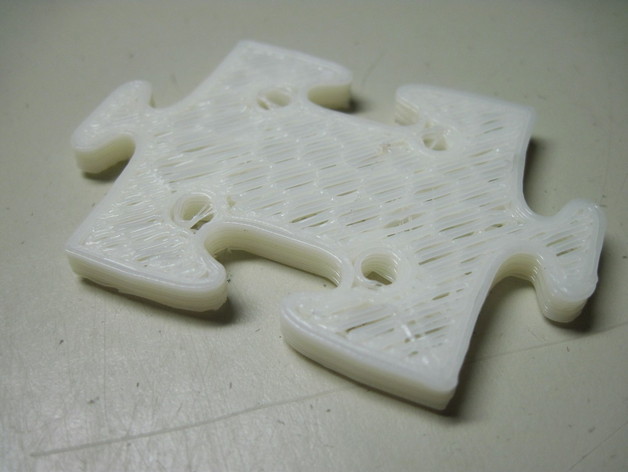
I wanted to create a printable part that could take the place of the plywood that makes up the CupCakeCNC. I chose to make a repeating pattern of interlocking puzzle pieces. However, a single layer of these puzzle pieces would not be strong enough for anything but a toy. I added a set of holes that would allow offset layers of puzzle pieces to be bolted together, forming a stronger whole. I expect to be starting into making corner and edge pieces. I think it would be possible to laser cut these. The current version is 40mm x 40mm x 4mm corner-to-corner-to-corner. Tongue-to-tongue it is 60mm. The holes are 4mm in diameter and spaced 20mm apart. Earlier attempts at 60mm x 60mm x 5mm pieces all had to be aborted due to head crashes with ABS shrinkage curling up the corners and breaking the raft from the build surface or, in one case curling up the entire acrylic build surface. This might have been due to the use of an Infill Solidity (ratio) of 1.0 This was created in Art of Illusion. Here is a breakdown of the objects in the .aoi file: Camera 1 and Light 1 were just left in there Puzzle_Curve_No_Clearance is the basic outline of the puzzle piece and does not have any adjustments for the clearance that will be needed for the tongue parts to fit in the mouth parts. It is an approximating curve. The corners are created with three overlapping points. Curve 1 and its children, Curve 1, Curve 1, and Curve 1 are curves to give an indication of where the holes would be located when I was working with Puzzle_Curve_No_Clearance. The first Puzzle_Curve_With_Clearance is a modification of Puzzle_Curve_No_Clearance where the tongues are decreased in size. You can see the changes by making visible only Puzzle_Curve_No_Clearance and the first Puzzle_Curve_With_Clearance. The points were offset by 0.25units. The second Puzzle_Curve_With_Clearance is a triangle mesh of the first Puzzle_Curve_With_Clearance. The Puzzle_Piece_With_Holes is the final object that was used for .stl output. It is made of Puzzle_Piece, a 4-unit extrusion of the Puzzle_Curve_With_Clearance triangle mesh. and a CSG union of four 8-unit long cylinders that are subtracted (CSG difference) from Puzzle_Piece to form the drill holes in the final object. The .gcode file uses a hexagonal fill and takes about 16 minutes to print on a CupCakeCNC. The file was created with an Infill Solidity (ratio) of 0.32. The hex_fill.zip file contains the contents of the .skeinforge directory used in Skeinforge to make the hexagonal fill parts seen in the images and used in the .gcode file. Instructions Put the pieces together like a puzzle, there is no wrong way, the 'tongues' fit into the 'mouths.' For a two layer setup, one layer will be offset from the other layer such that the holes of a piece in one layer will align with the holes of four separate pieces in the other layer. M3 nuts and bolts and optionally, washers will hold the two layers together. See the pictures for further details.
With this file you will be able to print Interlocking Puzzle Piece Flat with your 3D printer. Click on the button and save the file on your computer to work, edit or customize your design. You can also find more 3D designs for printers on Interlocking Puzzle Piece Flat.