IP Cam with Raspberry PI B and Camera case from fake Camera
thingiverse
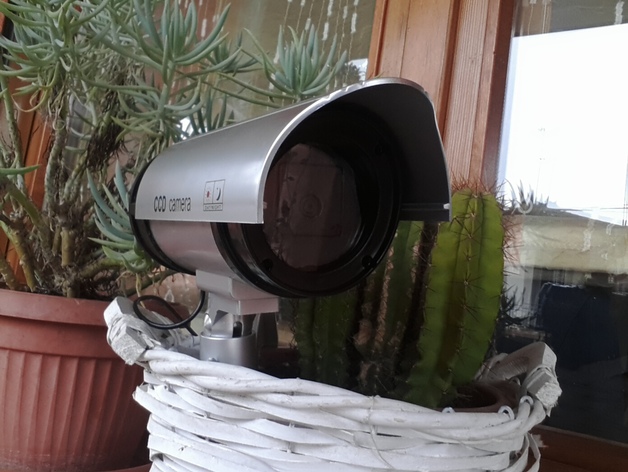
Being a huge Raspberry PI enthusiast, I had been considering setting it up as an IP Camera for surveillance purposes for a long time.\nSince buying the PI Camera to connect it to the board with its embedded connector, I found a ready software to use it for surveillance with video recording when movement occurs inside its range of vision, and my next step was to find or build a suitable case. Instead of making one from scratch, I discovered a "fake camera" case at a known German brand hard-discount market (easily available in Europe) with a relatively low price tag (less than 7 Euros).\nI only needed to adapt it to host the Raspberry PI and its camera, and supply power to get it up and running.\n\n \n \n Setup Guide\nBill of Materials:\nRaspberry PI B (I decided to use the B version instead of the more compact B+ with a microSD card because its microUSB connection is on the short edge of the PCB, making it easier to connect to the microUSB cable)\n32 GB SD card (with sufficient space to store recorded Full HD video) WiFi dongle for connecting to the Raspberry PI's USB port\nRaspberry PI Camera with a flat connector for connecting to the dedicated Raspberry PI socket (I used the standard version without IR filter, but there is also an option with IR capability for night vision)\nFake camera from various online sellers at different price points (6.99-10 Euros) case/enclosure designed specifically for the Raspberry PI Camera (found on Thingiverse and easily printed) for embedding in a support behind the fake camera glass\nmicroUSB cable (length of 1.8 meters, but I ordered a 3-meter version to allow more flexibility)\nThe Raspbian OS can be downloaded from the Raspberry website, installed onto the SD card by burning an image, and configured using the raspi-config utility.\nI connected the WiFi dongle to get wireless connectivity without an Ethernet cable, extended the memory usage on the SD Card to its maximum capacity, activated the camera module, and followed the IP Cam instructions on the Raspberry PI forums to complete software setup\nTo verify the system's functionality, I simply accessed it using a web browser at its IP address.\nThis setup produces a webpage with preview, motion detection buttons, and camera settings.\nThe video below (http://youtu.be/RQHKQPZgEVU) showcases the system's basic operation.\nWith everything working correctly, I proceeded to print the 3D printed parts, which included a camera case and an adapter for the fake camera glass with a fixing ring that includes screws.\nTo accommodate the original back cover of the "fake cam" (which contained a Red LED and IR components), I created and 3D printed a custom extension ring that was then glued onto the cylindrical body to provide support\nThe extension ring and camera case were both painted using acrylic spray paint\nSeveral photos are included in this post to demonstrate each step.\nI made a rough calculation of the component cost, excluding the SD card (a minimum of 32 GB), power supply (using an off-the-shelf smartphone or tablet USB charger is sufficient), and 3D printed parts. The estimated total for all components comes out to be approximately 90 Euros
With this file you will be able to print IP Cam with Raspberry PI B and Camera case from fake Camera with your 3D printer. Click on the button and save the file on your computer to work, edit or customize your design. You can also find more 3D designs for printers on IP Cam with Raspberry PI B and Camera case from fake Camera.