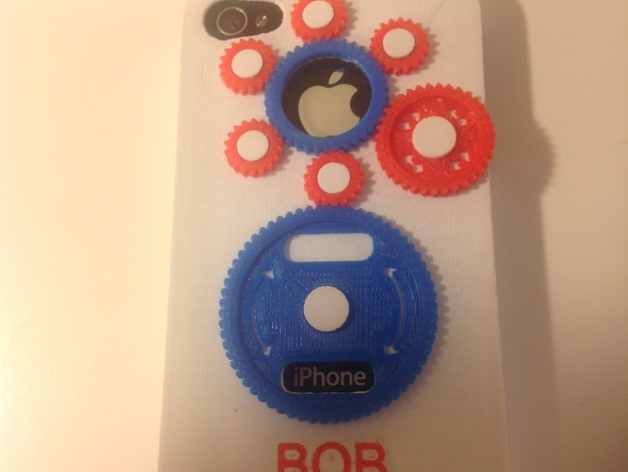
iPhone 4s Captured Gear Case
thingiverse
Update: New rivet file (V2) posted with tighter fit. This is an iPhone 4s Case with gears attached to the back that you can turn for hours of fun. The thumb gear hangs over the edge of the phone right below the volume buttons. Everywhere I go, people are amazed with it. The ring gear that surrounds the Apple logo is not physically attached to the phone case. It is held in by the tooth patterns on the surrounding gears! The large gear on the bottom turns to reveal the iPhone logo on the back of the phone as well. This is the coolest way to show off your iPhone pride. This is based off my iPhone 4s Slim Case Blank. http://www.thingiverse.com/thing:51533 There is room below the large gear to customize the case with your name or logo. Instructions Print the case and gears with: .20 mm layers 4 shells total raftless with no support 230 / 110 temp 80 / 150 speed Print the rivets with: .20 mm layers 10 shells total raftless with no support 210 / 110 temp 30 / 30 speed This thing requires you to glue some parts in place. The best way to do this is to get an empty nail polish bottle and put in some acetone and ABS chunks. You can get a can of acetone at the local hardware store. BE CAREFUL! IT IS FLAMMABLE AND TOXIC! It won't matter what color the glue is if you already have some made up because the glued parts won't be visible when the case is on. The rivets get pushed into the case and glue is painted on the inside surface of the rivet and case with some overlap. Print all parts in the colors of your choice. Make sure there are no burrs and check to make sure the rivets are snug in the case, and loose enough in the gears to turn freely. Push the rivets through the gears and into the holes on the phone. You must glue only 4 of the small gears surrounding the ring gear on first (leave the thumb gear and the small gear that is just above it off for now). When they are completely cured, slide in the ring gear and glue on the last small gear, the thumb gear, and the window gear. The ring gear has to be inserted in the same orientation as the small gears, smooth side down. The thumb gear and window gear rivets have larger heads. After all the rivets are dry, (I know, it is hard to resist turning them too soon. Wait about 1-2 hours.) Turn the gears slowly and gently to make sure they aren't glued down too. They will be tight at first, but I know that in a matter of a couple hours of not putting this thing down, they will be free as can be. You have to slide the top of the phone in first, and then snap the bottom sides around the phone. Removal is the reverse.
With this file you will be able to print iPhone 4s Captured Gear Case with your 3D printer. Click on the button and save the file on your computer to work, edit or customize your design. You can also find more 3D designs for printers on iPhone 4s Captured Gear Case.