LCR-T4 component tester ULTIMATE Box
thingiverse
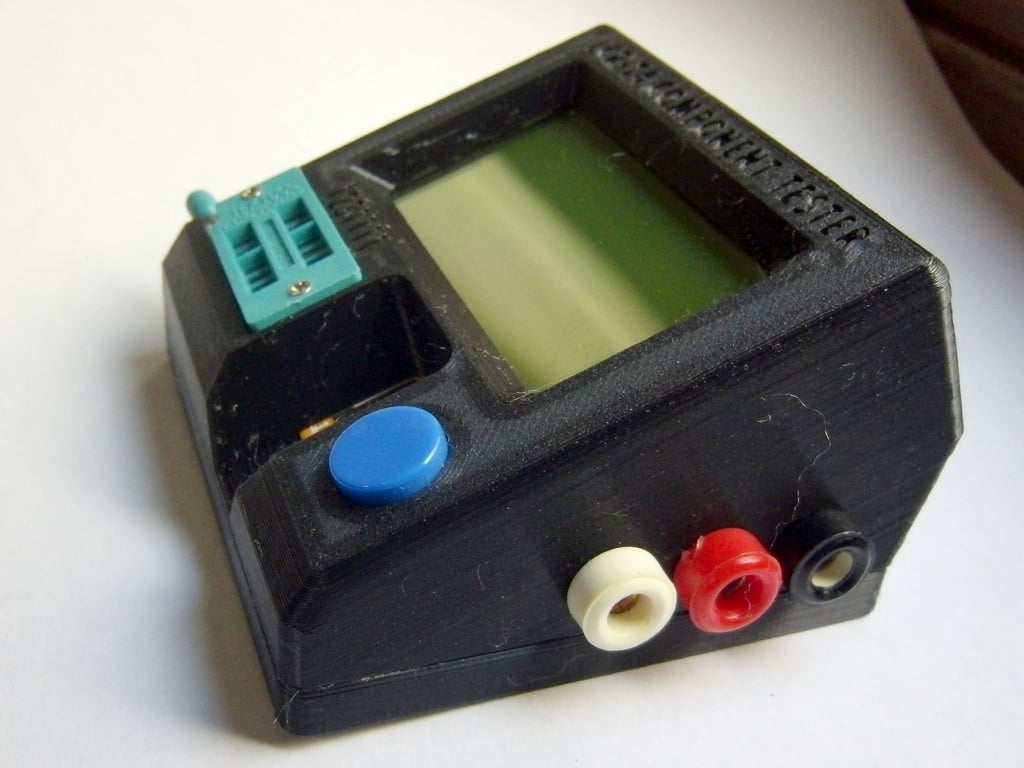
**Please support my work at: https://www.paypal.me/SalvoOgnibene Also 1$ or 50c are welcomes.** **Don't forget to post your make!** This is a ULTIMATE box for the LCR-Tx component tester, fork from the Phenomen work. https://www.thingiverse.com/Phenomen I got tired of all versions and remixes... wrong size, wrong windows, support needed, exposed display... Then I've completely redesigned everything. Pay attention: there are many versions and clones of this tester (T3 and T4). The one used from Phenomen is an earlier version, different in size from other ones, not compatible with the recent ones. This box is suitable for the tester with same ZIFF pin configuration between top row and bottom row: 123-1111. If your tester has 222-3333 in the bottom row isn't compatible with this box. You can recognize the 222-3333 version by the gap between ZIFF and the edge of board. The right version doens't have any gap and ZIFF socket is on the edge of circuit. (see images). If you've a 222-3333 version isn't definitely compatible with this box. Don't print it! Then, I've done several modification from the original one. You must print this box upside down (display at the bottom) and without any support. Don't worry about 55-60° screw supports: will be printed fine. There is another bad thing in all others boxes: display is not protected and it's exposed to damages. Then I've used an old CD/DVD transparent case and I've cut out a 58x40mm window to put between display and box. This will protect display from scratches and other damages. (see images) Then, there are two families of boxes: the ones ready for plexiglass and the ones not. The difference is the height of board's 4 supports. Then, there are two more types of boxes: the ones with SMD testing-hole and that with 3 holes for test leads. Just connect the 3 sockets at "1-2-3" pins on the rear of the ZIFF with soldering iron. Of course I have included all the features combination: eight boxes. You can distinguish them from filename. "1 Box.stl" (no plexiglass, no SMD, no 3 holes) "2 Box_holes.stl" (no plexiglass, no SMD) "3 Box_SMD.stl" (no plexiglass, no 3 holes) "4 Box_SMD_holes.stl" (no plexiglass) "5 Box_plexy.stl" (plexiglass ready, no SMD, no 3 holes) "6 Box_plexy_holes.stl" (plexiglass ready, no SMD) "7 Box_plexy_SMD.stl" (plexiglass ready, no 3 holes) "8 Box_plexy_SMD_holes.stl" (plexiglass ready, no SMD, no 3 holes) Choose what you want :) All holes are suitable for M3 screw. To refine the holes from printing lack, please, insert GENTLY a good steel M3 screw or a male drilling thread. Beware: use a well calibrated printer because the windows gap (ZIFF and button) are very tight. If you use the "SMD hole" box version will be a bit difficult to insert the circuit board in the box. Just enjoy yourselves while doing that! :) **Don't forget to post your make!** **Please, support me with a tip at: https://www.paypal.me/SalvoOgnibene Thanks.**
With this file you will be able to print LCR-T4 component tester ULTIMATE Box with your 3D printer. Click on the button and save the file on your computer to work, edit or customize your design. You can also find more 3D designs for printers on LCR-T4 component tester ULTIMATE Box.