IPi VRT (Legacy Model)
prusaprinters
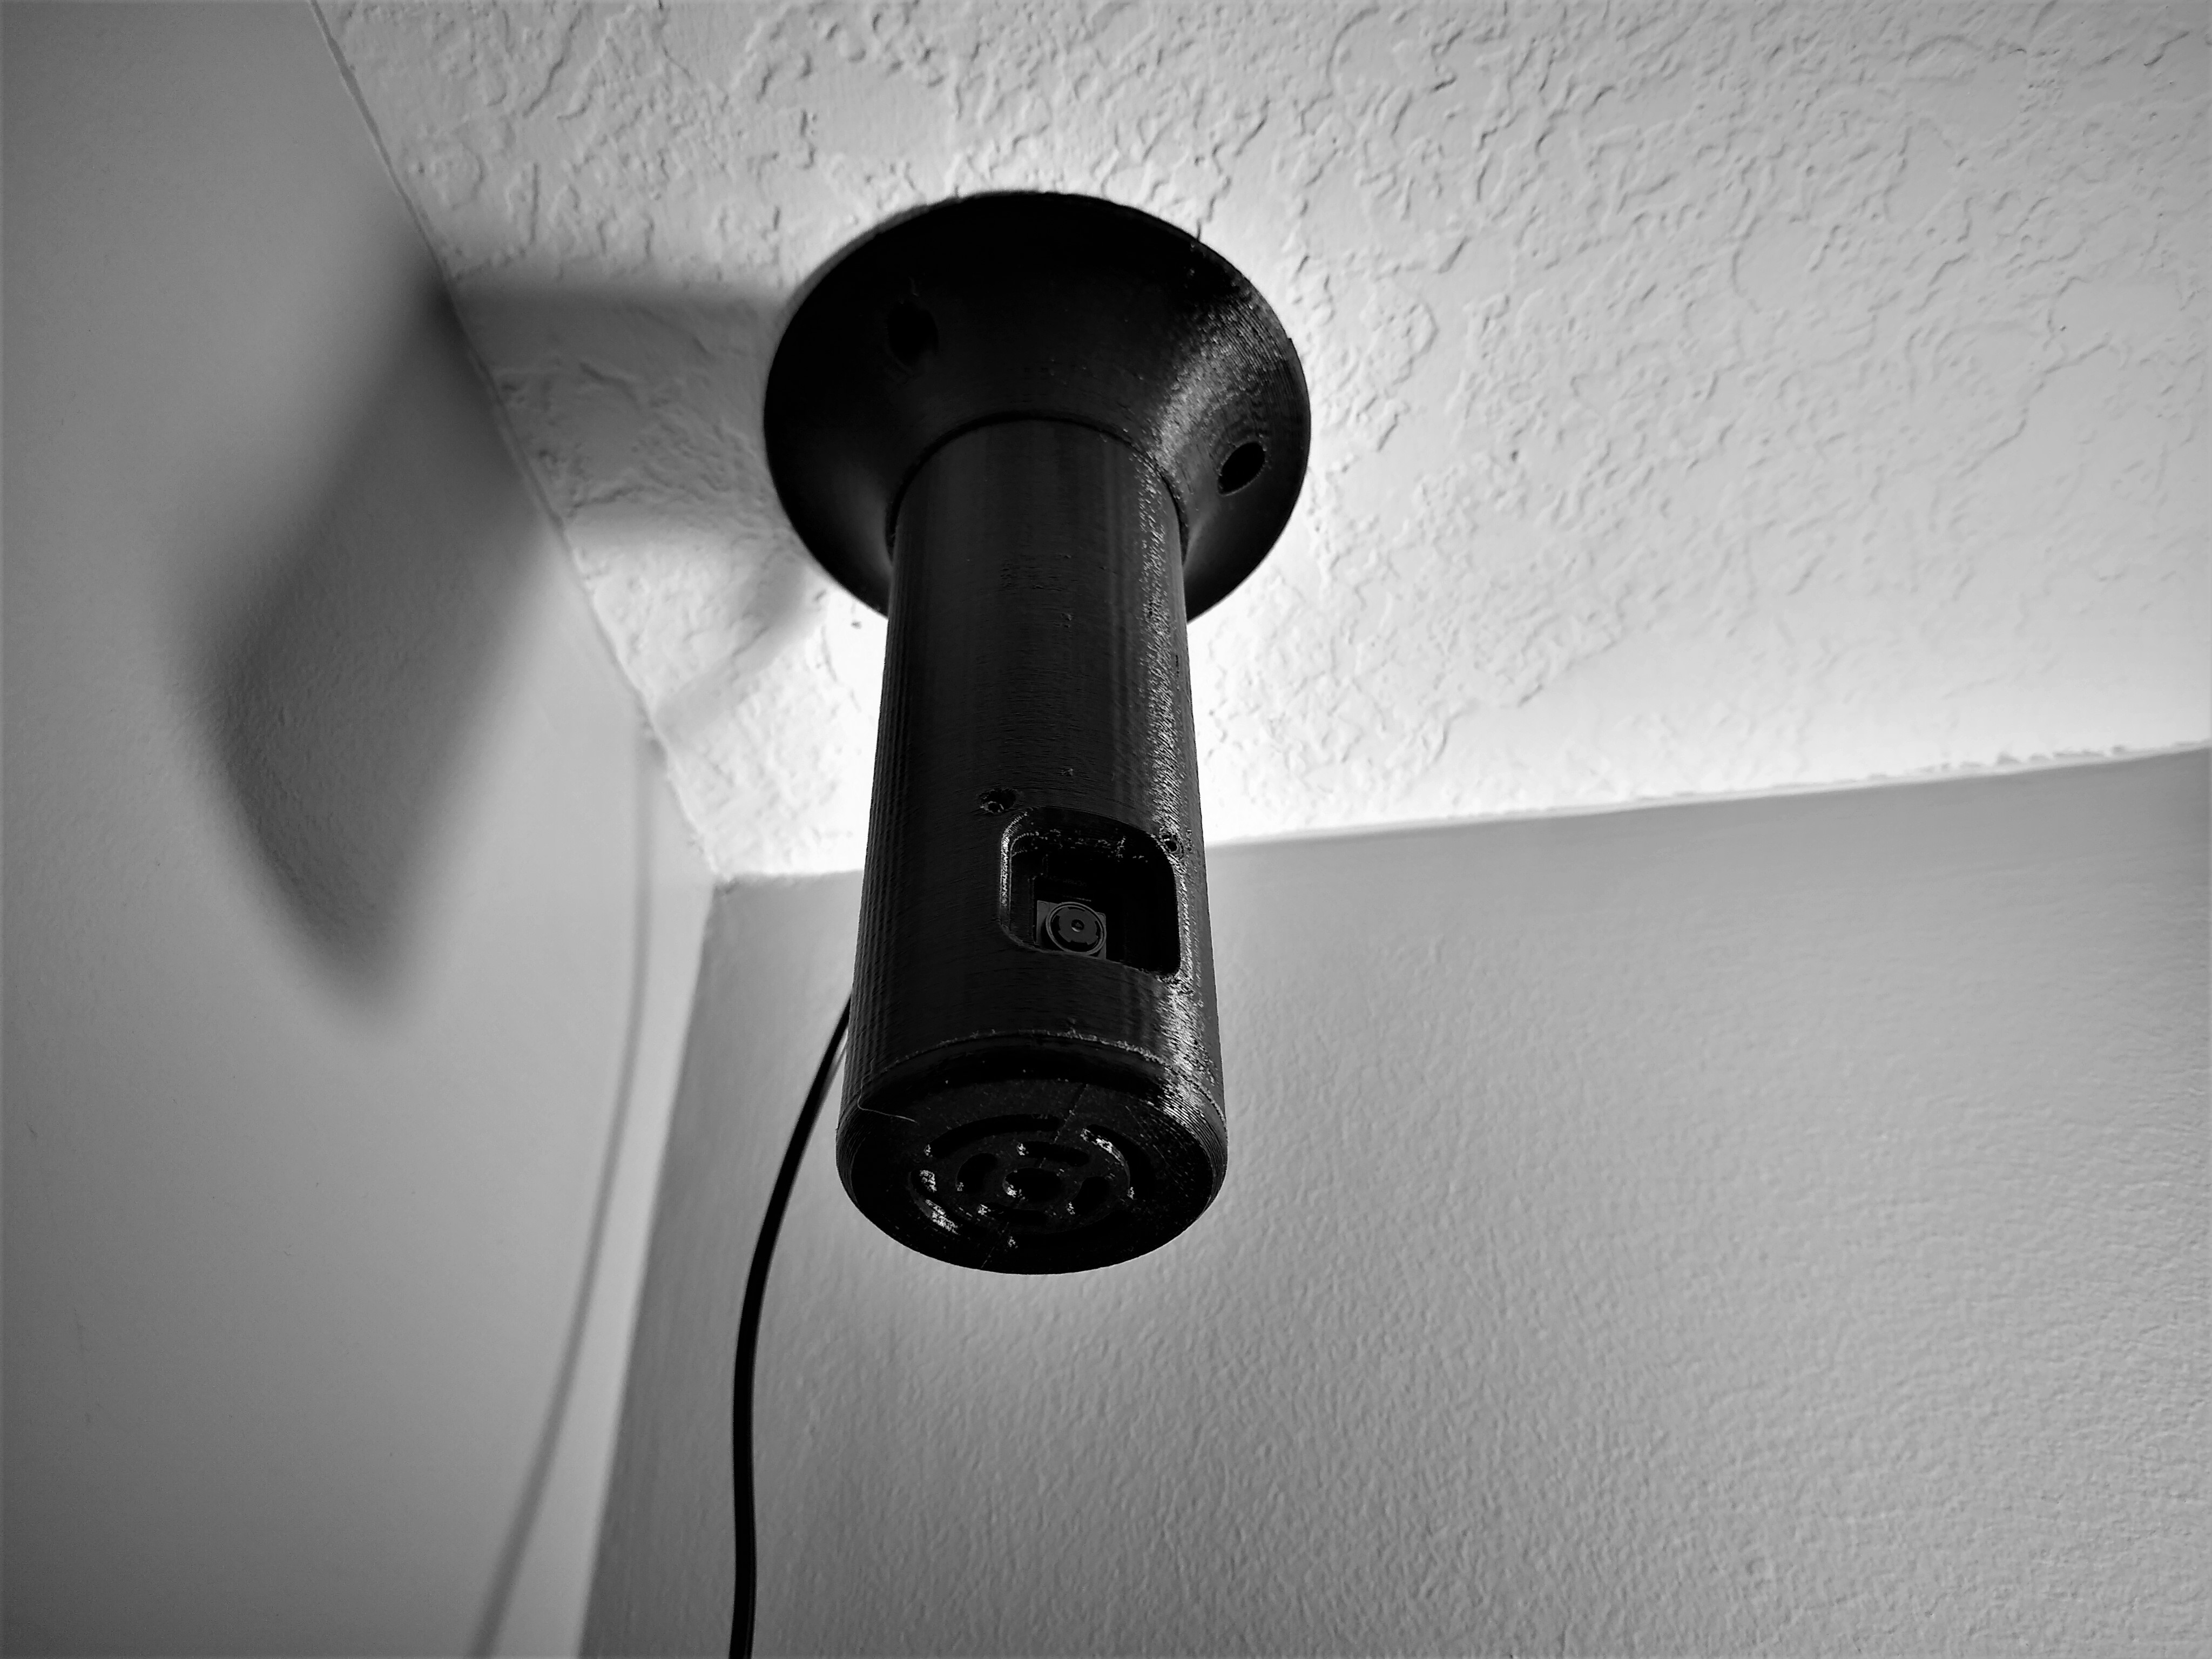
<p>(Originally Uploaded to Thingiverse January 10, 2020)</p> <p>Previously, all my IPi camera models were designed with the intent of pure utility; little to no care was had for aesthetics during the design processes. Normally, I'd design a camera to use the least amount of plastic for it's size, whilst being a small as possible. Basically, each iteration was designed for simplicity and function.</p> <p>This is the IPi VRT. (Vertical) The design presented isn't an iteration of the previous models; it is it's own design.This model is made for the technical minded consumer, while having the style and simplicity for the interior decorator inside us all.</p> <p>There are no hard edges, with the camera body and ceiling mount blending together to give the appearance of a singular structure. With today's smart home technology being built with more sleek lines, and more organic in shape, this security camera fits in quite well.</p> <p>On the mechanical design, this camera is designed to mostly snap fit together, requiring only two M2x8mm screws for mounting the camera module. The ceiling mount is also a rotational bearing; both pieces being printed as one part, unable to be separated. This makes the mount durable, while allowing reliable 360° rotation.</p> <p>The hardware is the same as previous models. A Raspberry Pi Zero W, along with a V2 Camera Module. This design requires a 125mm ribbon cable minimum. Since the ventilation holes are kept to a minimum, I would suggest a small heatsink for the Pi's CPU.</p> <p>I now exclusively us motionEyeOS for my IPi models. It's proven reliable over the years, and the features such as image masking and emailing motion captures are important, at least to me. (I've caught my cat climbing all over my work desk, something she KNOWS not to do when I'm around)</p> <p>With all that being said, I admit this model is probably the design I print from now on.</p> <p>Hardware:</p> <p>Raspberry Pi Zero W<br/> Raspberry Pi Camera V2.1 or V2.1 IR<br/> Raspberry Pi Zero Camera Ribbon Cable (Must be at least 125mm long)<br/> HDMI to Mini HDMI Cable<br/> USB to Micro USB Adapter (for wireless keyboard initial setup before SSH)<br/> Micro SD Card (8GB - 16GB)<br/> 2A Wall Power Supply<br/> M2 x 8mm Screws</p> <p>Software:</p> <p>motionEyeOS: <a href="https://github.com/ccrisan/motioneyeos/releases">https://github.com/ccrisan/motioneyeos/releases</a></p> <h3>Print instructions</h3><p>Standard Print Settings:</p> <p>Material: PLA<br/> Extruder: 210C<br/> Bed: 56C<br/> First Layer Print Height: .28mm<br/> First Layer Print Height: .20mm<br/> Wall Thickness: .40<br/> Wall Perimeters: 2<br/> Infill Pattern: Gyroid<br/> Material Flow: 100%<br/> Support Percentage: 15%</p> <p>Other Settings:</p> <p>Camera Body Infill: 20%<br/> Ceiling Mount/Rotary Bearing Infill: 35%<br/> Other Parts Infill: 25%</p> <p>Supports are only needed for the camera's view port at the front of the camera body.</p>
With this file you will be able to print IPi VRT (Legacy Model) with your 3D printer. Click on the button and save the file on your computer to work, edit or customize your design. You can also find more 3D designs for printers on IPi VRT (Legacy Model).