IR Light Switch WITH SOURCE CODE!!
thingiverse
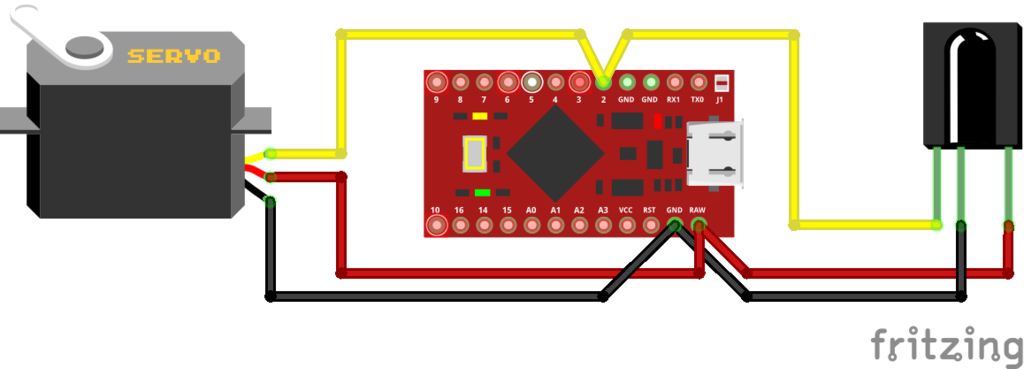
There's a bracket that fits any light switch and comes with an attachment. You'll need a small screw to secure the attachment to the servo motor. A servo motor and Arduino Pro Micro are also required. Don't solder header pins to the Arduino Pro Micro. The code is included in the download, along with a diagram. Go to the Arduino IDE, select Tools > Serial Monitor, and point your remote at the IR sensor while pressing a button. You should see lines of numbers on the screen. Ignore the ones that are just Fs, copy the code without Fs, exit the serial monitor, and paste it into the place where it says //PASTE YOUR NUMBER HERE. Don't delete 0x; it won't work if you do. For example, use 0x61A0A45B. Repeat this process for the second button. I'll soon post a video explaining how to do it. After completing these steps, comment out line 20 by adding two backslashes in front of the line that says Serial.begin(9600);. This will disable the serial monitor. You can now control your light with your remote. To use the bracket, remove the two white screws from your light and screw on the bracket instead. If you enjoy this project, please consider giving a tip.
With this file you will be able to print IR Light Switch WITH SOURCE CODE!! with your 3D printer. Click on the button and save the file on your computer to work, edit or customize your design. You can also find more 3D designs for printers on IR Light Switch WITH SOURCE CODE!!.