IR remote - AC Controller (ESPhome)
thingiverse
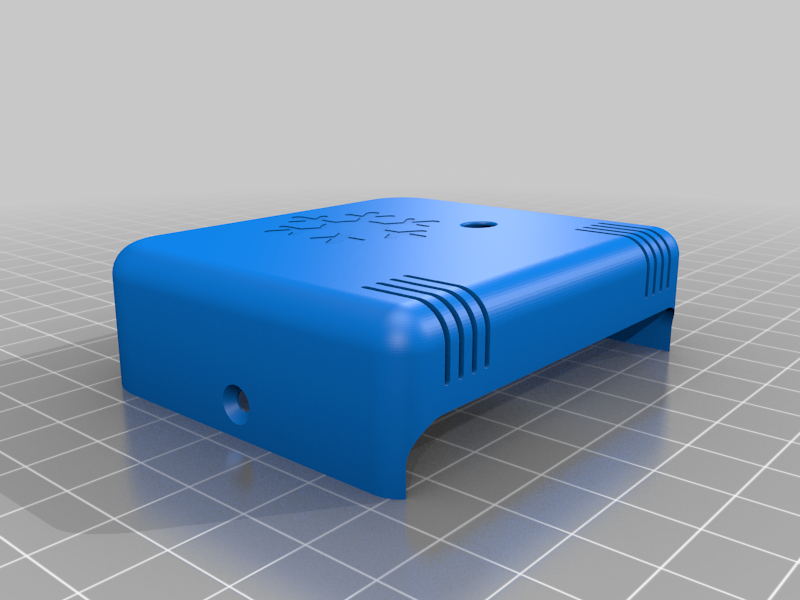
# **Smart AC Controller** - Home Assistant and ESPHome Here is a simple design of an AC Controller via ESPhome (HomeAssistant). I wanted something that doesn't require to drill any holes in the wall. The main frame is held by the switch cover plate, then the lid closes everything and hold the IR led in place. Please note that the IR LED is in angle so it faces the AC, you might need to modify this according to your set-up ! 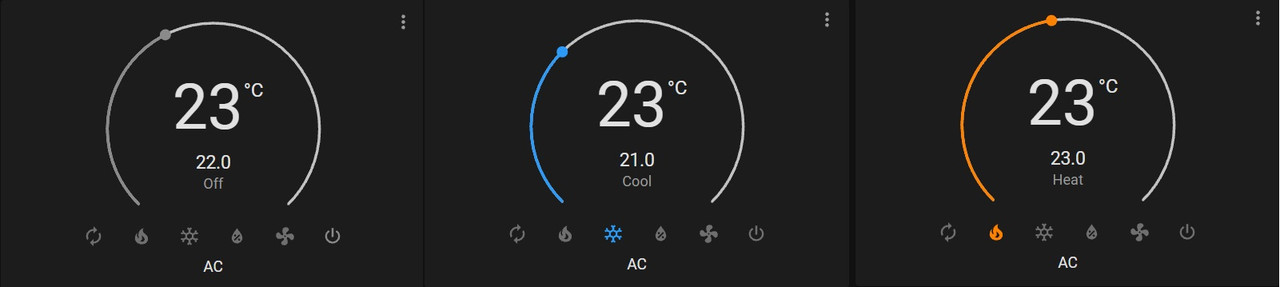 ## Printing : Not much to say, I've printed this in white PETG, with enough walls to be 100% filled. You can use what you want at this point..! I used textured PEI sheet ## BOM : - [DHT11 Temperature sensor](https://fr.aliexpress.com/item/1005001714267542.html?spm=a2g0o.productlist.0.0.6060387dzHvRg0&algo_pvid=90019cd4-72e7-4e8a-a879-5c55aa1be564&algo_exp_id=90019cd4-72e7-4e8a-a879-5c55aa1be564-8&pdp_ext_f=%7B%22sku_id%22%3A%2212000017263327294%22%7D) w/ built-in resistors** - [ESP8266 V2](https://fr.aliexpress.com/item/32665100123.html?spm=a2g0o.productlist.0.0.497e5c1bxWfoKA&algo_pvid=f04f6304-1987-4a25-a764-03786f7c5eeb&algo_exp_id=f04f6304-1987-4a25-a764-03786f7c5eeb-0&pdp_ext_f=%7B%22sku_id%22%3A%2266676497216%22%7D) : I use the V2 since it's smaller in size. A wemos would work too and it's even smaller - IR LED (1x) - 5mm - 2N2222 transistor - [Buck converter](https://fr.aliexpress.com/item/32835853612.html?spm=a2g0s.9042311.0.0.27426c372ZkTJW) (1x) *** - [12v 5.5mm x 2.5mm female connector](https://fr.aliexpress.com/item/4000759706828.html?spm=a2g0s.9042311.0.0.27426c37rwAbg2) (1x) - [12v 5.5 x 2.5 male connector](https://fr.aliexpress.com/item/32882544782.html?spm=a2g0s.9042311.0.0.27426c37rwAbg2) (1x) - M2 x 4mm countersink screws (7x) ** This temp sensor is not quite precise, using an DHT22 would have been better, but I do a correction in ESPhome that corrects the error and it's ''ok'' for me. *** I have a 12v CCTV power supply that runs all the smart things in my house. ## Wiring : - IR LED wiring : See tutorial [HERE](https://learn.adafruit.com/internet-of-things-infrared-remote/wiring) - DHT11 wiring : Using the module with build-in resistor is quite straight forward, connect the DAT pin to D6 or other similar pin, + to the 3.3v and ground to the GND. ## ESPhome programming : 1. Assuming you already have ESPHome installed and you know the basics 2. Set-up the new device : Please refer to [this page](https://esphome.io/components/climate/ir_climate.html) for more detail. 3. Add the Lovelace Card or any custom card ! Basic HA card (picture above) : 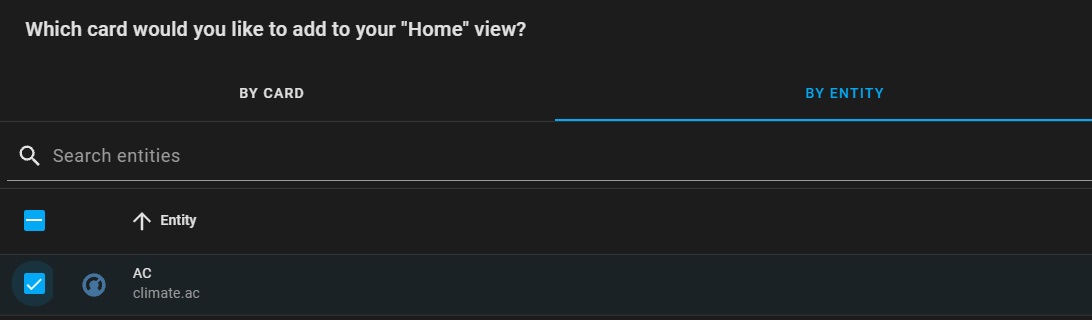 I usually flash the ESP over USB with a basic configuration just to have a first connection, then tweak all the settings via OTA update. ## Installation 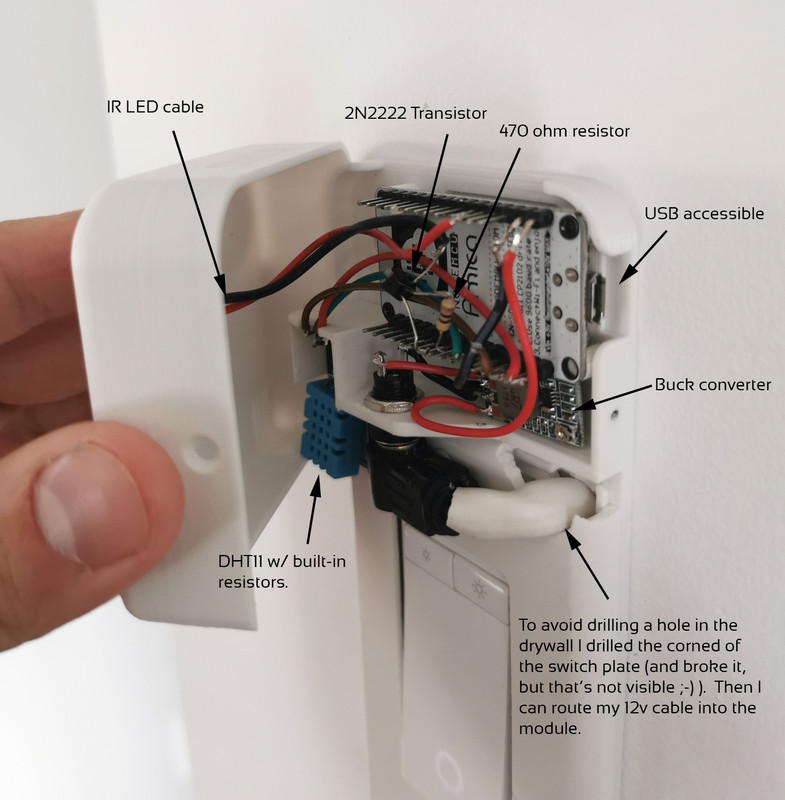 # Enjoy ! ###### Disclaimer : I'm not the ultimate reference in electronic and I only want to share my design. In all circumstances, I am not responsible of what could happen if you follow this tutorial.
With this file you will be able to print IR remote - AC Controller (ESPhome) with your 3D printer. Click on the button and save the file on your computer to work, edit or customize your design. You can also find more 3D designs for printers on IR remote - AC Controller (ESPhome).