Iris Monacle with LEDs
thingiverse
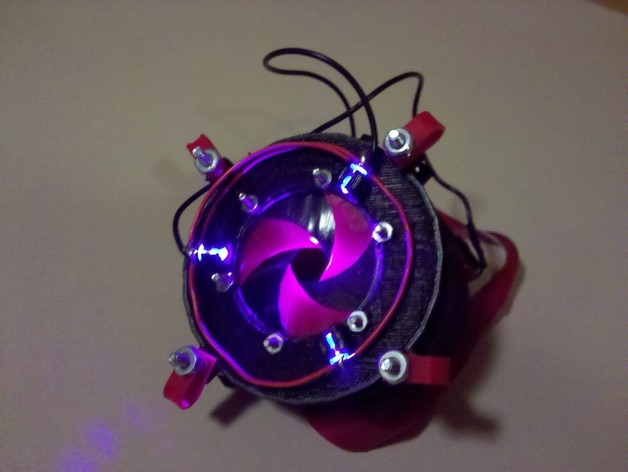
Construct this stylish wearable monocle featuring a functional iris mechanism, designed to look fabulous when illuminated by UV LEDs. The iris mechanism is inspired by an Instructables tutorial and the monocle comes with three LED mounts on the front. Assemble the layers of the monocle by following these steps: 1. Print 'RingWHolesAndMount.stl' 2. Attach six 'FlapWstub' pieces to the non-LED side of the ring, using low-profile head screws. 3. Arrange the flaps flush with the ring and attach them one on top of another. 4. (Optional) Thread four larger screws through the mounting holes of the monocle piece if you want to use it as a complete monocle accessory. 5. Print 'TestingRing.stl' and clean up circular slot for smooth rotation. Slide it onto the four screws with the slot facing away from the monocle. 6. Print 'RingWithSlots.stl', clean up slots, and slide it onto the screws so that the pegs fit into the circular slot on the TestingRing. 7. Place 'RingWHolesAndMount' onto the mounting screws, sandwiching the flaps between the rings and ensuring their pegs fit into the slots on RingWithSlots. 8. Slide one 'Spring.stl' onto each mounting screw to provide constant pressure and smoother movement. 9. Place a nut on each screw and tighten slightly. To mount LEDs, slide them into the LED mounts on the outermost ring. You might need to carve out some space for 5mm LEDs. Wiring in series with a small 2AA battery pack is an option. For the strap, use a pilates resistance band and tie it to the monocle piece where the slot is provided. This stylish accessory is sure to make you stand out from the crowd!
With this file you will be able to print Iris Monacle with LEDs with your 3D printer. Click on the button and save the file on your computer to work, edit or customize your design. You can also find more 3D designs for printers on Iris Monacle with LEDs.