Iron Battle Axe from Destiny
myminifactory
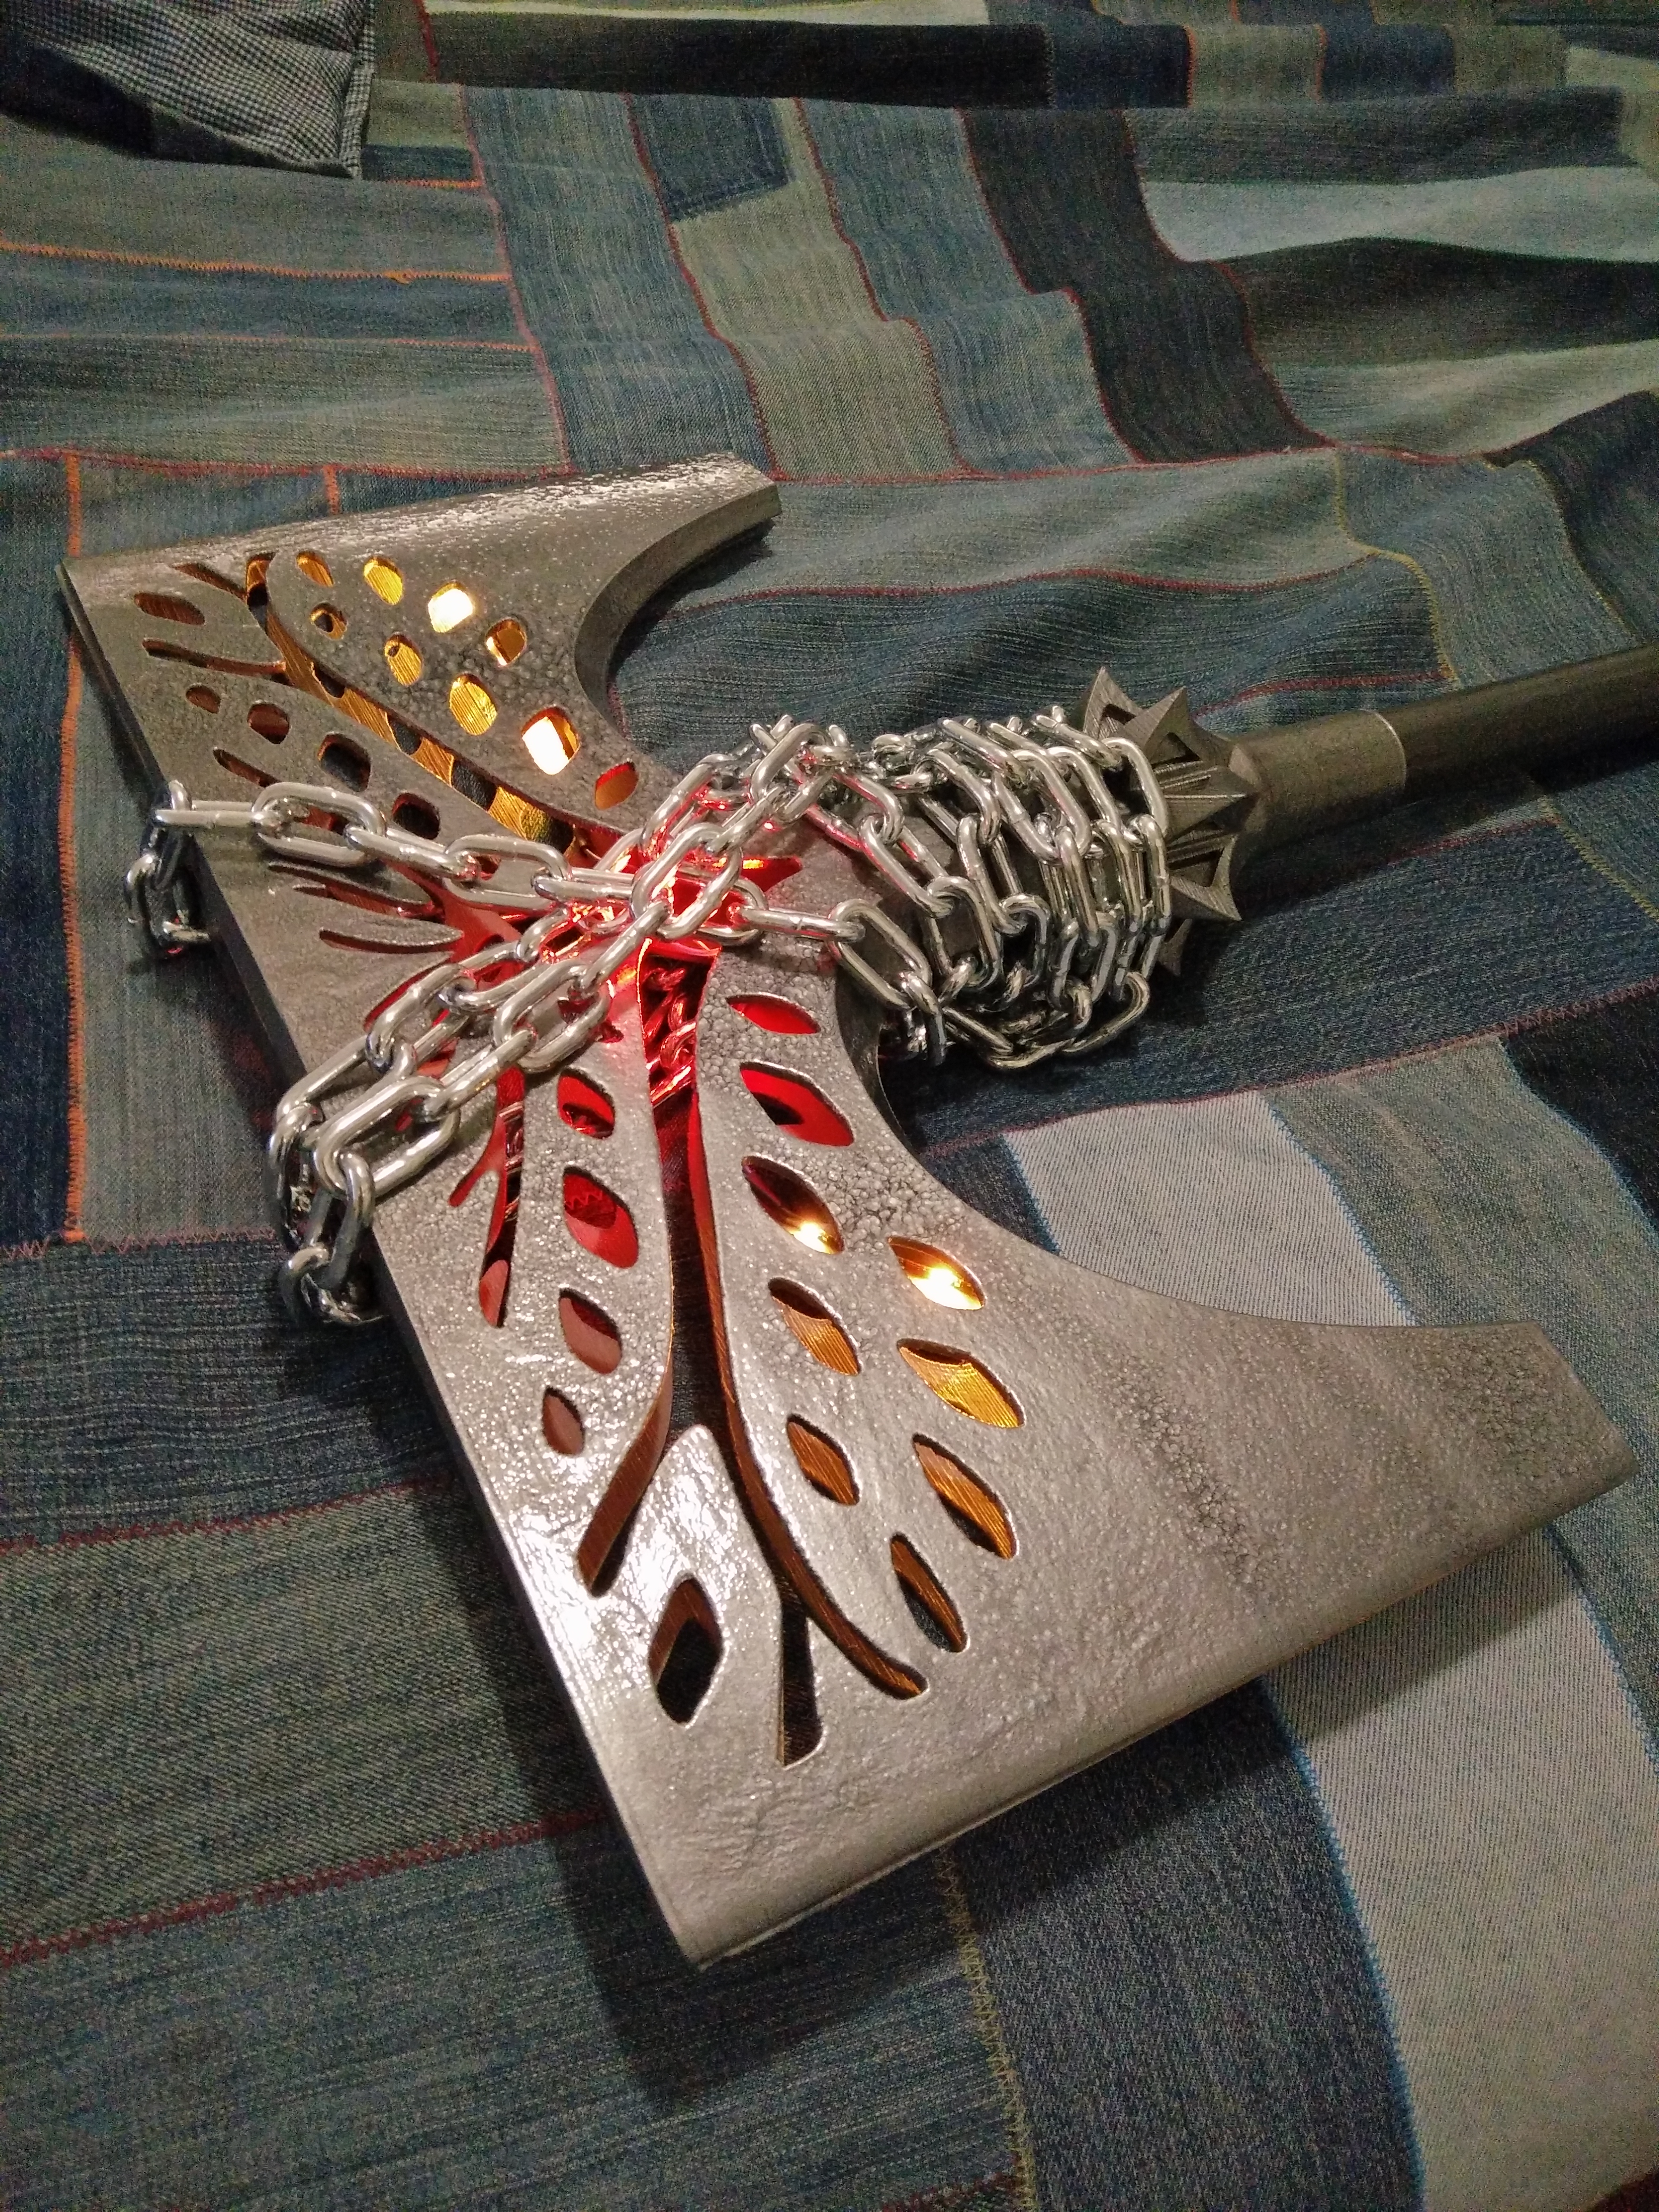
This is a replica of the Iron Lord Axe from Destiny: Rise of Iron. Print four of the axe quarters, you can use small dowels or rods to hold the left and right halves together, while the front and back was meant to be held on with magnets. You'll need to get twelve 1/4 inch and twelve 3/8 inch rare earth magnets that are 1/10 of an inch thick. The interface will hold the quarters, and can be friction fit (though I would use E6000 or epoxy) on to a, 1 1/4" aluminum tube One thing I would like to mention, when I started on this, I used the Iron Emblem that serves as the cover image for the Rise of Iron. The axe depicted there has a different height to width ratio than the in game model, at this point, I have changed the aspect ratio of the axe to follow that of the in game model The Grip file is optional, I am wrapping my grip in a leather braid, but I felt that not everyone would want to or even be able to do this, so I made a facsimile that you can print and use in place of real leather, it will slip right over the grip base, and will couple with the grip trim, you'll likely need to glue these parts together Print Settings Printer Brand: Printrbot Printer: Simple Black Rafts: No Supports: Yes Resolution: 100-200 Microns Infill: Yes Notes: Print settings for success:Axe Heads: Print using a brim, 3 layers (1.2mm) and an infill of 30%. Support material is crucial and I recommend using a grid structure instead of lines, %20 fill. The heads are tall and fairly thin, you can make use of minimal layer cooling time to slow down the printing process at the upper section. I have my printer set to 40mm/sec for outer shell, 60mm/sec for inner shells, and 80mm/sec for the infill. I set my layer cooling time to 60 seconds and printed two quarters (axe head half stl) at the same time, this will take about 32 hours with these settings. If you are having issues with the tops wiggling too much or don't want to deal with magnets, try using the Fused Axe Half instead Pommel: 10-15% infill, three shells. Support should be lines, and your slicer should only generate support for the middle hole (this hole is meant to hold a battery pack). No brim or raft is needed, nor are any special settings (such as an extended layer cooling time) Pole interface: Like the pommel, this needs no special settings, with the exception of infill. As this is mounting onto a pole and holding the axe head, it needs to be strong, use 60%-80% infill for this part, support can be lines to simplify removal, but I recommend having a fill density of 30% Grip base: Nothing special here, if it's too tall (was for me) just halve the height and print it twice Grip Trim: Nothing special here, print how you like Grip: Shouldn't need anything special, but if you are having a hard time with bed adhesion, use a brim. This part is optional, and can be replaced with leather. If you do make use of it, print it in black Axe head rib: This part fits inside a left/right half to help prevent flexing, nothing too special on this, use a minimum of 30% infill. Should only be needed if you are printing separate head quarters Trinket Cart: This part is meant to hold an Adafruit Pro Trinket inside the pole, your preferred settings will be fine Post-Printing Step one: getting the axe heads together To get the left and right halves of the axe heads together, I used a 1/8th inch brass rod from a hardware store, and cut that into small lengths. You will see a few holes in the axe that are about the same size, you may need to drill those out with a 1/8th inch drill bit. Soft fit the lengths of rod into the holes, and mark the point that they come out with a marker, pull the rods out and cut them so that the mark is in the middle of the segment. Add a dab of E6000 glue to each of the holes and reinsert the rods in a 1-2-1 pattern (Rod in on left, rod on right, rod on left) then press the two halves gently but firmly together. Fill any gap you get with epoxy putty /bondo. Let everything set Grab the rib parts and the pole interface. Place the pole interface on the half and use that as a guide as the where to put the rib. I put my rib about 1 cm above the top of the interface. Use E600 again to ensure a strong bond, but also use something like super glue or bondic to help hold the rib in place as the E6000 sets. Place the half against a table or other flat surface, inside down, while holding the rib in place while the superglue sets. This will prevent flexing When that is set, it's time to insert the magnets. Again, you may have to drill out the magnet holes a little. To do this, I found it was useful to get a Dremel router bit, 1/4 inch in size. The smaller magnet holes are that size, and you should be able to press the bit into the hole, on the back if the bit is a slot you can use to turn the bit with a screw driver. Using a screwdriver and not a dremel for this step will result in a tighter fitting hole. That being said, if you cannot or do not want to get a 3/8ths inch router bit for the larger magnet holes, then a careful hand on a Dremel, with a helping hand holding the axe half will allow you to edge those holes out with the 1/4 inch bit (this is how I did it) Test fit the magnets, they should fit more or less flush with the surface of the print. Pull them back out, and add a dab of E6000 to the hole, press the magnet back into place. Take extra care to ensure that you have the magnets oriented properly so that the front and back halves attract each other Choose one of the halves to be permanently attached to the pole interface, and glue it to the interface using E6000 Step Two: Poly Filla and sanding A lot of people really like to use bondo or a similar product when it comes to smoothing out a print. I don't, as I find it more difficult to sand than the PLA I usually use. Instead, I leave the bondo for filling in larger gaps, such as those you might get when you bond the left and right halves of the axe head together. Instead, I have found that wood filler, like plain white poly filla, does an amazing job of adhering to a print and sands very easily. You will get a high quality finish if you take the time to coat the print and sand off the excess Step Three: Painting After sanding the print, I like to use a grey primer to coat the whole prop, this includes the aluminum tube, this gives you a nice base for later paints, even if they are also 2 in 1 paint and primers. For the printed parts (with the exception of the Grip and trinket cart), I used a Rustoleum spray paint that is meant to give an object a hammered look, and used the pewter tone. The instructions for this call for thick applications, so it ends up helping to hide imperfections you may have missed in the smoothing step. For the pole, I used Testors Metallic Graphite spray enamel Step Four: Electronics Parts used:https://www.adafruit.com/products/2000https://www.adafruit.com/products/2226https://www.adafruit.com/products/2959 A cylindrical USB battery. Should be about 2000mAh. Measure the inner hole's diameter of the pommel to see what you can manage.3 Foot or so USB cable, some hook up wire and 3 pin connectors Place the trinket into the cart. Wire the trinket to the jewel (making sure that the power line goes to the USB power pin on the Trinket), cut off two sections of 8 pixels from the 1 meter strip, and connect them in parallel to the jewel, with about 10 cm of wire. The data should go Trinket -> jewel -> strips I used a modified version of the following https://learn.adafruit.com/neopixel-jack-o-lantern/assembly?view=all#the-codeYou'll need to change the blue and white flames so that they produce something between red and orange, and the number of pixels should be set to 15. Change the data pin to what you used when you hooked up the lights to the Trinket. Test the code on the Trinket and make sure you are happy with it. Thanks to the design of this project though, you can alter the code at any time simply by pulling off the Pommel and battery Now you are going to have to rewire some things, you have to get the jewel in the axehead and the trinket in the pole, which means getting wire though the pole interface, It may be useful for you to take a 3 pin JST connector, feed that through the interface so that the connector is at the bottom, and connect its wires to the jewel, and then use the mating pair of the connector to hook up to the Trinket. Be sure to pay attention to which pin is live, ground and data. Use the E6000 again to attach the jewel to the rib on the axe half attached to the pole interface, use a quickset glue to hold that in place for you as the E6000 sets. Place the strips along the contour of the bottom of the axe half where it joins to the other half so that they stick up towards the top of the half. Glue them in place as well, same tactic as the jewel The E6000 remains flexible when cured, so you won't have issues with detaching strips Throw the battery pack into the pommel, connect the usb cable to the trinket, feed the cable through the pole, connect the trinket to the jewel and place the cart down the tube. Plug the USB cable into the battery and make sure everything works Step Five: Finishing touches At this point, you have a passable axe, but it's missing some things. First, light diffuser. For this, I got some sheer, orange shimmery fabric from Fabricland, and used double sided fabric tape to hold it to the inside of the axe head (you can see the difference it makes in the photos attached to this project) Chain: I used about 10 feet of passing link chain from the hardware store for the chain wrap. This is very heavy, but accurate to the game. If you want something lighter, Fabricland had some decorative chain made of aluminum that has a similar link size, but a slightly different shape. Don't worry about getting the chain to wrap exactly as it does in game, it's somewhat of an physical impossibility to do, instead I wrapped it such that the crossing part only happens on one side, this keeps that cross more or less in place, while having a double cross (front and back) would end up having the chain fly off the sides Leather braid for the grip: The printed grip is fine, looks pretty good even, but we can do better. You'll want to get some leather strips, preferably 1 1/4 inch wide, but fairly thin. My local leather supplier does not have precut strips that fit the bill, so I bought an inexpensive sheep hide, and cut it into strips myself. For making the braid, I followed this guide to wrapping leather strips over bike handles: https://www.youtube.com/watch?v=-I53JFcpEq4 Don't forget to glue the grip base to the pole, and do not glue the grip trim to the grip base until after you are happy with the grip
With this file you will be able to print Iron Battle Axe from Destiny with your 3D printer. Click on the button and save the file on your computer to work, edit or customize your design. You can also find more 3D designs for printers on Iron Battle Axe from Destiny.