Jackite 31' Basecamp Mast System
thingiverse
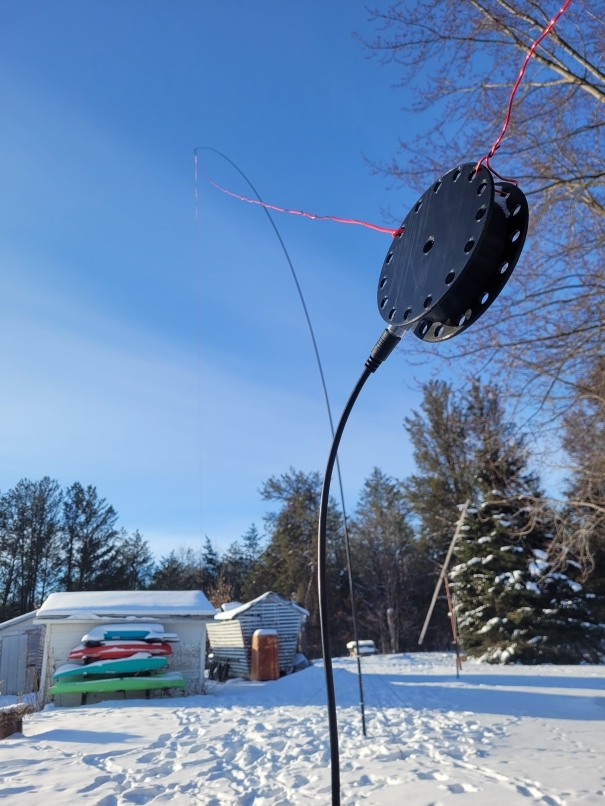
## Update: February 1, 2023 This mast system was used for Winter Field Day 2023 and held up great in Wisconsin winter weather (printed in PETG). No changes are planned at this time, but if you run into any issues using this, please comment so I can make improvements. # Overview This is a portable mast system designed to keep all the necessary components together in a convenient and easily-deployable package. At the core of the system is a 31' Jackite collapsible pole (no permanent modification necessary). These Jackite poles make incredible masts due to their small collapsed size and durability (the one I've been using as my permanent mast has seen 2 full years of Wisconsin weather and has no issues). ***NOTE:*** *this likely won't work for other size Jackite poles, as their diameters are different.* Additional pieces are attached to the pole to hold stakes as well as allow ratcheting guy lines to remain attached to both the stakes and guy ring during transport. Having the guy lines already attached helps to reduce deployment/packing time and ensure no components are forgotten on your next POTA/field day outing. ### Printed Parts - shock-cord-ring.stl (x1) - stake-clip.stl (x1) - guy-ring.stl (x1) - stake-holder.stl (x1) - spacer.stl (x2) - bumper.stl (x1 - optional) *bumper.stl is a small disc meant to be printed in TPU. With the first iteration of stake-holder.stl, the bottom was only 3mm thick. Unfortunately, this was not thick enough to survive some of the top sections crashing into it when they weren't secured properly. To combat this, the base of the stake holder is now 7mm thick and the bumper is provided as an additional protection. Further modifications will be made if this proves to have the same issues as V1.* ### Non-Printed Parts - [1/8in Shock Cord ~175mm length](https://www.amazon.com/dp/B07R3XZZPY) - [M3 heat insert nuts (x4)](https://www.amazon.com/dp/B09KZSJS88) - [M3x20 screws (x4)](https://www.amazon.com/dp/B078V3YCF6) - [M3 washers (x4)](https://www.amazon.com/dp/B078V3YCF6) - [16-14AWG Butt Connector (x1)](https://www.amazon.com/dp/B06XCX7WRV) - [Stakes (x3)](https://www.amazon.com/gp/product/B09P34WPBZ) - [Ratcheting guy lines (x3)](https://www.amazon.com/gp/product/B018WIOEDA) ## Assembly Begin by inserting the M3 heat insert nuts into the 5mm holes in the appropriate parts: 1 each in shock-cord-ring.stl and guy-ring.stl, and 2 in stake-holder.stl (see pictures for additional details). Assemble the shock cord ring by first cutting any extra plastic from the butt connector. Next, run the shock cord through the holes in shock-cord-ring.stl crimping the ends together where the ring splits *(There is additional space at this point in the ring to hide the butt connector)* Next, unscrew the existing cap from the bottom of the pole and thread on stake-holder.stl. If you chose to print the bumper, drop it into the bottom of the stake holder prior to screwing it on. Once the stake holder is screwed on, drop the two spacers between the pole and top of the stake holder, and tighten the stake holder around the spacers using M3 screws (see pictures for clarification). Once the stake holder is attached, attach the stake clip at the appropriate height and orientation; use a stake inserted in the stake holder to determine the correct position. After the stake holder, attach the shock cord ring where desired. The position of this part doesn't need to be exact since it's just for storing the extra line from the ratcheting guy lines. Finally, attach the guy ring to the top of the pole, insert the stakes, clip on the guy lines, and wrap up the extra line to complete the mast system.
With this file you will be able to print Jackite 31' Basecamp Mast System with your 3D printer. Click on the button and save the file on your computer to work, edit or customize your design. You can also find more 3D designs for printers on Jackite 31' Basecamp Mast System.
